I made some changes to the Github repo that caused deploys to not behave as intended, and to call it a “snafu” might be an understatement.
Plugin distribution
For the first 4 years of WPGraphQL, the plugin was not distributed on the WordPress.org plugin repository, one of the most common distribution channels for WordPress plugins. The plugin has been versioned on Github and primarily distributed on Github and Packagist.org. Users that wanted to install WPGraphQL would either clone the plugin or download the zip from Github, or use Composer to install the plugin from packagist.org.
Vendor Dependencies
Since downloading a Zip from Github was a pretty common way for folks to get the plugin, and I wanted users to be able to download the Zip, install it to WordPress and be immediately productive, without having to run composer commands to install dependencies. So, I made the decision to version the plugins external dependencies in the repository, even against the advice of Composer.
For quite some time the plan was to deploy the plugin to WordPress.org after the v1.0 release, and then stop versioning the Composer dependencies as Github would no longer be the primary method of distribution.
WPGraphQL reached v1.0 in November and has been distributed on WordPress.org since, so I began to work on implementing the plan to no longer version the vendor dependencies in the Git repo.
This workflow was in place starting in v1.0 of the plugin.
The workflow installs composer dependencies, then deploys the plugin to WordPress.org.
I was pretty sure that since the Workflow already included the composer install --no-dev step prior to the deploy action that I was already good to go. All I needed to do was add a new part of the workflow to create a Zip file of the plugin, including the installed dependencies, and upload that compiled Zip to the release as a release asset, so that users that still want to be able to download a zip from Github could do so.
The next step was remove the vendor directory and tell .gitignore that I no longer want to version that directory. This would allow me and other contributors to install the vendor dependencies while working locally, but not worry about committing them to the repo. So, I updated the .gitignore to ignore the vendor directory.
Broken release!
I released v1.2.0. And shortly after was told that it was breaking things for users.
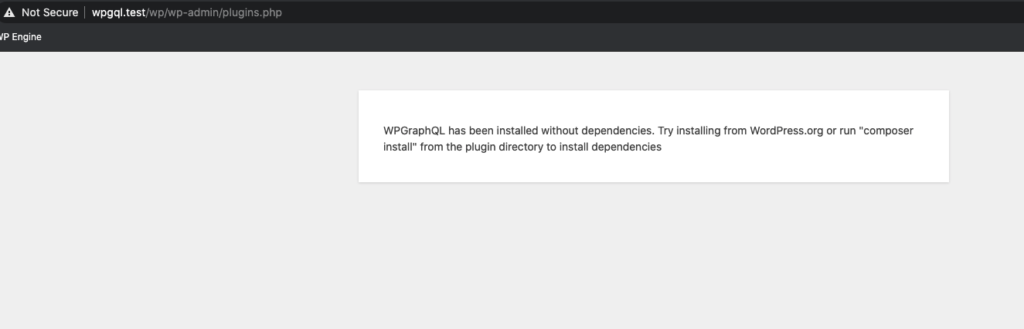
Users were reporting seeing the following screen:
Screenshot showing the wp_die() screen users were reporting.
I checked out the deploy action to see if it failed for some reason.
Updating Deploy Action
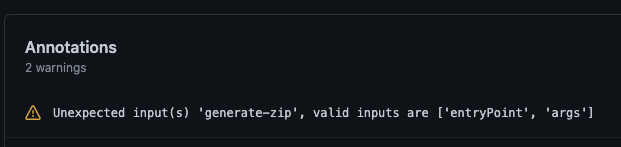
Github was reporting that my arguments for the “generate-zip” option on the 10up deploy action were not accurate.
Screenshot showing a warning from Github about the “generate-zip” option
I thought perhaps this was maybe causing something to not work quite right. So I checked the 10up action docs and it appeared this option perhaps wasn’t needed, so I removed the option, re-released, and watched the deploy process.
Still no luck. WordPress.org was missing files.
Aha!
The error that was reported to me made it clear that WordPress.org was excluding the vendor directory from the plugin, but I wasn’t sure why, as the workflow runs composer install before deploying.
I dug into the code for the 1oup action, and realized that if a .distignore isn’t present, then tit uses the git archive command, which ignores files from the `.gitignore` and the `.gitattributes` files.
Aha!
This means that when I added the vendor directory to the .gitignore file to stop versioning the directory, the deploy action was leaving that directory out of what gets deployed to WordPress.org. So my step in the workflow that runs composer install was being nullified by the update to the .gitignore file.
I did more investigating and found that the 10up action reads the .distignore file, if it exists. This was the missing piece!
I can use a .gitignore to ignore files used in local development from being versioned in Git, but separately configure what to ignore for distribution.
So, I added a .distignore file that ignores a lot of files that are useful for development but are not needed to run the plugin, and I configured this file to NOT ignore the vendor directory.
Success!
Now the plugin was deploying to WordPress.org with the vendor dependencies.
Fixed! But, still broken.
I had confirmation that installing from WordPress.org was working for users. It was fixed!
But now I was now getting reports that users installing the plugin from Composer, specifically as a dependency of Trellis / Bedrock were running into the same wp_die() screen that folks reported seeing when installing from WordPress.org where the vendor directory was missing.
So this seemed to mean that installing the plugin from Composer was also excluding the vendor dependencies?
Ooph!
I spun up a Trellis environment locally. It was super easy by the way – I typically use localwp.com for my local WordPress installs, but Trellis made it a breeze to get a local WordPress install running. Kudos to Ben and the other contributors of the project! ????.
From my Trellis-built WordPress environment, I installed WPGraphQL from WordPress.org, and it worked fine. ????
I deleted the plugin and installed from wpackagist (a wordpress specific Composer repository) and it worked fine. ????
But then, I installed the plugin from packagist.org, and I was met with the wp_die() screen others had reported. ????
Composer Dependencies!
It turns out that Composer installs the dependencies in the vendor directory of the parent project. I knew this, but my brain didn’t want to connect these dots.
Since the vendor directory was previously always installed in the wp-graphql/vendor directory, as it was versioned with the plugin, the file_exists() check was always true.
Now that the vendor directory isn’t versioned in the plugin, it can be installed anywhere within the project, so this check isn’t always true anymore.
When installing WPGraphQL from Packagist, the dependencies are not going to be installed in the wp-graphql/vendor, but instead in the vendor directory of the project that’s including WPGraphQL as a dependency.
So, I was able to update this part of the code to use the autoload from the WPGraphQL plugin if it exists, which it will when installing from WordPress.org or downloading the Zip from the Github release, and otherwise check for the existence of the dependency class (GraphQL\GraphQL) to make sure dependencies are installed whether in the plugin or the parent project.
Back in business!
Now, the plugin deploys to WordPress.org fine, can be installed with Composer from WPackagist and Packagist, and follows the recommendation of Composer to not version the dependencies in the Git repo.
With new employment comes a new Macbook, which I need to setup as a dev machine to continue working on WPGraphQL.
It’s always a tedious process to get a new computer setup to be an effective developer, so I thought I’d record all the steps I take, as I take them, and hopefully provide some help to others.
One of the first things I need to do to work on WPGraphQL, is have a local WordPress environment.
For the past 3 years or so, my preferred ways to setup WordPress locally is to use Local, a desktop application that makes it easy to setup WordPress sites with a few button clicks.
When working locally, I usually have a number of different WordPress sites with different environments. For example, I have a site that I use locally to test WPGraphQL with WPGraphQL for Advanced Custom Fields, and another environment where I test things with WPGraphQL and WPGraphQL for WooCommerce. Having different sites allows me to separate concerns and test different situations in isolation.
However, the constant is WPGraphQL. I want to be able to use the same version of WPGraphQL, that I’m actively making changes to, in both environments.
This is where symlinking comes in.
In the command line, I navigate to my local site’s plugins directory. For me, it’s at /Users/jason.bahl/Local Sites/wpgraphql/app/public/wp-content/plugins
Then, with the following command, I symlink WPGraphQL to the Local WordPress site: ln -s /Users/jason.bahl/Sites/libs/wp-graphql
This allows me to keep WPGraphQL cloned in one directory on my machine, but use it as an active plugin on many Local WordPress sites. As I create more sites using Local, I follow this same step, and repeat for additional plugins, such as WPGatsby or WPGraphQL for Advanced Custom Fields.
XDebug for PHPStorm Extension
PHPStorm is my IDE of choice, and Local provides an extension that makes it easy to get PHPStorm configured to work with XDebug. I recommend this extension if you use Local and PHPStorm.
TablePlus Extension
I used to use SequelPro, but have been transitioning to use TablePlus, and Local has a community extension that opens Local databases in TablePlus.
PHPStorm
For as long as I’ve been working on WPGraphQL, PHPStorm has been my IDE of choice. I won’t get into the weeds, and you are free to use other IDEs / Code Editors, but I find that PHPStorm makes my day to day work easier.
Pro tip: To save time configuring the IDE, export the settings from from PHPStorm on your old machine and import them on your new machine.
SourceTree
SourceTree is a free GUI tool for working with code versioned with Git. While Git is often used in the command line, sometimes I like to click buttons instead of write commands to accomplish tasks. I also find it super helpful to visualize Git trees to see the status of various branches, etc. I find the code diffs easier to read in SourceTree than in the command line too, although I like Github’s UI for code diffs the best.
In any case, I use SourceTree daily. I think it’s fantastic, and you can’t beat the price!
Note: If you try using SourceTree before using Git in the command line, it might fail. This is because you need to add github.com (or whatever git host you use) to your ssh known hosts. You can read more about this here.
MySQL
Local sets up MySQL for each site, but for running Codeception tests for WPGraphQL, I like to have a general MySQL install unassociated with any specific Local site that I can configure for Codeception to use.
I download and install MySQL v5.7.26 for macOS here.
I then ensured that I updated my .zshrc file to include this export, as described here, to ensure the mysqld command will work.
TablePlus
I used to use SequelPro, but it’s been deprecated, so I’ve begun using TablePlus. You can download it here.
Docker Desktop
WPGraphQL ships with a Docker environment that developers can spin up locally, and the tests also have a Docker environment so they can be run in isolation.
In order to spin up the local Docker environment or run tests with Docker, Docker Desktop needs to be installed and logged into.
Homebrew
Homebrew is a package manager for MacOS (or Linux). It makes it easy to install packages that are useful for development on a Mac.
I used Homebrew to install the below packages.
Command Line Tools for XCode
This is something I seem to forget almost any time I setup a new Mac. When trying to install things from the command line, I’m always prompted to install Command Line Tools for Xcode and agree to their licensing. For me, as I was installing Homebrew, I was prompted to Download and Install this. If you want to install it separately, follow these instructions.
Git
Since WPGraphQL is maintained on Github, Git is essential to my daily work.
With Homebrew installed, I use it to install Git, which is a free and open source distributed version control system designed to handle everything from small to very large projects with speed and efficiency.
Having git installed locally allows me to clone repositories from Github to my local machine, make commits to code, and push code back up to Github.
In order to use Git with 2-Factor Authentication enabled, I also had to get SSH keys setup for Github.
Composer
Composer is a PHP package manager. WPGraphQL uses Composer for test dependencies, so it’s important to have Composer installed in order to run tests. I used the command brew install composer to install Composer.
Note: I also had to make sure I was running a version of PHP that the zip module, so I followed these steps to get that working.
Node & NVM
Since I do a lot of work with JavaScript applications, such as Gatsby and the WP Engine Headless Framework, having Node installed locally is a must, and having nvm (Node Version Manager) to allow switching Node versions quickly is very helpful.
I followed this guide to get Node and NVM installed using Homebrew.
Time to contribute!
Now that I have my local environment setup and all my regular tools, I’m ready to contribute to WPGraphQL again!
On February 1, I announced that I was no longer employed at Gatsby, and stated a blog post would be coming soon.
This is that blog post.
TL;DR
I’m joining WP Engine as a Principal Software Engineer where I will continue maintaining WPGraphQL and will contribute to other projects and initiatives centered around the goal of making WordPress the best headless CMS.
Below I will expand a bit more on “Why WP Engine?”, but first, I’d like to take a moment to reflect on my time at Gatsby and acknowledge how important Gatsby is to the future of headless WordPress.
WPGraphQL and Gatsby
I am incredibly thankful for the opportunity I had to work at Gatsby to push forward WPGraphQL. Gatsby’s investment in WPGraphQL led to a lot of growth and maturation of the project
Project Growth and Maturation
I joined Gatsby in June 2019, and since then, WPGraphQL went from:
In addition to the growth and maturation of the core WPGraphQL plugin, the community around it has also grown.
While I believe WPGraphQL would have seen growth in the community regardless, I believe we can attribute at least some of this growth to Gatsby’s investment in WPGraphQL. Gatsby’s investment in WPGraphQL signaled that it wasn’t just a hobby project, but was solving real problems for real users, and users should have confidence using it in their projects.
When I joined Gatsby to work on WPGraphQL and collaborate with Tyler Barnes on WPGatsby and Gatsby’s new WordPress Source Plugin, the JavaScript ecosystem paid much more attention to using WordPress as a headless CMS, and the WordPress community got more comfortable using WordPress in ways they hadn’t before.
Many agencies, developers and site owners now consider WPGraphQL an essential part of their stack.
WordPress plugin developers have now created more than 30 WPGraphQL extensions, and there are now more than 1,500 people in the WPGraphQL Slack!
Gatsby has been incredibly generous in funding open source developers to work on projects related to, but not part of Gatsby. For example, John Otander was working on MDX, Rikki Schulte was working on GraphiQL, and I was working on WPGraphQL.
I was the last remaining of these engineers working primarily on other projects that tangentially, but not directly benefit Gatsby.
WordPress is only one part of Gatsby’s story. Gatsby can work well with just about any data source. Some popular non-WordPress choices are Contentful, Sanity, DatoCMS, Shopify, among many others.
The team I was part of was asking me to start transitioning to work more on other Gatsby integrations, such as Contentful and Shopify, and work less on WordPress and WPGraphQL. This doesn’t mean Gatsby was abandoning WordPress or WPGraphQL, just that I would need to spend less time on it and prioritize other things. There’s nothing wrong with this. There’s a lot of sound decision making to this when it comes to making Gatsby a sustainable business.
I feel right now is a unique time in history where more investment in WordPress as a headless CMS can change the future of WordPress. I believe WordPress is now more respected as a viable option for a headless CMS and that with the momentum of WPGraphQL, technologies like Gatsby, NextJS, and others, I need to spend more time focusing on WPGraphQL and headless WordPress, and not less time.
Fortunately for me, WP Engine is investing in the future of headless WordPress, and they see WPGraphQL as an important part of that future.
As ironic as it may sound, I believe that my departure from Gatsby will actually strengthen the WordPress + Gatsby integration.
Instead of partially focusing on the Gatsby side of the integration and partially focusing on the WordPress API side of the integration, this move will allow Gatsby to hire a backfill for my position to work specifically on the Gatsby side of integrations, and not have to worry about the WordPress server API side of things. This allows the team to narrow their focus and deliver higher quality code on the Gatsby side of the Gatsby + WP integration.
I intend to continue working with Tyler Barnes and the Gatsby Integrations and Collaborations team to ensure that users of Gatsby + WPGraphQL feel supported and productive. Gatsby + WPGraphQL will continue to play a big role in the future of Headless WordPress, and I’m here for it.
Why WP Engine?
Serendipity, at least to some degree.
Within a few weeks of having conversations about needing to start focusing less on WPGraphQL at Gatsby, I discovered that WP Engine was building a headless WordPress framework and was hiring engineers to focus on headless WordPress. The job description felt like it was describing me, almost perfectly. Serendipity.
A few years ago, prior to my time at Gatsby I was interested in a position at WP Engine. But at the time there was a hard requirement for employees to be in Austin, TX. I have so many friends and family members in Denver that I have no plans to move if I don’t absolutely have to. WP Engine no longer requires employees to be in Austin, so I could now work for WP Engine without needing to move. Serendipity.
Along with the serendipitous aligning of stars, WP Engine is a generally attractive employer.
WP Engine is a leader in the WordPress space. I’ve trusted WP Engine to host many sites I’ve worked on over the last decade, including WPGraphQL.com and jasonbahl.com.
While WP Engine’s primary business is managed WordPress hosting, it also invests in a lot of products and projects that make it easier for businesses to run their sites on WordPress.
Projects such as LocalWP (that I gave a shout out to on Syntax.fm in Jul 2019) and Genesis Blocks are thriving under WP Engine, and I believe that WPGraphQL can continue to mature and thrive with WP Engine’s support.
WP Engine’s investment in headless WordPress isn’t limited to me joining to continue working on WPGraphQL and other headless WordPress projects. There will be more hires and projects aimed at reducing the friction of using WordPress as a headless CMS, and allowing businesses to get started and move faster within that context.
I believe that WP Engine’s investment in this space will allow WPGraphQL to grow and mature faster than ever before, as I will be part of a larger team working to make WordPress the best it can be.
So, does WP Engine own WPGraphQL?
Before my time at Gatsby, during my time at Gatsby and now as I transition to working at WP Engine, WPGraphQL has and will continue to be operated and maintained as a free, open-source community plugin benefitting anyone using WordPress.
WP Engine pays my salary, and in exchange I will be maintaining WPGraphQL and helping grow the headless WordPress ecosystem, reducing friction in many different ways.
What’s next for WPGraphQL?
I can’t officially commit to any of these things quite yet, but some things I have on my radar to tackle in the near future include, but are not limited to:
Significant updates to WPGraphQL for Advanced Custom Fields
Updates to the GraphiQL IDE that ships with WPGraphQL (testing as public and authenticated user, for example)
Introduce new Custom Scalars (datetime, HTML, among others)
Add Support for Image Uploads
Update Schema surrounding Media
Introduce a MediaItem interface and different GraphQL Types for Image, Video, etc
New tooling to help developers move faster
Query / error logging
Breaking change notifications
Persisted Queries
Query Complexity configuration and analysis
WPGraphQL Subscriptions (real time updates when data changes)
Component library(s) using WPGraphQL Fragments
More tutorials, videos, blog posts about using WPGraphQL in various contexts
I’m excited to get started at WP Engine and work on the next chapter of WPGraphQL and headless WordPress! I hope to have a more formal roadmap to discuss with the community in the near future, once I get settled as a WP Engine employee.
I’m so thankful to the community that has embraced WPGraphQL. I feel so much love and appreciation from thousands of developers that are using, contributing to, and providing feedback for WPGraphQL.
I’ve made many genuine friends from the WPGraphQL community and I am so thankful that this next chapter of my career allows me to continue working in this community.
The goal of this article is to make a non-authenticated GraphQL query for a User with no published content and to get the User returned in the response.
Like the following:
{
  users(where:{login:"UnpublishedAuthor"}) {
    nodes {
      id
      name
    }
  }
}
NOTE: To test these queries you will want to use a GraphQL client that is not Authenticated, such as GraphQL Playground or Altair. WPGraphiQL, the GraphiQL IDE built-in to WPGraphQL in the WordPress dashboard currently executes GraphQL queries as your authenticated user.
The Problem
WPGraphQL respects WordPress core access control rights. Meaning that data which is exposed publicly by WordPress core is exposed publicly in WPGraphQL, but data that is exposed only in the WordPress Dashboard is restricted by WPGraphQL to GraphQL requests made by authenticated users with proper capabilities to see the data.
In WordPress, users that have not published content are not public entities and WPGraphQL respects this.
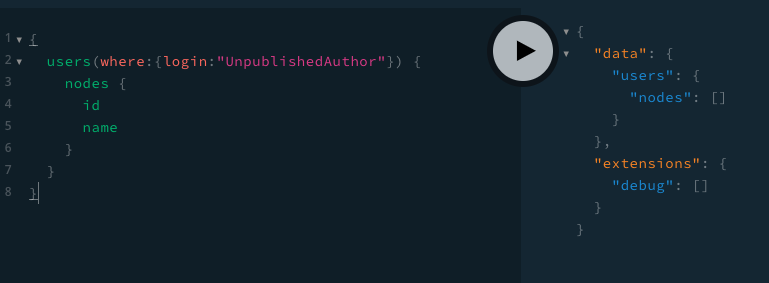
This means by default, the same query as above would return empty results, because the “UnpublishedAuthor” user is not allowed to be seen by a public, non-authenticated GraphQL request.
In some cases, you might decide you want to show Users that don’t have published content in the results of your WPGraphQL Queries.
The Solution
The below snippets should help accomplish this.
Adjust the underlying WP_User_Query
When using WPGraphQL to query a connection (a list) of users, WPGraphQL sets an argument of 'has_published_posts' => true for the underlying WP_User_Query, meaning that the SQL query for a list of users will reduce the results to users that have published posts.
To adjust this, we can use the `graphql_connection_query_args` like so:
WPGraphQL has a Model Layer that centralizes the logic to determine if any given object, or fields of the object, should be allowed to be seen by the user requesting data.
The User Model prevents unpublished users from being seen by non-authenticated WPGraphQL requests.
To lift this restriction, we can use the following filter:
add_filter( 'graphql_object_visibility', function( $visibility, $model_name, $data, $owner, $current_user ) {

  // only apply our adjustments to the UserObject Model
  if ( 'UserObject' === $model_name ) {
    $visibility = 'public';
  }

  return $visibility;

}, 10, 5 );
Testing our Changes
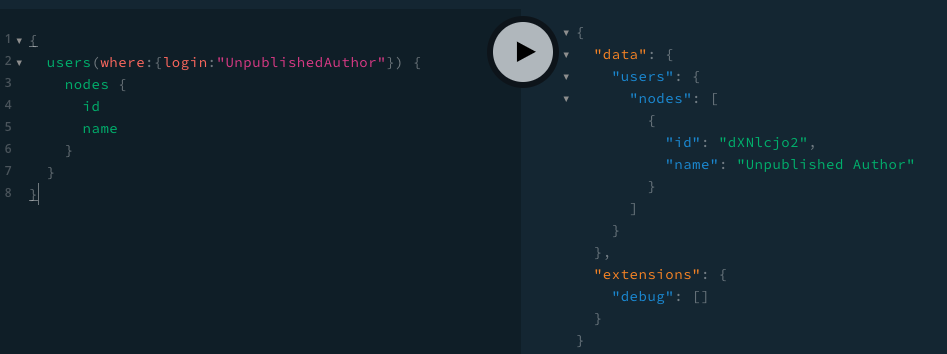
Now that we’ve adjusted WPGraphQL to show all users to public GraphQL requests, we can use GraphiQL to test.
For the sake of testing, I created a new User with the name of “Unpublished Author” and will make a GraphQL Query for users, like so:
{
  users {
    nodes {
      id
      name
    }
  }
}
And with the above snippets in place, I’m now able to see the UnpublishedAuthor in my GraphQL query results.
If you’ve been using WPGraphQL for your side projects, but are waiting for the “stable” version, then this is it! You can use WPGraphQL in production with the confidence that it is secure, well documented, and supported full time and long term.
If you’re new to the WPGraphQL community, you may ask yourself, “But WordPress already has the REST API. What’s different about using WPGraphQL?”
Well, when you use WPGraphQL to turn your WordPress site into a GraphQL server, multiple resources can be fetched at the same time. And by design you get back the exact data you asked for, nothing more, nothing less. In addition to being easier to work with compared to the REST API, data loading with GraphQL is faster and more efficient. (Read more: “WPGraphQL vs. WP REST API“)
If you are upgrading to 1.0 or another version, see the release notes for information on breaking changes and preparing your site. If you are new, start at the homepage and follow our step-by-step docs.
In this post I want to talk about the journey to 1.0, why it took so long to get to 1.0, and a look at what’s next for WPGraphQL. But before diving into that, I want to also announce some other fun stuff that has also come to life along with this release.
WPGraphQL is now available on the WordPress.org repository
New WPGraphQL.com website
WPGraphQL Swag available on the Gatsby Swag Store
WPGraphQL on WordPress.org
The WordPress.org plugin repository has long been the default distribution mechanism for WordPress plugins. Prior to today, developers had to install WPGraphQL using Composer and installing from packagist, or by downloading from Github.
We believe that distributing WPGraphQL on the WordPress.org plugin repository should make it easier for users to find and install and keep updated.
New WPGraphQL.com website
WPGraphQL.com has been re-built from the ground up.
Before today, WPGraphQL had 2 primary domains:
WPGraphQL.com, a “traditional” WordPress site using WordPress as the CMS and the theme layer
docs.wpgraphql.com, a Gatsby site using Markdown files in a Github repository for the content.
Now, instead of splitting some content in Markdown files on Github and some content in WordPress, WPGraphQL.com now uses WordPress as the CMS for all content, and and has a Gatsby front-end powered by the new Gatsby Source WordPress plugin, WPGatsby and of course WPGraphQL.
We’ll be releasing tutorials and videos in the coming weeks and months walking through how various parts of the site were created to provide inspiration for you to build great things with this stack as well, but for now you can draw inspiration from the repository this site is built from: https://github.com/wp-graphql/wpgraphql.com
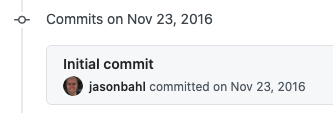
WPGraphQL was started in November 2016 (with no commit message ???? ) and has come a long way in that time.
Screenshot of the “Initial Commit” in Github
By the end of 2017 the codebase was pretty robust and provided a Schema to interact with many parts of WordPress. Posts, Pages, Custom Post Types, Tags, Categories, Custom Taxonomies, Comments and Nav Menus.
Qz.com was the first site to go to production with WPGraphQL, even before I was using it in production! A few years later and they are still running on WPGraphQL! You can learn more about the early days of their stack from this presentation from December 2017.
In early 2018, my team took WPGraphQL into production on a network of 54 large WordPress sites. WPGraphQL was used as a syndication engine for our network of newspapers. Unlike most GraphQL users, we didn’t initially have a JavaScript or native mobile UI that was using GraphQL, we had PHP WordPress servers syndicating content and GraphQL solved a lot of pain points we had been facing when using REST.
By the end of 2018, more than 100 sites were using WPGraphQL in some way.
Now, WPGraphQL seems to be running all over the place!
This is a non-comprehensive list of sites using WPGraphQL in production in some way:
According to Packagist.org as of June 30, 2020 there were nearly 50,000 installs of WPGraphQL in the wild, and as of November 2020 Packagist reports 71,573 installs.
In 2019 Credit Karma paid for a security audit on the plugin and all reported issues were resolved.
It’s safe to say, WPGraphQL is production ready!
So, why the wait for 1.0?
So, if WPGraphQL has been production ready for such a long time, why is is still not 1.0?
Breaking Changes & WordPress
The WordPress ecosystem has a strong commitment to backward compatibility. This means that once functionality is introduced to a WordPress plugin, it often sticks around forever.
With that in mind, before tagging WPGraphQL 1.0, I wanted so badly to be at a place with the codebase & Schema that I could no longer predict anymore breaking changes.
I wanted the GraphQL Schema to be “perfect” before tagging it 1.0, because I knew that whatever would be in the WPGraphQL Schema at 1.0 would need to remain in the Schema forever. The WordPress community is used to things working the same way “forever” and I wanted to play along.
Breaking Changes & WPGraphQL
The reality is that for software to get better, sometimes it needs to make breaking changes.
WPGraphQL will never be perfect, and it will need to occasionally break to make things better.
For example, when the GraphQL Specification updates to include Input Unions or Interfaces that can implement other Interfaces, WPGraphQL will need to break to keep up with the GraphQL Specification.
There would be no way to keep GraphQL as we know it today and take advantage of tomorrow’s GraphQL Spec without breaking.
WPGraphQL turning 1.0 isn’t a statement that there will never be breaking changes, instead it’s a statement of stability and long term support.
So, how will breaking changes be handled in a post-1.0 world?
Semantic Versioning
WPGraphQL has been following Semver practices for a few years. We will continue to follow Semver and let version numbers communicate meaning. The summary of Semver versioning is as follows:
MAJOR version when you make incompatible API changes,
MINOR version when you add functionality in a backwards compatible manner, and
PATCH version when you make backwards compatible bug fixes.
You can read more about the details of Semver at semver.org
Seamless Upgrade Paths
When WPGraphQL needs to make breaking changes to the Schema, there are sometimes ways to make the changes and allow for seamless upgrade paths.
What that means, is that WPGraphQL can introduce a new feature while keeping the old feature. For example, let’s say the following (hypothetical) query were in the Schema and the author field returned the name of the Author:
{
  book {
    author
  }
}
Let’s say we realized that the Author should actually be a one-to-one connection to an object with edge space for relational context. We would want to change the schema to allow for the following query instead.
{
  book {
     author {
         node {
             name
          }
     }
  }
}
If WPGraphQL made this change, any consumer application would break.
So, what we can do is introduce the new feature like so:
{
   book {
     author
     authoredBy {
        node {
            name
        }
     }
   }
}
We could introduce the new feature as a new field name authoredBy which returns the data in the shape we want.
The end goal, however, is to have the author field return the author.node.name shape.
So, with both fields (author and authoredBy) co-existing on the server, consumer applications could make use of GraphQL Aliases and update their code from:
{
  book {
     author
  }
}
to:
{
   book {
      author: authoredBy { # Consumer uses an alias to prepare for the upcoming change to the author field
          node {
             name
          }
      }
   }
}
Once consumers have updated their code, the server could then update once more to flip the old field name to the new shape. So, the next release would have the following possible:
{
   book {
      author {
         node {
             name
          }
      }
      authoredBy {
        node {
            name
        }
     }
   }
}
So now, the old field author no longer returns the name directly, it now returns the new nested node/name shape. The client is using an alias to query the authoredBy field, so now the consumer should update their code from:
{
   book {
      author: authoredBy { # Consumer uses an alias to prepare for the upcoming change to the author field
          node {
             name
          }
      }
   }
}
to:
{
   book {
      author
          node {
             name
          }
      }
   }
}
Now, the consumer application is using the new shape of data and the old author field, and one more release would be able to remove the temporary authoredBy field that was used for seamless upgrades.
If you manage custom fields in WordPress using Advanced Custom Fields, and you want to use WPGraphQL to get a list of posts filtering by the ACF field value, you’ll need to implement a few things in your themes functions.php.
Summary:
Register a new “where” argument to the WPGraphQL Posts connection
Filter the Posts connection resolver to account for this new argument
Register the new “where” argument:
First you need to create a add_action on graphql_register_types that will look something like the following code snippet. Here we register a field on the RootQueryToMyCustomPostTypeConnectionWhereArgs where you can define MyCustomPostType as your post type. The type we register will be an ID (This can also be of type Boolean, Float, Integer, orString) for my case I wanted to get only posts that where connected to an other post via the ACF post object field (the field was set to return only the Post ID).
Filter the connection resolver
add_action('graphql_register_types', function () {

    $customposttype_graphql_single_name = "MyCustomPostType";

    register_graphql_field('RootQueryTo' . $customposttype_graphql_single_name . 'ConnectionWhereArgs', 'postObjectId', [
        'type' => 'Int',
        'description' => __('The databaseId of the post object to filter by', 'your-textdomain'),
    ]);
});
Next we have to create an add_filter to graphql_post_object_connection_query_args. If you are familiar with WordPress loops via WP_Query, here we set the $query_args like we would do on any other loop, but we check for your custom where:.
The key will be the name of the field, the value will be the value you will give the postObjectId: "123" in your query, speaking of the query that will ook something like
On Thursday, March 26, 2020 I pair programmed with Jacob Arriola, Senior Web Engineer at Zeek Interactive.
Zeek Interactive is a California-based software agency specializing in WordPress and Apple iOS. They recently moved their own marketing website from traditional WordPress to Headless WordPress with WPGraphQL as the API and Gatsby as the front-end.
With the recent move of their site to Gatsby, and more Gatsby + WordPress projects in the pipeline, Jacob wanted to get more familiar with extending the WPGraphQL Schema.
In this video, we walk through registering custom Types and Fields to the WPGraphQL Schema. We use the popular WordPress SEO by Yoast plugin as an example of custom data we’d like to expose to the WPGraphQL Schema.
WPGraphQL makes use of cursor-based pagination, inspired by the Relay specification for GraphQL Connections. If you’re not familiar with cursor-based pagination it can be confusing to understand and implement in your applications.
In this post, we’ll compare cursor-based pagination to page-based pagination, and will look at how to implement forward and backward pagination in a React application using Apollo Client.
Before we dive into cursor-based pagination, let’s first look at one of the most common pagination techniques: Page-based pagination.
Page Based Pagination
Many applications you are likely familiar with paginate data using pages. For example, if you visit Google on your desktop and search for something and scroll down to the bottom of the page, you will see page numbers allowing you to paginate through the data.
Screenshot of Google’s pagination UI
WordPress also has page-based pagination mechanisms built-in. For example, within the WordPress dashboard your Posts are paginated:
Screenshot of the WordPress dashboard pagination UI
And many WordPress themes, such as the default TwentyTwenty theme feature page-based pagination:
Screenshot of the TwentyTwenty theme pagination UI
How Page-Based Pagination Works
Page-based pagination works by calculating the total number of records matching a query and dividing the total by the number of results requested for each page. Requesting a specific page results in a database request that skips the number of records totaling the number of records per page multiplied by the number of pages to skip. For example, visiting page 9 on a site showing 10 records per page would ask the database to skip 90 records, and show records 91-100.
Performance Problems with Page-Based Pagination
If you’ve ever worked with on a WordPress site with a lot of records, you’ve likely run into performance issues and looked into how to make WordPress more performant. One of the first recommendations you’re likely to come across, is to not ask WordPress to calculate the total number of records. For example, the 10up Engineering Best Practices first recommendation is to set the WP_Query argument no_found_rows to true, which asks WordPress to not calculate the total records.
As the total number of records grow, the longer it takes for your database to execute this calculation. As you continue to publish posts, your site will continue to get slower.
In addition to calculating the total records, paginated requests also ask the database to skip a certain number of records, which also adds to the weight of the query. In our example above, visiting page 9 would ask the database to skip 90 records. In order for a database to skip these records, it has to first find them, which adds to the overall execution. If you were to ask for page 500, on a site paginated by 100 items per page, you would be asking the database to skip 50,000 records. This can take a while to execute. And while your everyday user might not want to visit page 500, some will. And search engines and crawlers will as well, and that can take a toll on your servers.
The (lack of) Value of Page Numbers in User Interfaces
As a user, what value do page numbers provide in terms of user experience?
For real. Think about it.
If you are on my blog, what does “page 5” mean to you?
What does “page 5” mean to you on a Google search results?
Sure, it means you will get items “50-60”, but what does that actually mean to you as a user?
You have no realistic expectation for what will be on that page. Page 5 on my blog might be posts from last week, if I blogged regularly, but Page 5 also might be blog posts from 2004. You, as the user don’t know what to expect when you click a page number. You’re just playing a guessing game.
It’s likely that if you clicked page 5 on my blog, you are looking for older content. Instead of playing a guessing game clicking arbitrary page numbers, it would make more sense and provide more value to the user if the UI provided a way to filter by date ranges. This way, if you’re looking for posts from yesterday, or from 2004, you could target that specifically, instead of arbitrarily clicking page numbers and hoping you find something relevant to what you’re looking for.
Inconsistent data in page-based UIs
Page based UIs aren’t consistent in the content they provide.
For example, if I have 20 blog posts, separated in 2 pages, page 1 would include posts 20-11 (most recently published posts), and page 2 would include posts 1-10. As soon as I publish another article, page 1 now would include items 21-12, page 2 would include items 2-11, and we’d have a page 3 with item 1, the oldest post.
Each time a new blog post is published, the content of each paginated archive page changes. What was on page 5 today, won’t be the same next time content is published.
This further promotes the fact that the value provided to users in page numbers is confusing. If the content on the pages remained constant, at least the user could find the content they were looking for by always visiting page 5, but that’s not the case. Page 5 might look completely different next time you click on it.
Cursor-Based Pagination
Many modern applications you’re likely familiar with use cursor-based pagination. Instead of dividing the total records into chunks and skipping records to paginate, cursor-based pagination loads the initial set of records and provides a cursor, or a reference point, for the next request to use to ask for the next set of records.
Some examples of this type of pagination in action would be loading more tweets as you scroll on Twitter, loading more posts as you scroll on Facebook, or loading more Slack messages as you scroll in a channel.
Animated GIF demonstrating scrolling in Slack to load more messages
As you scroll up or down within a Slack channel, the next set of messages are loaded into view (often so fast that you don’t even notice). You don’t arbitrarily click page numbers to go backward or forward in the channel and view the next set of messages. When you first enter a channel, Slack loads an initial list of messages and as you scroll, it uses a cursor (a reference point) to ask the server for the next set of messages.
In some cases, such as Slack channels, infinite scrolling for pagination can enhance the user experience. But in some cases, it can harm the user experience. The good news is that cursor-based pagination isn’t limited to being implemented via infinite scroll. You can implement cursor pagination using Next / Previous links, or a “Load More” link.
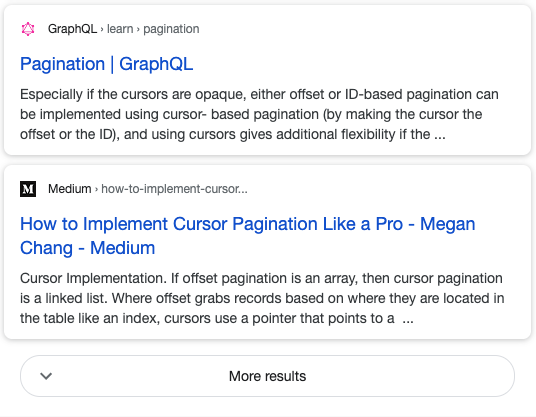
Google, for example, when used on mobile devices uses a “More results” button. This avoids subjecting users to the guessing game that page numbers lead to, and also avoids some of the downsides of infinite scrolling.
Screenshot of Google search results with a “More results” button, as seen on a mobile device
Performance of Cursor Based Pagination
Cursor pagination works by using the reference, the cursor, to point to a specific place in the dataset, and move forward or backward from that point. Page-based pagination needs to skip x amount of records, where cursor pagination can go directly to a point and start there. As you page through records with page-based pagination your queries get slower and slower, and it’s further impacted by the size of the dataset. With cursor pagination, the size of your dataset doesn’t affect performance. You are going to a specific point in the dataset and returning x number of records before or after that point. Going 500 pages deep will get quite slow on page-based, but will remain equally performant with cursor-based pagination.
No Skipped Data
Let’s say you visit your Facebook newsfeed. You immediately see 5 posts from your network of family and friends. Let’s say the data looks something like the following:
COVID-19 update from Tim
Meme from Jen
Embarrassing Photo 1 from Mick
Embarrassing Photo 2 from Mick
Dog photo from Maddie
Quarantine update from Stephanie
Inspirational quote from Dave
Breaking Bad meme from Eric
Quarantine update from your local newspaper
Work from Home tips from Chris
In page-based pagination, the data would look like so:
Page 1
Page 2
COVID-19 update from Tim
Quarantine update from Stephanie
Meme from Jen
Inspirational quote from Dave
Embarrassing Photo 1 from Mick
Breaking Bad meme from Eric
Embarrassing Photo 2 from Mick
Quarantine update from your local newspaper
Dog photo from Maddie
Work from Home tips from Chris
Let’s say Mick wakes up and realizes he shouldn’t have posted the embarrassing pics. He deletes the pics at the same time you’re looking at Page 1 of the posts.
When you scroll to look at more posts, the overall dataset now looks like the following:
Page 1
Page 2
COVID-19 update from Tim
Breaking Bad meme from Eric
Meme from Jen
Quarantine update from your local newspaper
Dog photo from Maddie
Work from Home tips from Chris
Quarantine update from Stephanie
5 Keto Recipes from Barb
Inspirational quote from Dave
“Tiger King” trailer from Cassie
Since the two embarrassing photos were deleted, page 2 now looks different. Both “Quarantine update from Stephanie” and “Inspirational quote from Dave” are not on Page 2 anymore. They slid up to page 1. But the user already loaded page 1 which included the now deleted pice. So, when you scroll, and page 2 loads, these two posts won’t be included in your feed!
With page-based pagination, you would miss out on some content and not have any way to know that you missed it!
And Dave and Stephanie will be sad that you didn’t like their posts.
This happens because the underlying SQL query looks something like this:
SELECT * from wp_posts OFFSET 0, LIMIT 5 // Page 1, first 5 records
SELECT * from wp_posts OFFSET 5, LIMIT 5 // Page 2, skips 5 records regardless
With cursor pagination, a pointer is sent back and used to query the next set of data. In this case, it might be a timestamp. So, when you scroll to load more posts, with cursor pagination you would get all items published after the last cursor. So, “Quarantine update from Stephanie” and “Inspirational quote from Dave” would be included because they were posted after the timestamp of the embarrassing photos that have been deleted. The cursor goes to a specific point in the dataset, and asks for the next set of records after that point.
The underlying SQL query for cursor pagination looks something like this:
SELECT * from wp_posts WHERE cursor > wp_posts.post_date ORDER BY wp_posts.post_date LIMIT 5
So, instead of skipping 5 records, we just get the next set of posts based on publish date (or whatever the query is being ordered by). This ensures that the user is getting the proper data, even if there have been changes to the existing dataset.
Cursor Pagination with WPGraphQL
Below is an example of forward and backward pagination implemented in a React + Apollo application.
(If your browser isn’t loading this example application below, click here to open it in a new window)
In this example, we’ll focus specifically on the list.js file.
Paginated Query
One of the first things you will see is a paginated query.
query GET_PAGINATED_POSTS(
    $first: Int
    $last: Int
    $after: String
    $before: String
  ) {
    posts(first: $first, last: $last, after: $after, before: $before) {
      pageInfo {
        hasNextPage
        hasPreviousPage
        startCursor
        endCursor
      }
      edges {
        cursor
        node {
          id
          postId
          title
        }
      }
    }
  }
In this query, we define the variables first, last, after and before. These are options that can be passed to the query to affect the behavior. For forward pagination first and after are used, and for backward pagination last and before are used.
In addition to asking for a list of posts, we also ask for pageInfo about the query. This is information that informs the client whether there are more records or not, and how to fetch them. If hasNextPage is true, we know we can paginate forward. If hasPreviousPage is true, we know we can paginate backwards.
Our PostList component makes use of the Apollo useQuery hook to make an initial query with the variables: { first: 10, after: null, last: null, before: null }. This will ask WPGraphQL for the first 10 posts, which will be the 10 most recently published posts.
When the data is returned, we map over the posts and return them and render the Post titles as unordered list items.
Next / Previous buttons
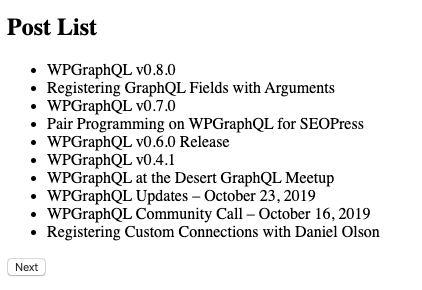
Since there are more than 10 posts, the pageInfo.hasNextPage value will be true, and when this value is true, we know we can safely show our Next button. Since this is the first page of data, there are no posts more recent, so pageInfo.hasPreviousPage will be false. Since this is false, we will not load the Previous Button.
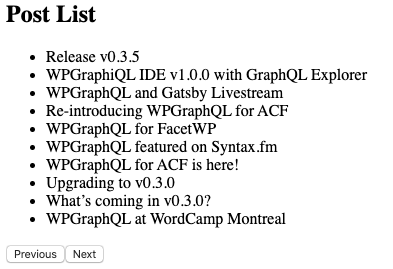
The initial load of the application is a list of 10 posts with a Next button.
Screenshot of the example application’s initial loaded state
When the “Next” button is clicked, it makes use of the Apollo fetchMore method, and re-queries the same query, but changing the variables to: { first: 10, after: pageInfo.endCursor, last: null, before: null }. These variables tell WPGraphQL we want the first 10 posts after the endCursor, which is a reference to the last item in the list on the first page. When those posts are returned, we make use of Apollo’s updateQuery method to replace the Post list with the new list.
So now, after clicking “Next”, we have a new list of posts displayed, and both a “Previous” and “Next” button.
Screenshot of the example application after clicking the “Next” button
Both the Previous and Next buttons are displayed, because the values for pageInfo.hasNextPage and pageInfo.hasPreviousPage were both true. This information from the query tells the client that there are posts on either side, so we can paginate forward or backward.
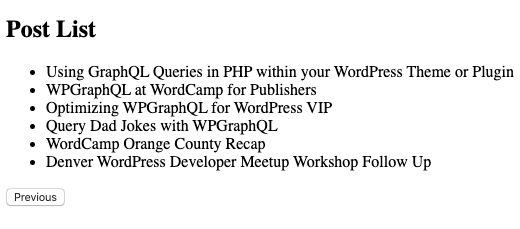
If we click “Next” a few more times, we will reach the end of the dataset, and pageInfo.hasNextPage will be false, and we will no longer want to show the “Next” button.
Screenshot of the example application at the end of the dataset
When the “Previous” button is clicked, it makes use of the Apollo fetchMore method, and re-queries the same query, but changing the variables to: { first: null, after: null, last: 10, before: pageInfo.startCursor }. These variables tell WPGraphQL we want the last 10 posts before the startCursor, which is a reference to the first item in the list on the page. This allows us to paginate backward and get the previous items.When those previous posts are returned, we make use of Apollo’s updateQuery method to replace the Post list with the new list, and we’re back to showing both “Previous” and “Next” buttons again, until you click previous enough times to be back at the beginning of the dataset.
Summary
In this post, I compared page-based pagination and cursor-based pagination. We then looked at an example application built with React and Apollo querying the WPGraphQL.com GraphQL API and implementing forward and backward pagination.
I hope this article helps inspire you to use WPGraphQL in fun ways as we build the future of the web together!