Category: Tutorials

Tutorials about using WPGraphQL

  • Gravity Forms in Headless WordPress with Nuxt/Vue

    Gravity Forms is a WordPress plugin that allows you to create a variety of forms on your WordPress site. Its large selection of add-ons lets you send collected form data to various CRMs, process data, and more!

    In this article, you’ll learn how you can query for Gravity Form data, render the form in a Nuxt.js app, perform field validation, and submit the form entries to your headless WordPress backend.

    I’ll provide a Nuxt.js app repo that contains Vue components, Vue composables, and helper functions that you can use for your own projects and experiment with. Let’s dive in! 

    Prerequisites

    To benefit from this article, you should be familiar with the basics of working with the command line, headless WordPress development, Vue, and Nuxt.

    Steps for setting up:

    1. Set up a WordPress site and get it running.  Local by WP Engine is a good dev environment to use.
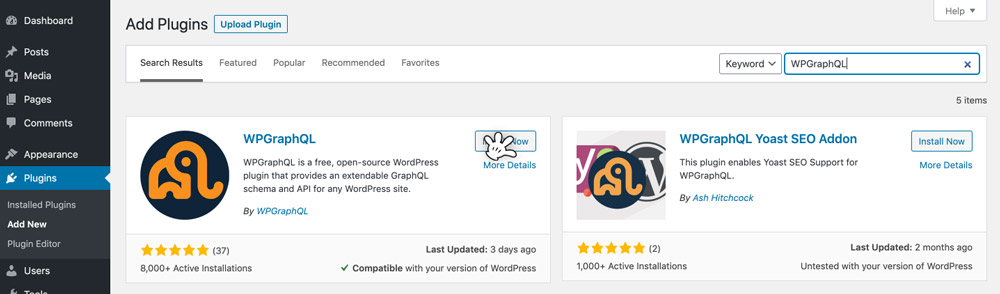
    2. Install and activate the Gravity Forms, WPGraphQL, and WPGraphQL for Gravity Forms WordPress plugins.
    3. Clone down the Nuxt repo for this project by copying and pasting this command in your terminal:
    npx degit Fran-A-Dev/nuxt3-headlesswp-gravity-forms#main my-project
    1. Import the questionnaire form. From the WordPress admin sidebar, go to Forms > Import/Export > Import Forms. Select the gravityforms-questionnaire-form.json inside the root of the Nuxt project folder and click the button to import it.
    2. Create a .env.local file inside of the root of the Nuxt project. Open that file in a text editor and paste in: NUXT_PUBLIC_WORDPRESS_API_URL=http://wpgraphqlgravtyforms.local/graphql,replacing wpgraphqlgravtyforms.local with the domain for your WordPress site. This is the endpoint that Nuxt will use when it sends requests to your WordPress backend.
    3. Run npm install to install the dependencies.
    4. Run npm run dev to get the server running locally.
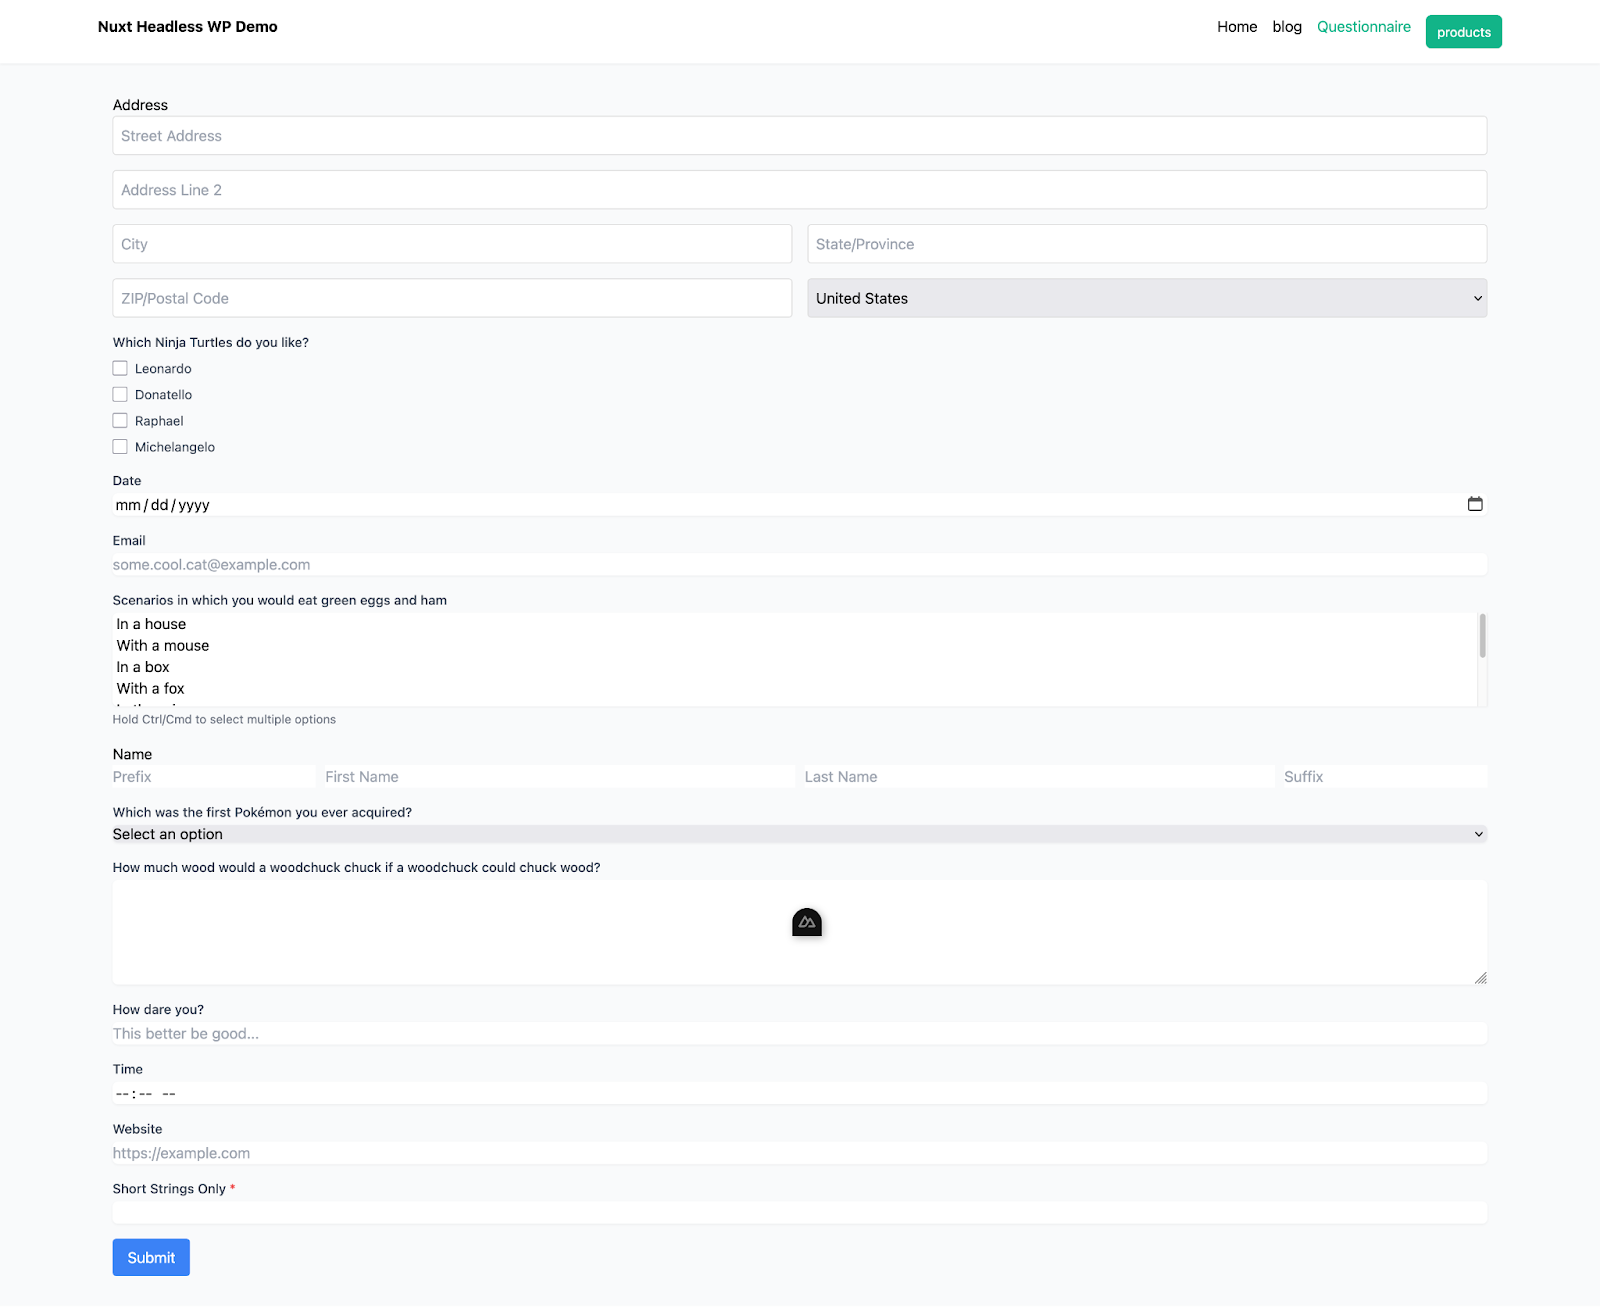
    5. You should now be able to click the “Questionnaire” link in the header to go to the form at http://localhost:3000/questionnaire in a web browser and see it in all its glory:
    WPGraphQL for Gravity Forms

    The WPGraphQL for Gravity Forms plugin is a powerful extension for WPGraphQL that provides a comprehensive suite of features that allows developers to interact with Gravity Forms via GraphQL. Let’s start by querying for a form.

    Querying for a Form

    To query for a form, we have the `gfForm` query that we can use to query for data about our Gravity Forms. Here’s a simple example if you want to replace the existing query in the project, open up `composables/useGravityForm.js` and paste this query in replacement of the one currently there:

    query getForm {
      gfForm(id: 1, idType: DATABASE_ID) {
        databaseId
        title
        description
        formFields(first: 500) {
          nodes {
            ... on TextField {
              id
              type
              label
            }
            ... on SelectField {
              id
              type
              label
              choices {
                text
                value
              }
            }
          }
        }
      }
    }


    In this query, we are asking for form data.  The `gfForm` query retrieves a specific form by its database ID (id: 1).

    For that form, the query fetches basic information like its title and description.

    The query also fetches the formFields (up to ), and for each field, it checks whether it’s a TextField or SelectField. Depending on the type, it will fetch the appropriate data such as id, type, label, and for SelectField, it will also retrieve the choices (with their text and value).

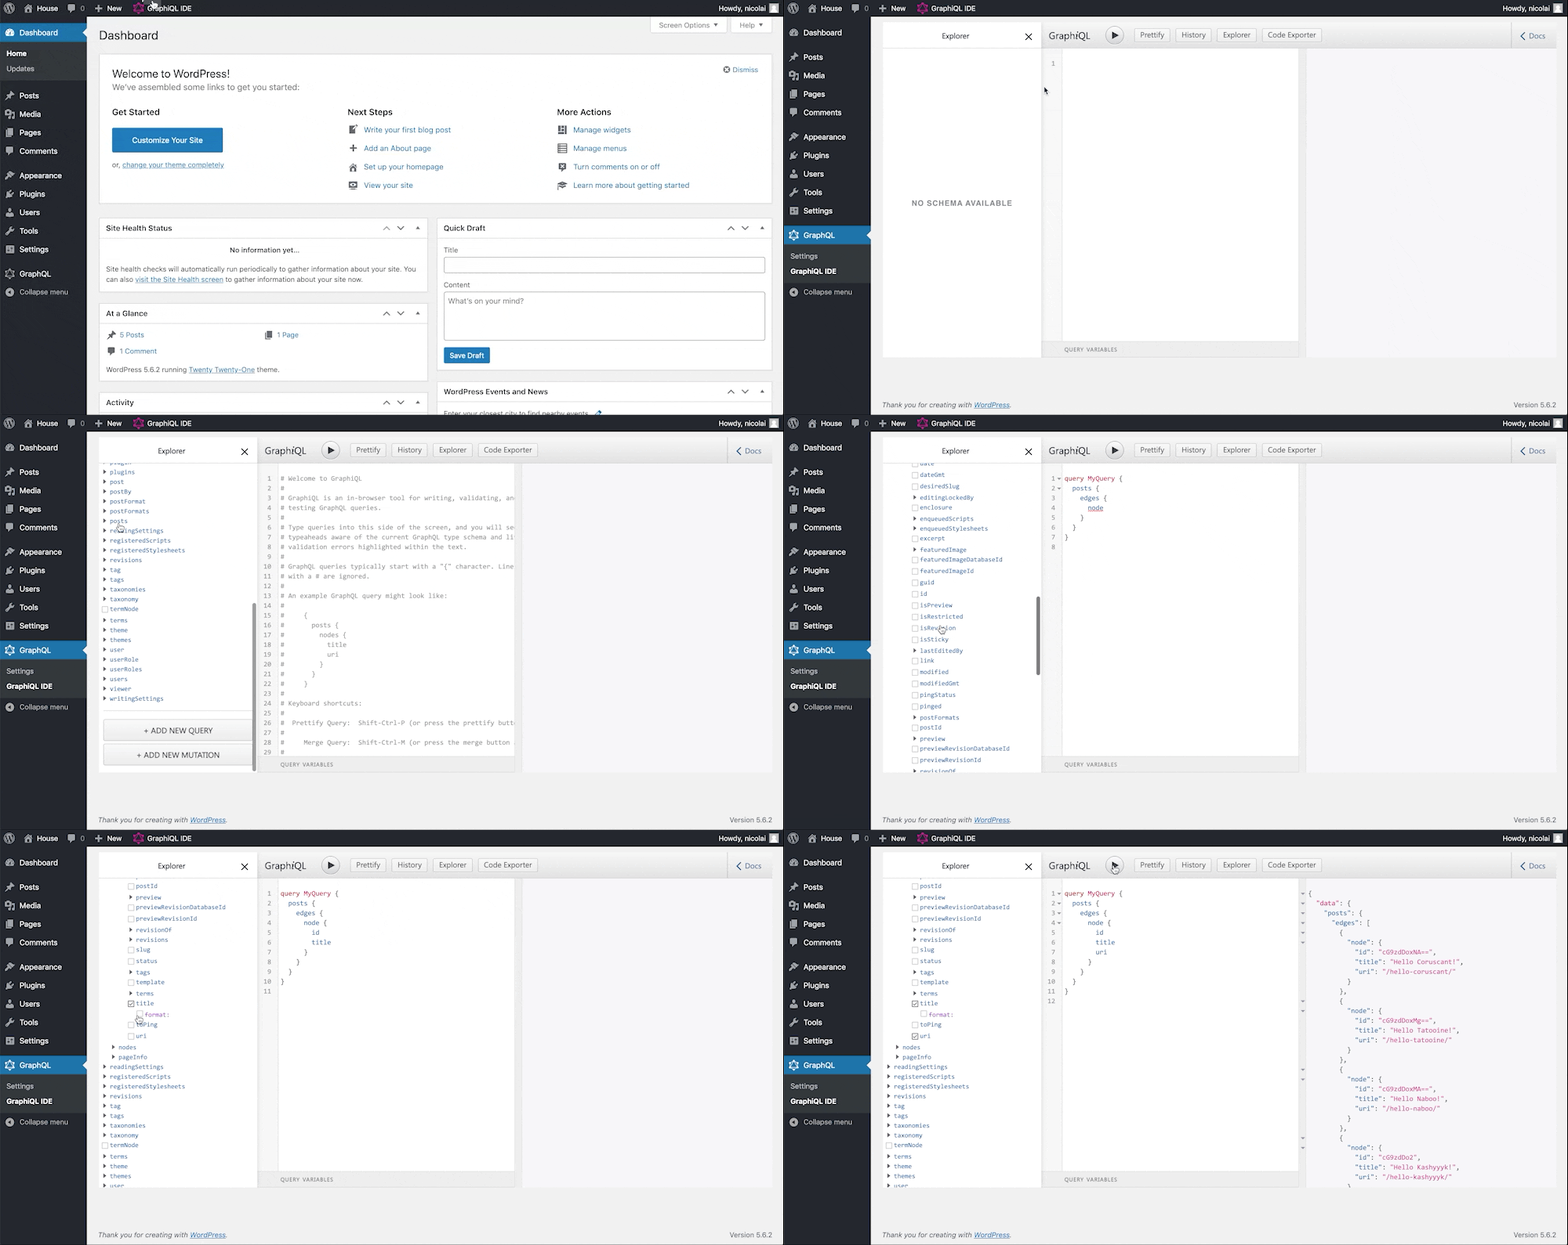
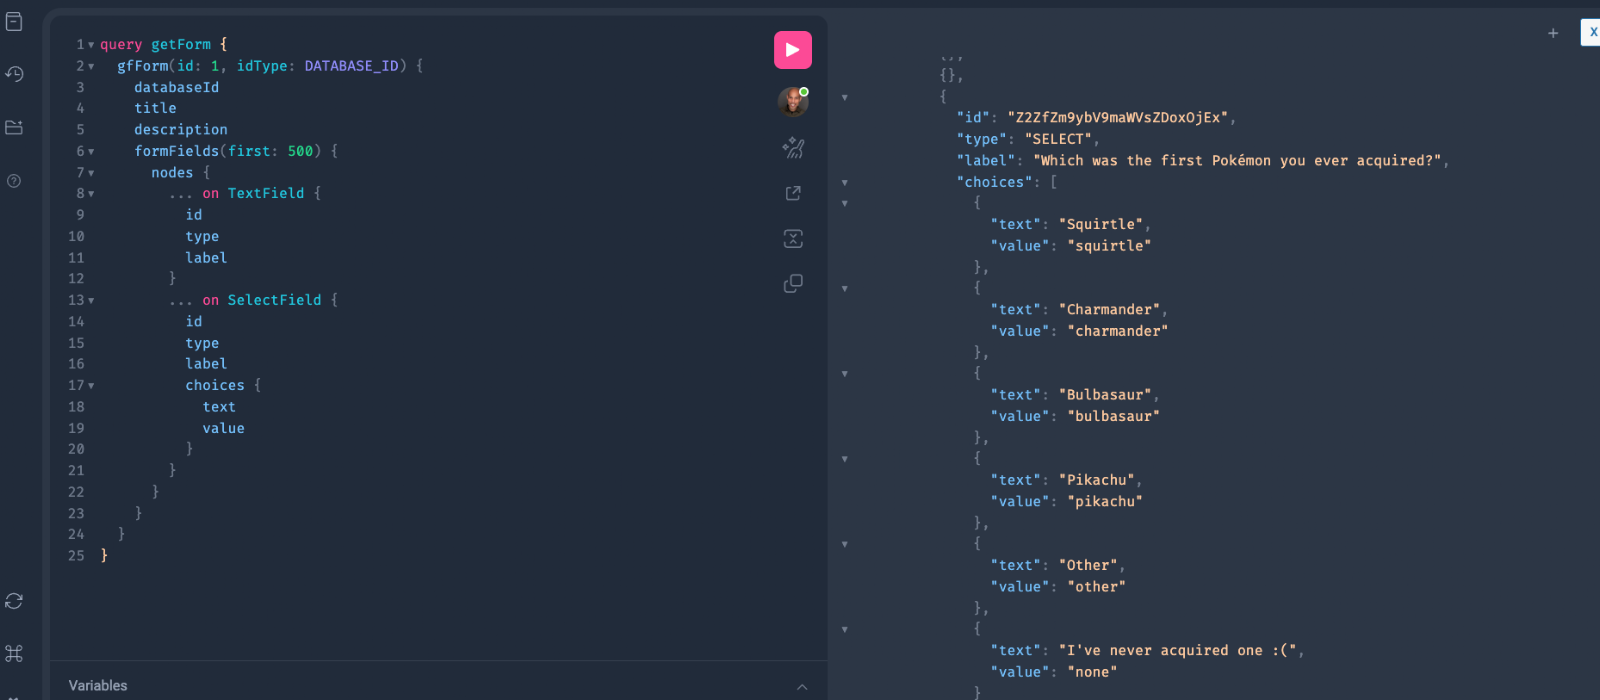
    Go ahead and test out this query right from the WordPress admin by following these steps:

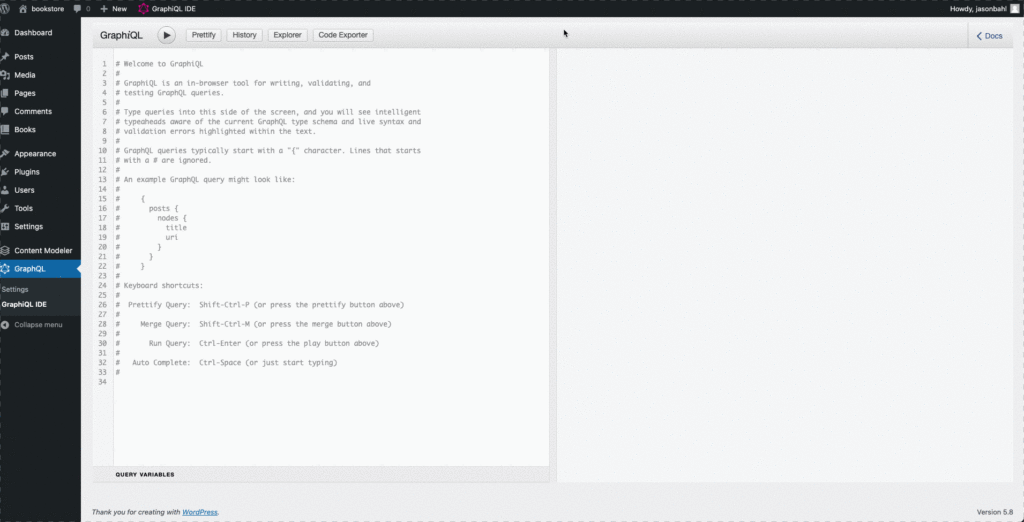
    1. Go to GraphQL > GraphiQL IDE.
    2. Paste the query above into the left column, replacing id: 1 with the ID of the imported form.
    3. Click the ▶ button to execute the query.
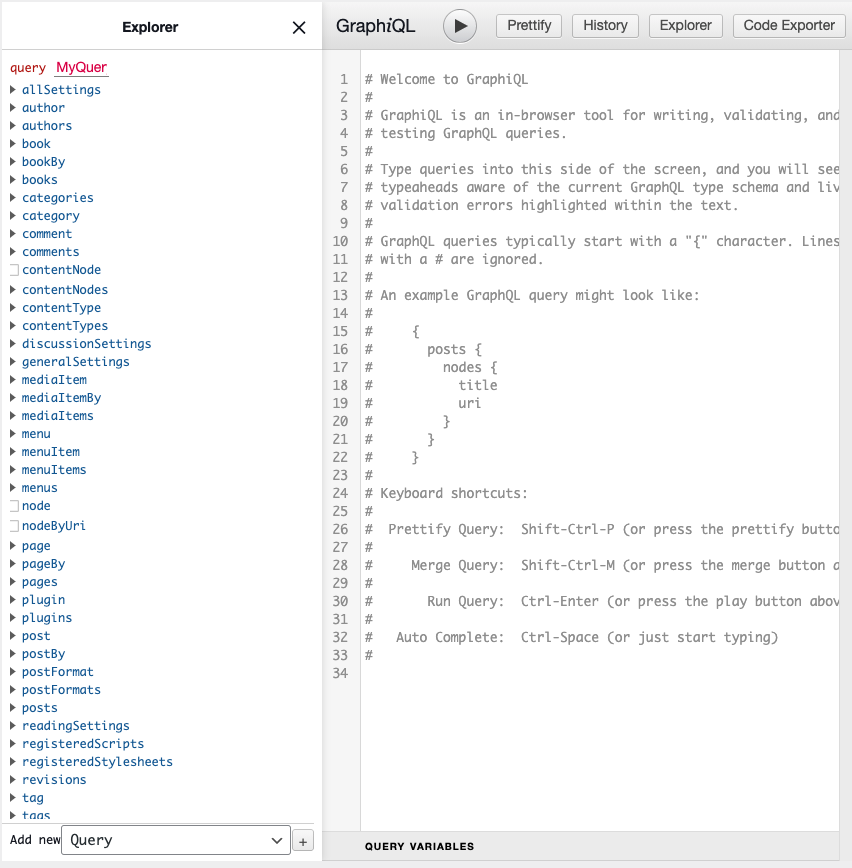
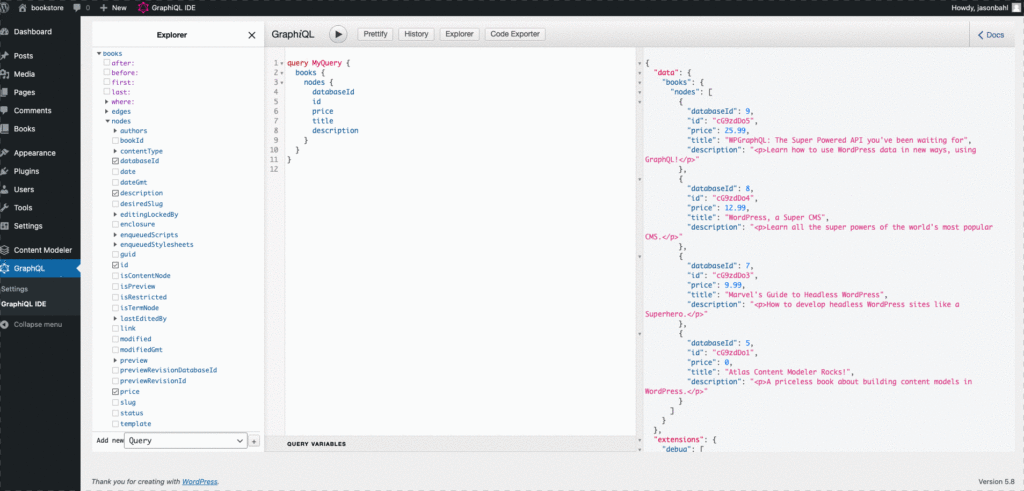
    4. See the results returned in the right column. You should see this:
    Gravity Forms Field Support

    Now, let’s highlight one of the latest features of WPGraphQL for Gravity Forms which we use in this project.  This feature is Forms Field support with the FormField interface.

    The interface approach leverages GraphQL interfaces to abstract shared properties among Gravity Forms fields, meaning you can query a common set of fields like “label” or “isRequired” across multiple field types.

    This method allows you to write a more composable query that automatically includes any new field type that implements a given interface without needing to update your query.

    In our project, we used inline fragments on interfaces such as GfFieldWithLabelSetting and GfFieldWithRulesSetting to fetch common properties like label and isRequired from each form field.

    Our query retrieves both inputType and type values. The sample’s current component mapping relies on the static type property to determine which Vue component to render. For the scope of this article, the inputType is still included in the query output to point out the new support.

    inputType Prop

    For other use cases outside the scope of this article, you can leverage the inputType property instead of the static type to dynamically determine which component to render for each Gravity Forms field.

    This dynamic approach allows a single form field to resolve into multiple input types—such as a Quiz Field that can be rendered as either a Checkbox or Radio Field—based on its configuration. Using the inputType allows your code to automatically map to the correct component, making it a bit more flexible and easier to maintain as new input variants are introduced. Stay tuned for a future article that focuses on this!

    Check out the WPGraphQL for Gravity Forms readme for more documentation on gfForm , the FormField interface and other queries and mutations the plugin offers.

    Querying for the form in Nuxt

    Now that we know what a query for a form looks like and the FormField interface the types inherit let’s see how we can use it in our Nuxt app.

    Open up the Nuxt app in your code editor and navigate to the composables/useGravityForm.js file.  

    This file is a Nuxt.js composable designed to interface with WPGraphQL for fetching Gravity Forms data. It imports the ref function from Vue and the runtime configuration using useRuntimeConfig from Nuxt’s #app alias. It defines a reactive variable called formFields that will hold the array of form field objects retrieved from the backend.

    A multi-line GraphQL query named formQuery is declared to fetch a Gravity Form’s fields by its ID. The query leverages GraphQL interfaces to abstract common properties shared by multiple field types.

    For more complex field configurations, inline fragments on GfFieldWithChoicesSetting fetch choices and input details, while GfFieldWithConditionalLogicSetting retrieves any conditional logic rules defined on the field:

    const formQuery = `
      query GetGravityForm($formId: ID!) {
      gfForm(id: $formId, idType: DATABASE_ID) {
        formFields(first: 300) {
          nodes {
            id
            databaseId
            inputType
            type
            visibility
            ... on GfFieldWithLabelSetting {
              label
            }
            ... on GfFieldWithRulesSetting {
              isRequired
            }
            ... on GfFieldWithCssClassSetting {
              cssClass
            }
            ... on GfFieldWithDefaultValueSetting {
              defaultValue
            }
            ... on GfFieldWithSizeSetting {
              size
            }
            ... on GfFieldWithPlaceholderSetting {
              placeholder
            }
            ... on GfFieldWithMaxLengthSetting {
              maxLength
            }
            ... on GfFieldWithInputMaskSetting {
              inputMaskValue
            }
            ... on GfFieldWithChoicesSetting {
              choices {
                text
                value
              }
              inputs {
                id
                label
              }
            }
            ... on GfFieldWithConditionalLogicSetting {
              conditionalLogic {
                actionType
                logicType
                rules {
                  fieldId
                  operator
                  value
                }
              }
            }
          }
        }
      }
    }

    The fetchForm function is defined to send a POST request to the WordPress GraphQL endpoint using Nuxt’s useFetch composable. It includes a request body that contains the query and variables, with a default formId of "1" to retrieve a specific form.  In this line containing the body object, go ahead and replace the integer with your specific ID:

     body: JSON.stringify({
              query: formQuery,
              variables: { formId: "1" }, // Default formId (you can change this to what your id is)
            }),


    The immediate flag shown below is set to false so that the fetch operation is not executed automatically, allowing for manual triggering via the execute function.

    This is important because it provides better control over when data is fetched, optimizing performance and preventing unnecessary network requests. By waiting for a specific point in the component lifecycle—such as when a button is clicked or a user interacts with the page—we ensure that data is only fetched when needed. In this case, we trigger the fetch manually within the onMountedlifecycle hook, which ensures that the data is loaded once the Nuxt page component rendering the form is attached to the DOM:

    immediate: false, // Prevent automatic execution
            transform: (res) => {
              if (res.errors) {
                console.error("GraphQL Errors:", res.errors);
                throw new Error(res.errors[0].message);
              }
              const fields = res.data?.gfForm?.formFields?.nodes;
              if (!Array.isArray(fields)) {
                console.error("Invalid fields data:", res.data);
                throw new Error("Invalid form fields data");
              }
              return fields;
            },
          }
        );
    
        // Return execute to manually trigger the fetch later
        return { data, status, fetchError, execute, refresh };
      };

    Submitting the form in Nuxt

    Staying in the useGravityForm.js file, we finish off the logic to allow the user to submit form data to our WordPress backend via Nuxt.  

    We do this with the submitForm function.  This is an asynchronous function that accepts a form ID and field values, transforms these values using transformFieldValue, and then submits them via a GraphQL mutation. 

    This mutation sends the form ID and the transformed field values to the backend, which responds with either errors or confirmation details. Finally, the composable returns an object containing formFields, fetchForm, and submitForm so that other parts of the Nuxt application can fetch and submit Gravity Forms data:

    const submitForm = async (formId, fieldValues) => {
        try {
          const transformedValues = Object.entries(fieldValues)
            .map(([id, value]) => {
              const field = formFields.value.find(
                (f) => f.databaseId === parseInt(id, 10)
              );
              if (!field) {
                console.warn(`No field found for ID ${id}`);
                return null;
              }
              return transformFieldValue(field, value);
            })
            .filter(Boolean);
    
          const mutation = `
            mutation SubmitForm($formId: ID!, $fieldValues: [FormFieldValuesInput!]!) {
              submitGfForm(input: {
                id: $formId
                fieldValues: $fieldValues
              }) {
                errors {
                  id
                  message
                }
                confirmation {
                  message
                  type
                }
                entry {
                  id
                  ... on GfSubmittedEntry {
                    databaseId
                  }
                }
              }
            }
          `;
    
          const response = await fetch(config.public.wordpressUrl, {
            method: "POST",
            headers: {
              "Content-Type": "application/json",
              Accept: "application/json",
            },
            body: JSON.stringify({
              query: mutation,
              variables: {
                formId: parseInt(formId, 10),
                fieldValues: transformedValues,
              },
            }),
          });
    
          const result = await response.json();
    
          if (result.errors) {
            throw new Error(result.errors.map((e) => e.message).join(", "));
          }
    
          return result.data.submitGfForm;
        } catch (error) {
          console.error("Submit form error:", error);
          throw error;
        }
      };
    
      return { formFields, fetchForm, submitForm };
    }

    Rendering The Form

    Now that we know how the form data is being queried for and submitted, let’s check out where this logic is being used, how the state is being managed, and where the data is being rendered.

    Navigate over to pages/headlesswp-gform/index.vue.  

    Take a look at the entire file in your code editor. Let’s break it down from top to bottom.

    The script starts by importing Vue’s reactive functions (ref, reactive, onMounted, watch) and several form field components (e.g., InputField, EmailFieldDon’t worry, we will discuss where these are coming from in the next section) to render the form.

    It then imports the useGravityForm composable, which provides functions to fetch form metadata and submit form data from WPGraphQL:

    import { ref, reactive, onMounted, watch } from "vue";
    
    import {
      InputField,
      DropdownField,
      ChoiceListField,
      AddressField,
      DateField,
      TimeField,
      NameField,
      PhoneField,
    } from "~/components/form-fields";
    
    import EmailFieldComponent from "~/components/form-fields/EmailField.vue";
    
    import useGravityForm from "~/composables/useGravityForm";
    const { fetchForm, submitForm, formFields } = useGravityForm();

    Following that, a reactive reference formValues is declared using ref({}) to store user input for each form field.

    Then we establish a reactive error storage object for both address and email validations. It defines a validateAddress function that checks if each required component of an address is present and formatted correctly, updating error messages as needed. 

    Similarly, the validateEmail function uses a regular expression to confirm that the email address adheres to a valid format. If any validation fails, the corresponding error message is set and the function returns false. This client-side validation ensures that only complete and correctly formatted data is submitted, improving user experience and data integrity.

    const formValues = ref({});
    const error = ref(null);
    
    const validationErrors = reactive({
      address: {
        street: null,
        city: null,
        state: null,
        zip: null,
        country: null,
      },
      email: null,
    });
    
    // Validate the entire address object and update errors per field.
    const validateAddress = (address) => {
      let valid = true;
      if (!address.street) {
        validationErrors.address.street = "Street address is required.";
        valid = false;
      } else {
        validationErrors.address.street = null;
      }
      if (!address.city) {
        validationErrors.address.city = "City is required.";
        valid = false;
      } else {
        validationErrors.address.city = null;
      }
      if (!address.state) {
        validationErrors.address.state = "State is required.";
        valid = false;
      } else {
        validationErrors.address.state = null;
      }
      if (!address.zip || !/^\d{5}$/.test(address.zip)) {
        validationErrors.address.zip = "Please enter a valid 5-digit ZIP code.";
        valid = false;
      } else {
        validationErrors.address.zip = null;
      }
      if (!address.country) {
        validationErrors.address.country = "Country is required.";
        valid = false;
      } else {
        validationErrors.address.country = null;
      }
      return valid;
    };
    
    // Validate the email value and update the error.
    const validateEmail = (email) => {
      const emailRegex = /^[a-zA-Z0-9._%+-]+@[a-zA-Z0-9.-]+\.[a-zA-Z]{2,}$/;
      if (!emailRegex.test(email)) {
        validationErrors.email = "Please enter a valid email address.";
        return false;
      }
      validationErrors.email = null;
      return true;
    };

    Next, The updateFieldValue function merges the current formValues with a new value for a given field ID, ensuring that changes to input fields update the reactive state.

    Inside the onMounted lifecycle hook, the code calls fetchForm() to get the form metadata and immediately triggers the fetch using execute():

    // Handle field value updates
    const updateFieldValue = (fieldId, value) => {
      formValues.value = {
        ...formValues.value,
        [fieldId]: value,
      };
    };
    
    onMounted(() => {
      const { data, error: fetchError, execute } = fetchForm();
      execute();

    A watcher on the returned data initializes formFields and builds an initialValues object based on the field type, setting default values (e.g., an object for addresses, and an empty array for checkboxes).

    For example, if a field is of type “ADDRESS,” the code sets its default value to an object with empty strings for street, lineTwo, city, state, zip, and a default country of “US.”

    A separate watcher monitors fetchError and updates the local error reference with the error message if the fetch fails:

    watch(data, (newData) => {
        if (newData && Array.isArray(newData)) {
          formFields.value = newData;
          const initialValues = {};
          newData.forEach((field) => {
            switch (field.type) {
              case "ADDRESS":
                initialValues[field.databaseId] = {
                  street: "",
                  lineTwo: "",
                  city: "",
                  state: "",
                  zip: "",
                  country: "US",
                };
                break;
              case "CHECKBOX":
              case "MULTISELECT":
                initialValues[field.databaseId] = [];
                break;
              case "NAME":
                initialValues[field.databaseId] = {
                  prefix: "",
                  first: "",
                  middle: "",
                  last: "",
                  suffix: "",
                };
                break;
              default:
                initialValues[field.databaseId] = "";
            }
          });
          formValues.value = initialValues;
        }
      });
    
      watch(fetchError, (err) => {
        if (err) {
          error.value = err.message;
        }
      });
    });

    The handleSubmit function validates the email and address fields by checking their corresponding values in formValues and displays an alert if validation fails:

    const handleSubmit = async () => {
    
      let isValid = true;
    
      // Validate email field before submission
    
      const emailField = formFields.value.find((field) => field.type === "EMAIL");
    
      if (emailField && formValues.value[emailField.databaseId]) {
    
        if (!validateEmail(formValues.value[emailField.databaseId])) {
    
          isValid = false;
    
        }
    
      }
    
      // Validate address field before submission
    
      const addressField = formFields.value.find(
    
        (field) => field.type === "ADDRESS"
    
      );
    
      if (addressField && formValues.value[addressField.databaseId]) {
    
        if (!validateAddress(formValues.value[addressField.databaseId])) {
    
          isValid = false;
    
        }
    
      }
    
      if (!isValid) {
    
        alert("Please fix the errors before submitting.");
    
        return;
    
      }

    If validation passes, it calls submitForm with the current form values, transforming them as needed and handling the response for errors or confirmation.

    On successful submission, the form is reset by building a new object (resetValues) with default values for each field, which is then assigned to formValues.value.

    Finally, the template loops over formFields and dynamically renders the appropriate component for each field type (using the fieldComponents mapping), binding each component’s value to formValues via v-model and providing a submit button to send the form data:

    try {
        const response = await submitForm(1, formValues.value);
        if (response?.errors?.length > 0) {
          throw new Error(response.errors[0].message);
        }
        if (response?.confirmation) {
          const temp = document.createElement("div");
          temp.innerHTML = response.confirmation.message;
          const cleanMessage = temp.textContent || temp.innerText;
          alert(cleanMessage);
    
          // Reset fields after submission
          const resetValues = {};
          formFields.value.forEach((field) => {
            switch (field.type) {
              case "ADDRESS":
                resetValues[field.databaseId] = {
                  street: "",
                  lineTwo: "",
                  city: "",
                  state: "",
                  zip: "",
                  country: "US",
                };
                break;
              case "CHECKBOX":
              case "MULTISELECT":
                resetValues[field.databaseId] = [];
                break;
              case "NAME":
                resetValues[field.databaseId] = {
                  prefix: "",
                  first: "",
                  middle: "",
                  last: "",
                  suffix: "",
                };
                break;
              default:
                resetValues[field.databaseId] = "";
            }
          });
          formValues.value = resetValues;
        }
      } catch (err) {
        alert(`Error submitting form: ${err.message}`);
      }
    };
    
    // Map field types to components
    const fieldComponents = {
      TEXT: TextField,
      EMAIL: EmailField,
      TEXTAREA: TextAreaField,
      SELECT: SelectField,
      MULTISELECT: MultiSelectField,
      ADDRESS: AddressField,
      CHECKBOX: CheckboxField,
      DATE: DateField,
      TIME: TimeField,
      NAME: NameField,
      WEBSITE: WebsiteField,
    };


    Field Component Rendering

    Now let’s discuss where those field component imports were coming from in the previous section.  Navigate to components/field-forms.    This folder contains all the component files for the fields.  

    In our project, we organized the form field components into groups based on shared behavior and UI patterns. We consolidated similar text-based inputs—like Text, Email, Website, and even Text Area—into a single InputField component.

    For fields that use dropdowns, we combined Select and MultiSelect into a unified DropdownField component. For fields that involve multiple choice inputs, such as Checkbox and Radio fields, we created a consolidated ChoiceListField component.

    Meanwhile, fields with unique layouts or behaviors (like AddressField, DateField, TimeField, and NameField) were kept as separate components.

    To simplify importing these components into our main form, we created a barrel file (index.js) in the form-fields folder that re-exports all of them.

    Since there are a few, let’s just break down the common patterns they follow:

    Props Definition

    All components define a consistent set of props:

    • field: An object containing field metadata (required)

    Contains information like databaseId, label, isRequired, and field-specific properties

    • modelValue: The current value of the field

    Type varies based on the field (string, array, object)

    Includes appropriate default values

    Event Handling

    Each component emits events to update the parent component’s state:

    All components use the update:modelValue or update:model-value event for two-way binding.

    This follows Vue’s convention for custom v-model implementation

    Field-Specific Validation

    Many components include field-specific validation logic:

    • Simple fields may validate on input
    • Complex fields (like EmailField, AddressField) have dedicated validation functions
    • Error messages are stored in reactive variables and displayed in the template

    Consistent Template Structure

    All components follow a similar template structure:

    • A wrapper div with class field-wrapper
    • A label displaying the field name and required indicator if needed

    Input element(s) with appropriate bindings:

    • :value bound to the model value
    • Event handlers to emit update events
    • Error message displayed when validation fails

    ​​Complex Field Handling

    For complex fields (like Address, Name):

    • Data is structured as objects with multiple properties
    • Components use appropriate layout techniques (grid, flexbox) to organize multiple inputs
    • Updates maintain the overall object structure while changing specific properties

    What’s the deal with Errors and Why do we handle them?

    What is the deal, Jerry??? Well, the deal is that we handle two types of errors in this app. This would be a great question, the great comedian, Jerry Seinfeld could ask.

    Request or Server Errors

    These are errors that prevent the form entry from being saved. In our Nuxt implementation with Gravity Forms, we encounter several types of network-related errors:

    • Network connectivity issues when the user’s connection drops
    • WordPress backend errors (500 Internal Server Error)
    • Authentication or permission errors when submitting to protected forms
    • GraphQL syntax or schema errors

    Our application handles these errors through the try/catch block in the form submission process. When using the submitForm function from our useGravityForm composable, we capture server errors and display them prominently to the user with an alert.

    Inside the useGravityForm composable, we format GraphQL errors into a user-friendly message that tells the user that the submission failed on a popup in the browser.


    You can test this error handling by disabling your network connection in DevTools and attempting to submit the form. The application will display an error message indicating the network failure.

    Field Validation Errors

    Our application implements a dual-layer validation approach:

    1. Client-Side Validation: Implemented for specific field types to provide immediate feedback
    2. Server-Side Validation: Handled by the WordPress Gravity Forms backend

    When the server returns validation errors, they’re processed in the handleSubmit function of our index.vue component. The application checks response?.errors?.length to determine if validation errors exist and displays them accordingly.

    For client-side validation, certain field types have built-in validation:

    Email Field: Validates email format using a regex pattern

    Address Field: Validates complete address information and proper postal code formats

    Required Fields: All required fields are checked before submission

    To test field validation, use the “Short Strings Only” field at the bottom of the form. This field is configured in the Gravity Forms admin to accept a maximum of 5 characters. If you enter more than 5 characters and submit the form, the server will reject the submission and return a validation error.

    Unlike some fields that implement client-side validation (like email and address), this text field relies on server-side validation in Gravity Forms. The error message will display after the submission attempt, informing you about the 5-character limit constraint.

    This demonstrates how our application strategically combines client-side validation for enhanced user experience with server-side validation for critical business rules and data integrity.

    What is Not Included

    You can drop these components, and composables and get up and running with Gravity Forms forms quickly in a Nuxt app, but there are features they don’t provide. Some examples:

    • Support for Gravity Forms’ Conditional Logic rules
    • Rendering an existing Gravity Forms entry and allowing the user to update its field values
    • Support for all field types

    Conclusion

    We hope this blog post helped you understand how to use forms in headless WordPress with Gravity Forms, WPGraphQL for Gravity Forms, and Nuxt!

    As always, we’re super stoked to hear your feedback and learn about the headless projects you’re working on, so hit us up in the WPGraphQL Discord!

    Special thanks to David Levine and Daniel Roe for helping me write this article and the code!
  • Code Syntax Highlighting in Headless WordPress

    If you’re using Headless WordPress with Next.js or any other frontend framework, you might have run into a small issue when displaying code snippets: the native WordPress code block doesn’t support syntax highlighting. This can be a problem for developer-focused sites or tutorials where reading and understanding code snippets is key.

    This shortcoming of the native Code block often leads developers to look for other solutions that support code syntax highlighting. For a recent headless WordPress project our team worked on, we researched a few options, including the Syntax-highlighting Code Block (with Server-side Rendering) and Code Block Pro. We found Code Block Pro to offer the highest quality syntax highlighting, provide tons of features and customization options, and even support a number of popular VS Code themes to choose from, giving code snippets a nice, professional look.

    In this guide, we’ll show you how to install and use Code Block Pro with a Headless WordPress setup, ensuring your code snippets are presented properly on the front end.

    If you prefer the video format of this article, you can access it here:

    Prerequisites

    Before reading this article, you should have the following prerequisites checked off:

    • Basic knowledge of Next.js 14
    • Next.js boilerplate project that uses the App Router
    • A WordPress install
    • A basic knowledge of WPGraphQL and headless WordPress

    In order to follow along step by step, you need the following:

    • A Next.js project that is connected with your WordPress backend.
    • A dynamic route that grabs a single post by its URI to display a single post detail page

    If you do not have that yet and do want to follow along step by step, you can clone down my demo here: https://github.com/Fran-A-Dev/Kevin-Bacon-Code-Syntax-Highlighting-HeadlessWP/tree/main

    To gain a basic understanding of Next.js, please review the Next.js docs.

    Steps

    Install and activate Code Block Pro

    Steps to install and activate the Code Block Pro plugin:

    • Go to your WordPress admin dashboard.
    • Navigate to Plugins > Add New.
    • Search for “Code Block Pro“.
    • Click Install Now, then Activate.

    You should have this:

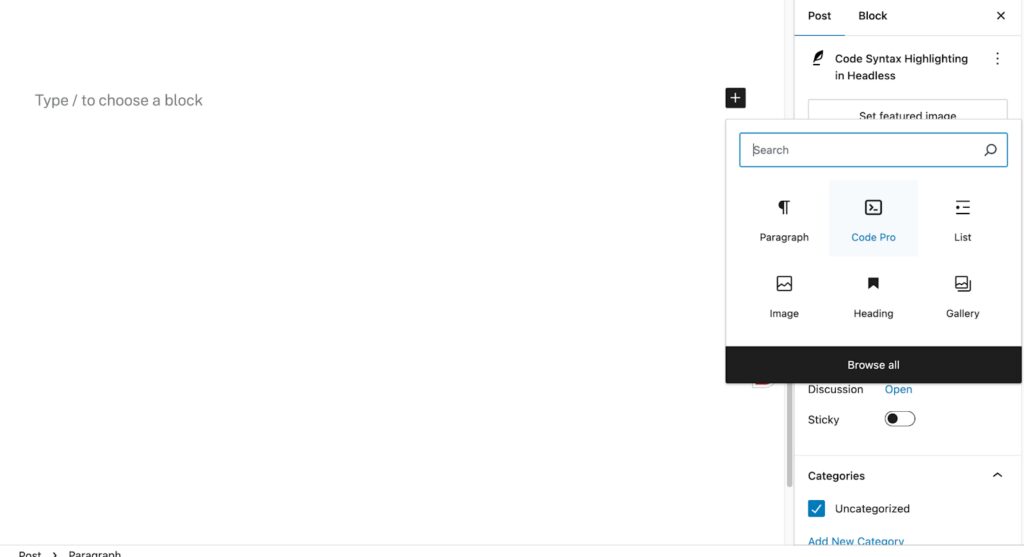
    Now that it is activated, create a new post in WordPress.  In the block editor, click the plus icon to insert a new block and select the Code Pro block.  It looks like this:

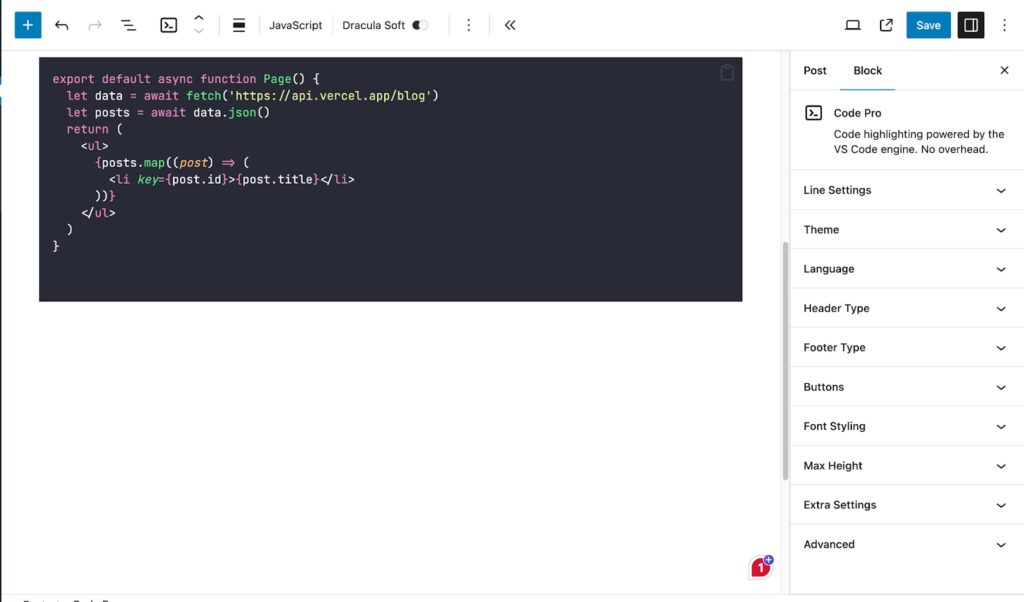
    When you select it, a syntax-highlighted code block will be added.  Go ahead and paste whatever code you want in that block and then save the post.  In this case, I am going to add some jsx that renders a page.  Note that the panel on the right contains many configuration options.

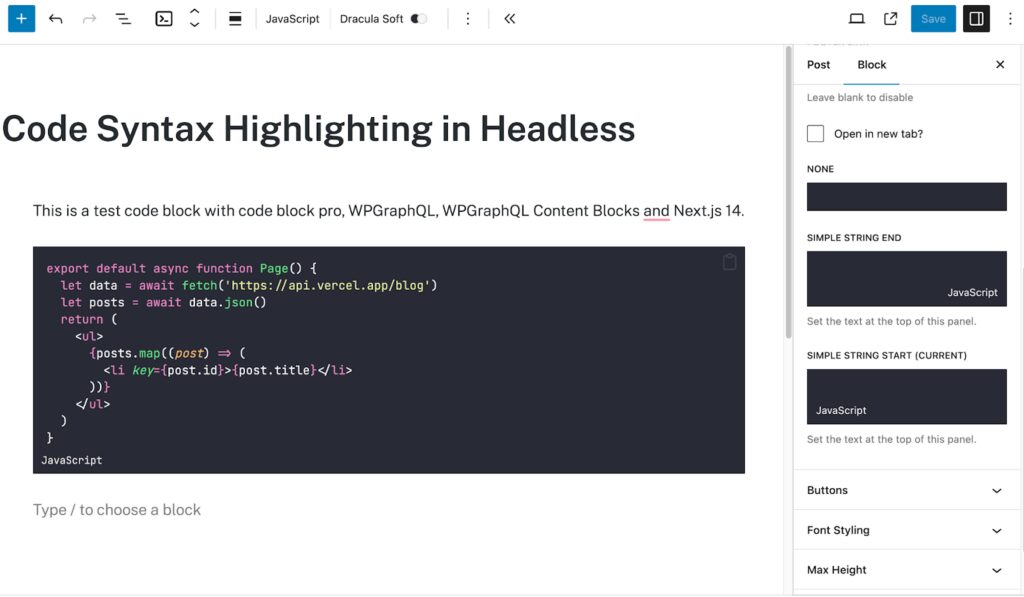
    I chose the “Dracula Soft” theme for this article and the header type is set to “none” to achieve a blank header.  The footer is set to “simple string start” which displays the kind of language the code is in at the bottom.  I also highlighted lines 1 and 2 to show off the line-by-line highlight feature:

    That is it!  Stoked!  This is what you have to do. If simple syntax highlighting and formatting are all you need, as well as displaying the programming language in your post, you are done.  Now, let’s get this to render on your decoupled frontend.

    Configure Next.js and App Router

    In this article, we will use the App Router in Next.js 14. You should already have a boilerplate Next.js project spun up in the app router. Go ahead and open your Next.js project in your code editor.
    The first thing we need to do is add some code to our CSS.  Navigate to your globals.css file in the app directory.  Add this CSS:

    /* Line highlighting for Code Block Pro blocks */
    pre.shiki {
      padding-inline: 0;
    }
    pre.shiki .line {
      padding-inline: 2rem;
    }
    pre.shiki .cbp-line-highlight {
      display: inline-block;
      width: 100%;
      background-color: rgba(255, 255, 255, 0.06);
    }


    This css will ensure that line highlighting is properly formatted, creating a more readable and accessible presentation for longer code blocks.

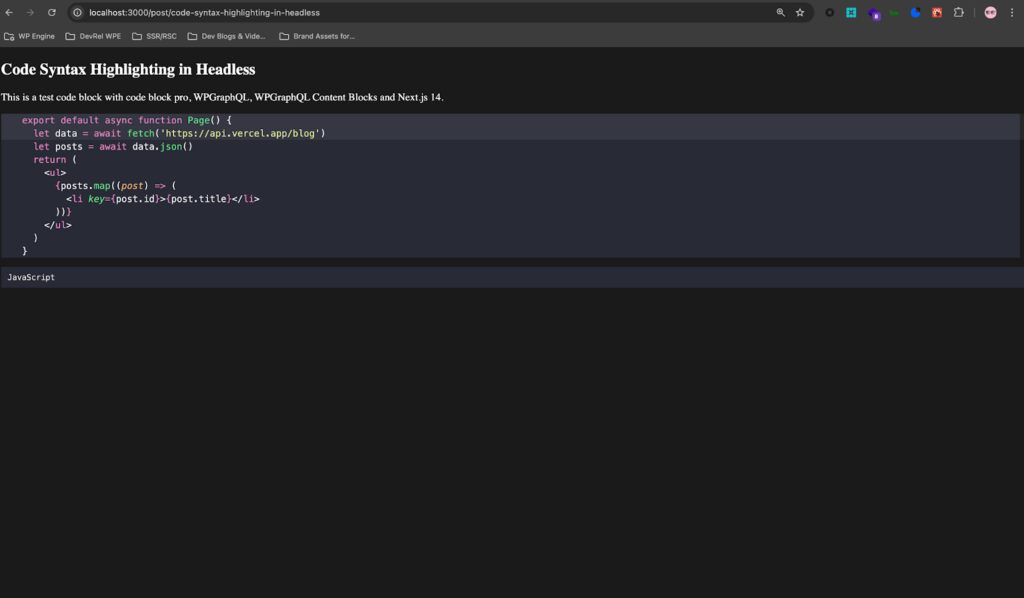
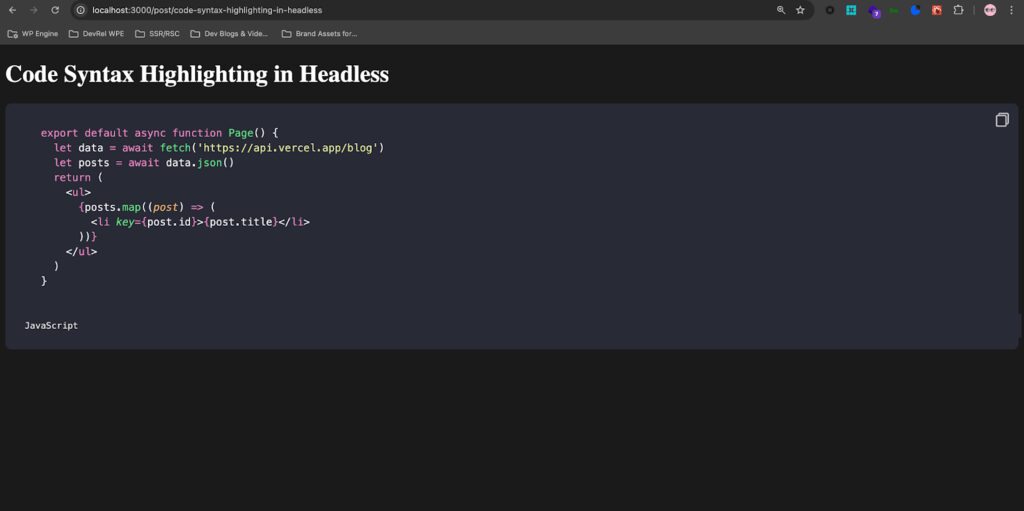
    Save that and run npm run dev to spin up your dev server and visit the single post detail page where you added the code.  You should have something like this:

    Out of the box, the plugin with some css allows you to easily display code, highlighting, and the programming language in a nice, readable way. 

    Taking it a Step Further – WPGraphQL & WPGraphQL Content Blocks

    You can stop at just installing the plugin and adding the css to your frontend application to get the formatting and highlighting.  If you want to implement a copy-to-clipboard feature whereby users can click a button to copy the code within the code snippet to their clipboard, however, follow the additional steps below.

    Install and activate WPGraphQL & WPGraphQL Content Blocks

    WPGraphQL is a canonical WordPress plugin that provides an extendable GraphQL schema and API for any WordPress site.

    WPGraphQL Content Blocks is a WordPress plugin that extends WPGraphQL to support querying (Gutenberg) block data. Let’s install both plugins.

    Go to the plugins page in your WP admin and search for WPGraphQL. You can add and activate the plugin from there.

    Go to the WPGraphQL Content Blocks repo and download the latest .zip version of the plugin.

    Navigate to your WP install and upload the plugin .zip to your WordPress site.

    Once that is done, activate the plugin.

    Create an editor block query to get Code Block Pro data

    Next, let’s query for the Code Block Pro data.  Head over to GraphQL IDE and paste in this query:


    query GetPostsWithCodeBlocks {
      posts {
        nodes {
          title
          content
          editorBlocks {
            name
            ... on KevinbatdorfCodeBlockPro {
              attributes {
                language
                lineNumbers
                code
              }
              renderedHtml
            }
          }
        }
      }
    }
    

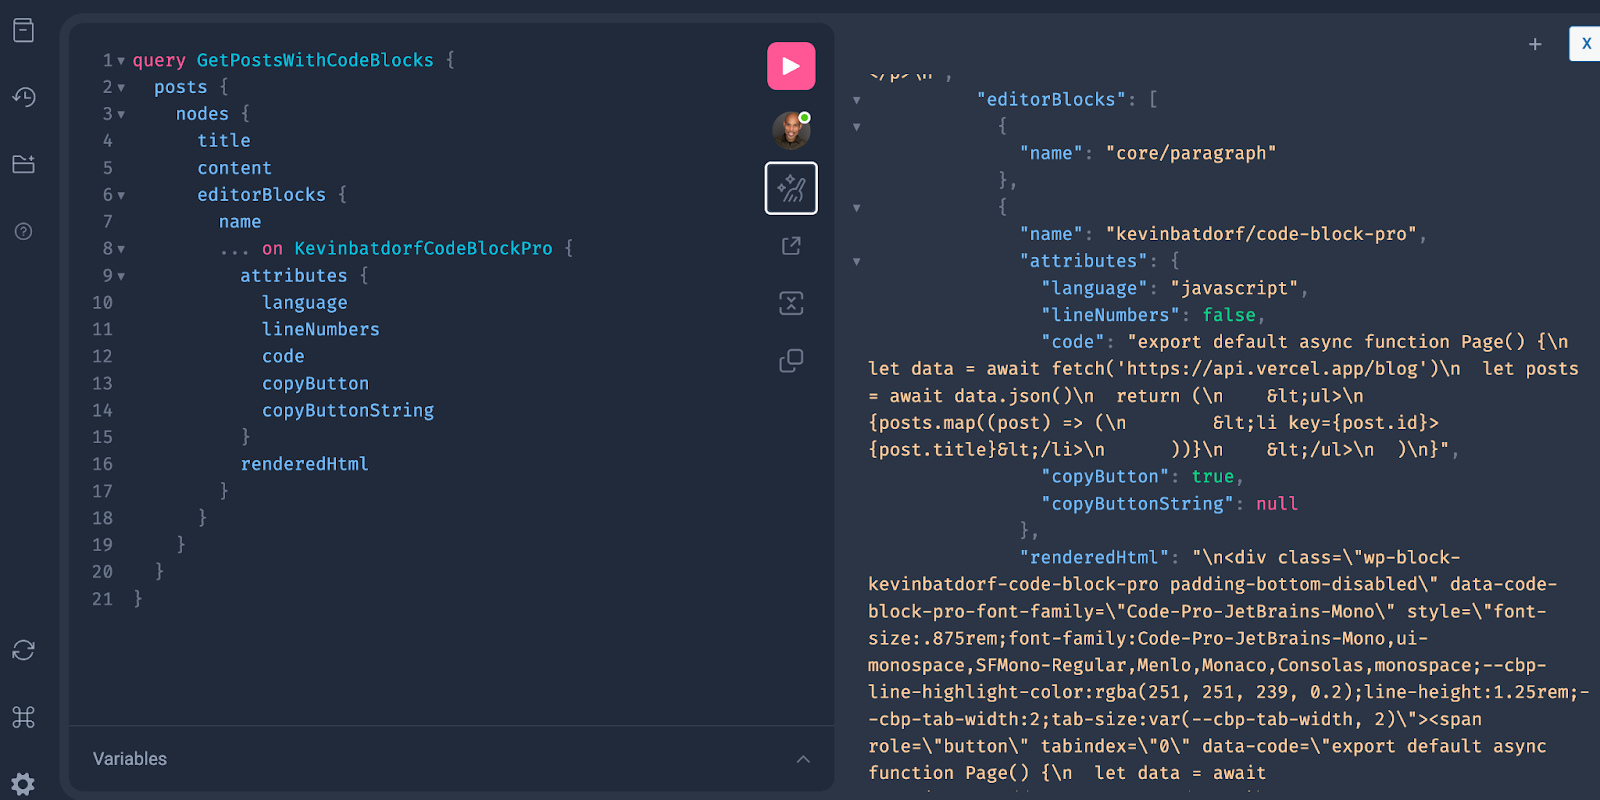
    Now press play and you should get this response:


    As shown in the IDE, this query returns all posts along with the Code Block Pro data, including the attributes we are asking for (programming language, HTML-rendered code snippet, code, line numbers, copy button, etc.).

    Rendering the Code Block in Next.js

    Now that we have the data, we need to render the code block in our Next.js frontend. Here’s how you can do it in Next.js 14.

    Navigate to app/post/[uri]/page.jsx file.  In this file, paste this code block in:

    "use client";
    import { useState } from "react";
    import "../../globals.css";
    
    async function getPost(uri) {
      const query = `
      query GetPostByUri($uri: ID!) {
        post(id: $uri, idType: URI) {
          title
          editorBlocks {
            name
            ... on KevinbatdorfCodeBlockPro {
              attributes {
                language
                lineNumbers
                code
                copyButton
                copyButtonString
              }
              renderedHtml
            }
          }
        }
      }
      `;
    
      const variables = {
        uri,
      };
    
      const res = await fetch(process.env.NEXT_PUBLIC_GRAPHQL_ENDPOINT, {
        method: "POST",
        headers: {
          "Content-Type": "application/json",
        },
        next: {
          revalidate: 60,
        },
        body: JSON.stringify({ query, variables }),
      });
    
      const responseBody = await res.json();
      return responseBody.data.post;
    }
    
    export default async function PostDetails({ params }) {
      const post = await getPost(params.uri);
    
      return (
        

    {post.title}

    {/* Loop through the editor blocks to render CodeBlockPro if available */} {post.editorBlocks.map((block, index) => { if (block.name === "kevinbatdorf/code-block-pro") { return ( ); } return null; })}
    ); } // CodeBlockDisplay inline function to display code block function CodeBlockDisplay({ attributes, renderedHtml }) { const [copied, setCopied] = useState(false); // Handle copy button functionality const handleCopy = async () => { try { if (navigator && navigator.clipboard) { console.log("Copying the text:", attributes.code); await navigator.clipboard.writeText(attributes.code); setCopied(true); setTimeout(() => setCopied(false), 3000); // Reset after 3 seconds } else { console.error("Clipboard API not available."); } } catch (err) { console.error("Failed to copy: ", err); } }; return (
    {/* Render the HTML of the code block */}
    {/* Show the copy button */} {attributes.copyButton && ( )} {/* Show the language at the bottom */} {attributes.language && (
    {attributes.language} {attributes.language}
    )}
    ); } function CheckMarkIcon() { return ( ); } function CopyIcon() { return ( ); }

    This is a big code block, so let’s break it down into sections. 

    Starting at the top, we have our “use client” directive since we are importing and using the useState hook in React which needs to run on the client.  Then we have our globals.css file for the styling:

    "use client";
    import { useState } from "react";
    import "../../globals.css";

    Following that, we have our WPGraphQL query to fetch the post and code block data:

    async function getPost(uri) {
      const query = `
        query GetPostByUri($uri: ID!) {
          post(id: $uri, idType: URI) {
            title
            editorBlocks {
              name
              ... on KevinbatdorfCodeBlockPro {
                attributes {
                  language
                  lineNumbers
                  code
                  copyButton
                  copyButtonString
                }
                renderedHtml
              }
            }
          }
        }
      `;
    
      const variables = { uri };
      const res = await fetch(process.env.NEXT_PUBLIC_GRAPHQL_ENDPOINT, {
        method: "POST",
        headers: { "Content-Type": "application/json" },
        next: { revalidate: 60 },
        body: JSON.stringify({ query, variables }),
      });
    
      const responseBody = await res.json();
      return responseBody.data.post;
    }

    This function defines a GraphQL query to fetch post data, specifically targeting the KevinbatdorfCodeBlockPro block that contains attributes such as language, code, and the copyButton.

    The uri (Unique Resource Identifier) is passed into the GraphQL query to fetch the correct post.

    The query is then sent to the GraphQL API using fetch, with headers defining the request as POST and the body as JSON. The response is parsed as JSON, and the post data is returned for rendering.

    Next, we have our PostDetails component:

    export default async function PostDetails({ params }) {
      const post = await getPost(params.uri);
    
      return (
        

    {post.title}

    {post.editorBlocks.map((block, index) => { if (block.name === "kevinbatdorf/code-block-pro") { return ( ); } return null; })}
    ); }

    The PostDetails component fetches the post data using the getPost function, passing the post uri as a parameter.  Following that, the post title is displayed using a simple <h1> tag.

    Then editorBlocks field is mapped over, and the function checks if the block name is "kevinbatdorf/code-block-pro". If it is, it renders the CodeBlockDisplay component, passing in the block’s attributes and HTML.

    The next part is the CodeBlockDisplay component:

    function CodeBlockDisplay({ attributes, renderedHtml }) {
      const [copied, setCopied] = useState(false);
    
      const handleCopy = async () => {
        try {
          if (navigator && navigator.clipboard) {
            console.log("Copying the text:", attributes.code);
            await navigator.clipboard.writeText(attributes.code);
            setCopied(true);
            setTimeout(() => setCopied(false), 3000);
          } else {
            console.error("Clipboard API not available.");
          }
        } catch (err) {
          console.error("Failed to copy: ", err);
        }
      };
    
      return (
        
    {attributes.copyButton && ( )} {attributes.language && (
    {attributes.language} {attributes.language}
    )}
    ); }

    The component uses useState to manage whether the copy button was clicked. This means that after the copy action is triggered, the "Copied!" message will be displayed for 3 seconds before resetting back to the original "Copy" button state.

    After that, the handleCopy function uses the Clipboard API to copy the code (contained in attributes.code) to the user’s clipboard. It checks if the API is available and logs an error if not.

    The rendered HTML of the code block is then injected into the DOM using dangerouslySetInnerHTML, which is necessary because the content comes from WordPress in HTML format. If the block has a copyButton attribute, the copy button is conditionally displayed. Additionally, the programming language is displayed at the bottom of the block if it’s available.

    The last thing we need to do is include components for rendering the SVG icons:

    function CheckMarkIcon() {
      return (


      );
    }
    
    function CopyIcon() {
      return (


      );
    }

    The CopyIcon here is displayed by default. After the user clicks on the button to copy the code, that SVG is hidden and swapped out with the CheckMarkIcon to indicate that the code snippet was successfully copied.

    Update globals.css file

    The last thing we need to do before testing our code block page is to update the css to collectively enhance the presentation of the code block by ensuring the elements are properly spaced, visually appealing, and interactive (with the copy button).

    This setup compliments the functionality provided in the JavaScript code for copying code snippets.  You can style it however you would like, but I chose to do it this way.

    .code-block-container {
      position: relative;
      padding: 16px;
      background-color: #282a36; /* Dark theme for the code block */
      border-radius: 8px;
      margin-bottom: 24px;
    }
    
    .copy-button {
      position: absolute;
      top: 10px;
      right: 10px;
      background: none;
      border: none;
      cursor: pointer;
      padding: 0;
      display: flex;
      align-items: center;
      justify-content: center;
    }
    
    .copy-button svg {
      height: 24px;
      width: 24px;
      color: #ccc;
      transition: color 0.3s ease;
    }
    
    .copy-button:hover svg {
      color: #fff;
    }
    
    .language-label {
      display: block;
      font-size: 12px;
      color: #bebebe;
      text-align: left;
      padding-top: 8px;
    }


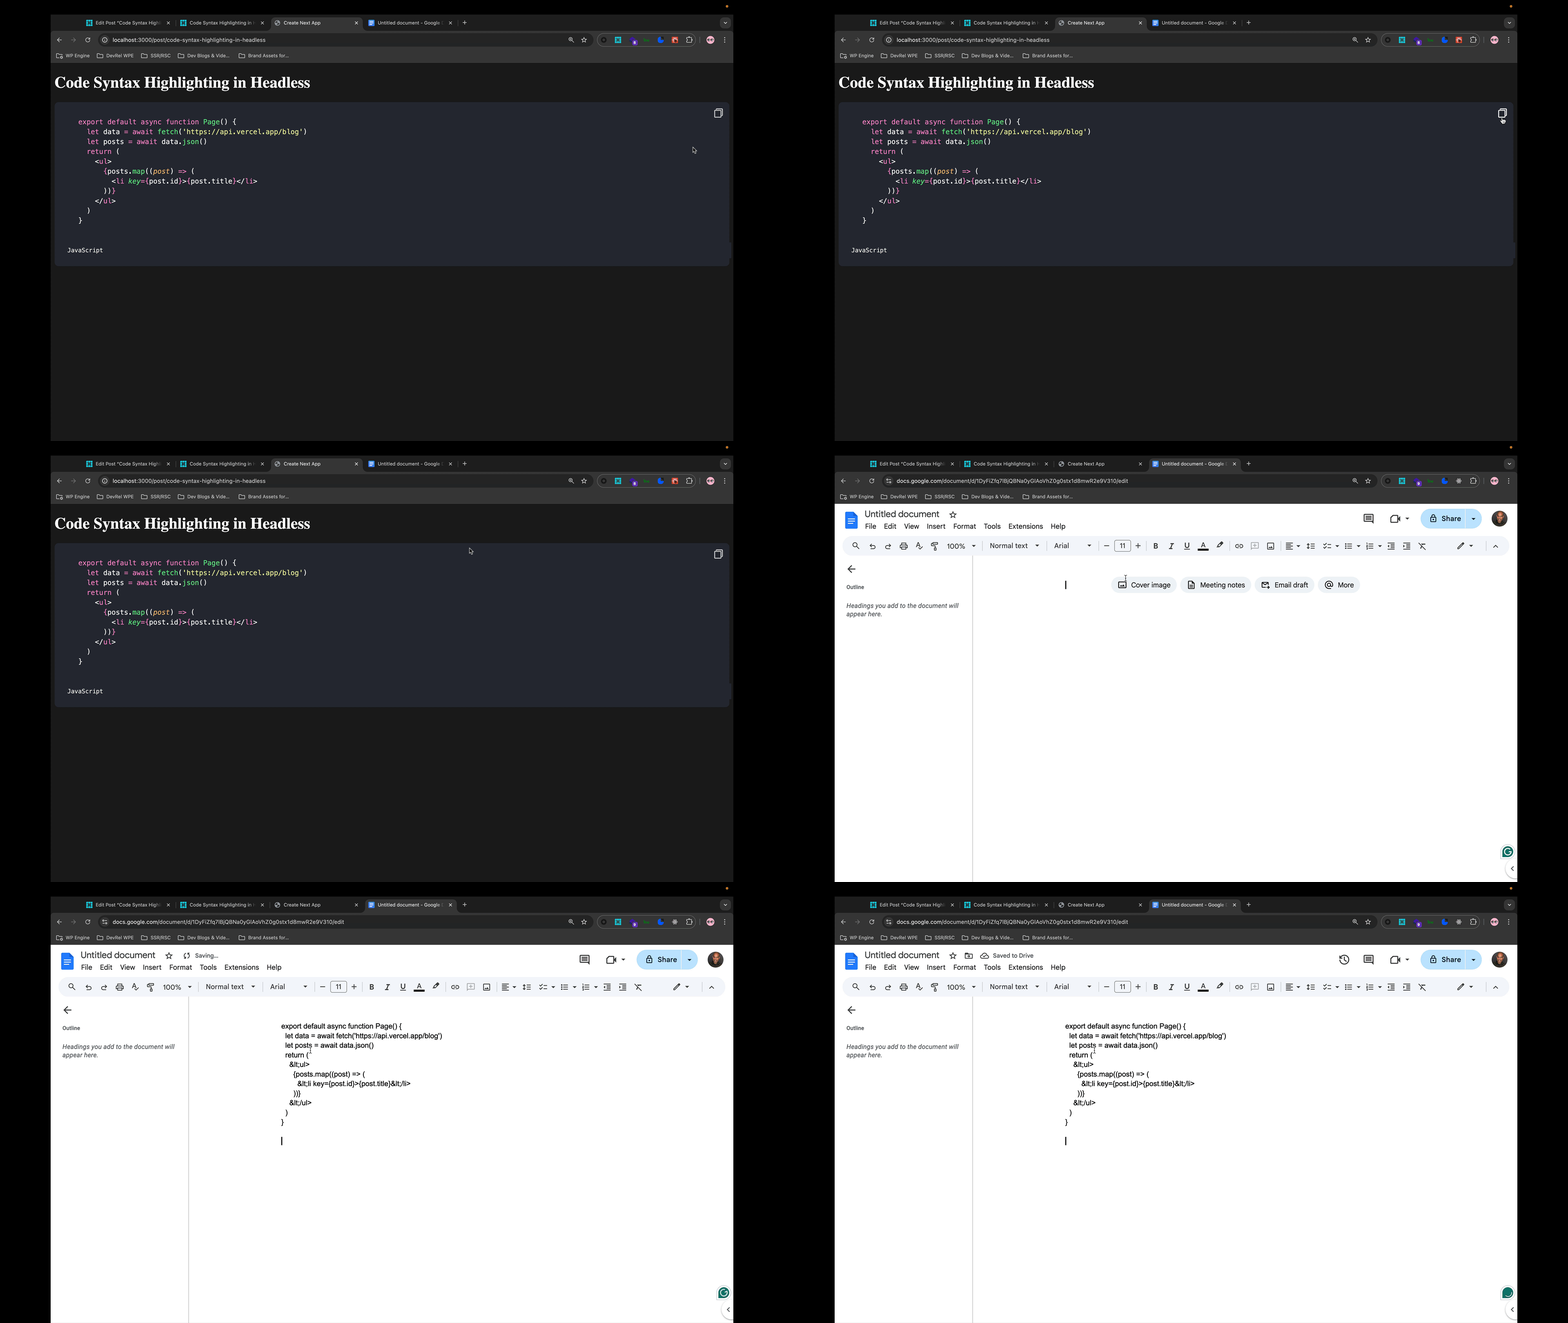
    We are ready to test this page.  Navigate to your WordPress admin and grab whatever slug is related to the post you embedded code with.  When you visit that page, you should have something that looks like this:

    Now, to test the copy functionality, click on the clipboard box icon and then paste it into a document to test that it works:

    Stoked!! This works!  Now let’s discuss more options and practices to use this feature.

    Other Options

    Here are two more options you can get stoked with in adding code syntax highlighting to your headless WordPress app.

    Create A Separate Code Block Pro Component

    Instead of embedding the entire code block logic directly into a single page file, it’s a good practice to create a separate component specifically for handling Code Block Pro blocks.

    This approach enhances code readability, reusability, and maintainability by isolating the code block’s functionality. You can easily import this component into any page that requires the code block, such as your page.jsx file, without cluttering the page’s primary logic.  For this example, our separate component would look like this:

    "use client";
    import { useState } from "react";
    
    // This component renders the Code Block Pro block with copy-to-clipboard functionality
    export default function KevinBatdorfCodeBlockPro({ attributes, renderedHtml }) {
      const [copied, setCopied] = useState(false);
    
      // Handle the copy functionality
      const handleCopy = async () => {
        try {
          if (navigator && navigator.clipboard) {
            await navigator.clipboard.writeText(attributes.code);
            setCopied(true);
            setTimeout(() => setCopied(false), 3000); // Reset after 3 seconds
          } else {
            console.error("Clipboard API not available.");
          }
        } catch (err) {
          console.error("Failed to copy: ", err);
        }
      };
    
      return (
        
    {/* Render the HTML of the code block */}
    {/* Show the copy button */} {attributes.copyButton && ( )} {/* Show the language at the bottom */} {attributes.language && (
    {attributes.language} {attributes.language}
    )}
    ); } // CheckMarkIcon component for when the text has been copied function CheckMarkIcon() { return ( ); } // CopyIcon component for the default copy button function CopyIcon() { return ( ); }

    Since I already explained the code’s function and logic in the previous section, you can go over what it does there.

    Conclusion

    Syntax highlighting and copy-to-clipboard functionality are valuable enhancements to the code snippets on your headless WordPress sites.

    By leveraging the Code Block Pro plugin and WPGraphQL, we were able to query and render code blocks with ease. This approach improves readability and user experience, allowing visitors to easily copy code snippets directly from your posts. The combination of server-side rendering with client-side interactivity using Next.js, along with a clean, simple styling approach, ensures that you can maintain a visually appealing and functional code block display.

    As always, we’re stoked to hear your feedback and see what headless projects you’re building! Hit us up in our Discord!

  • How to Customize WPGraphQL Cache Keys 💾🔑

    Caching is important in optimizing performance for headless WordPress setups. The WPGraphQL Smart Cache plugin helps manage caching for GraphQL queries, ensuring faster response times. In this guide, we’ll walk you through setting up your WordPress environment, installing the necessary plugins, and customizing GraphQL cache keys to better suit your specific needs.

    Prerequisites

    Before reading this article, you should have the following prerequisites checked off:

    Understanding Default WPGraphQL Smart Cache Behavior

    WPGraphQL Smart Cache automatically tags cached responses with keys derived from the GraphQL queries. These keys are linked to specific WordPress data (e.g., posts, pages, taxonomies). When relevant data is updated, the associated cache is invalidated. 

    For example, a query that retrieves posts with specific categories and tags will generate cache keys like list:post, list:category, and list:tag. If any of these categories or tags are updated, the entire cache is invalidated, ensuring the data stays current.  

    In addition to the list:$type_name keys, individual node IDs are also included. 

    These individual IDs are used to purge cache when updates or deletes happen.

    The list:$type_name is used to purge when a new thing is published.  For example list:post will be purged when a new post is published, but purge( "post:1" ) would be purged when post 1 is updated or deleted.   

    Let’s see this in action.  Navigate to your WP admin, then open your WPGraphQL IDE. Copy and paste this query:

    query GetPosts {
      posts {
        nodes {
          title
          uri
        }
      }
    }
    

    When you press play in your IDE, this will make a query to your site’s WPGraphQL endpoint. 

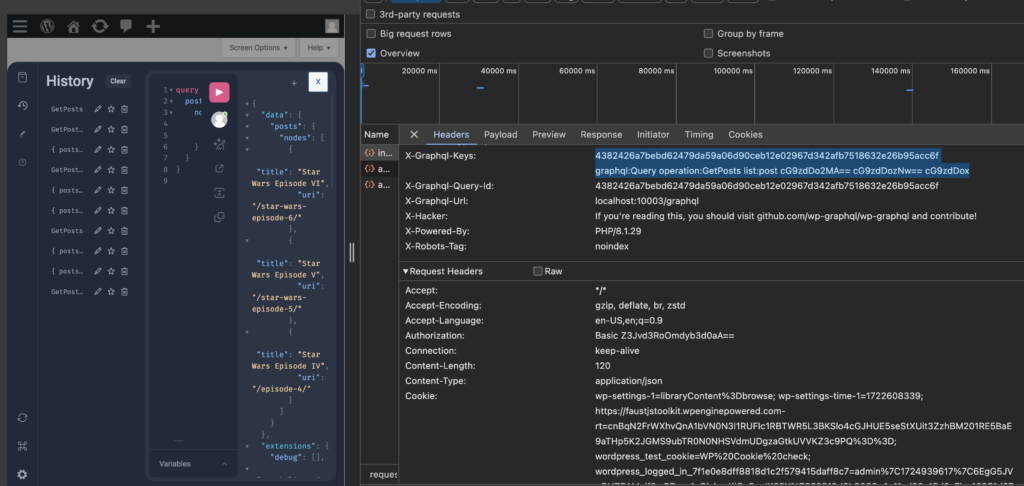
    Then WPGraphQL will return headers that caching clients can use to tag the cached document. Next, Open your dev tools.  In this case, I am using Google Chrome.  When I open up the dev tools and inspect the response headers, you should see this:

    Here, we see the X-GraphQL-Keys header with a list of keys. If this query were made via a GET request to a site hosted on a host that supports it, the response would be cached and “tagged” with these keys.

    For this particular query, we see the following keys:

    • Hash of the Query: This is a unique identifier which is in this example

    4382426a7bebd62479da59a06d90ceb12e02967d342afb7518632e26b95acc6f for the specific query made. It ensures that the exact same query returns the same cached response unless invalidated.

    • Operation Type (graphql:Query): Indicates that the operation is a GraphQL query, as opposed to a mutation or subscription
    • Operation Name (operation:GetPosts): Identifies the specifically named query, in this case, GetPosts, which helps in targeting this operation for caching or invalidation.
    • List Key (list:post): This key identifies that the query is fetching a list of posts. Any changes to the list of posts would trigger cache invalidation.
    • Node ID (cG9zdDox): This represents the specific node (e.g., a post) that was resolved in the query. Changes to this node will invalidate the cache for this query.

    If a purge event for one of those tags is triggered, the document will be tagged with these keys and purged (deleted) from the cache.

    Understanding Cache Invalidation with WPGraphQL Smart Cache

    WPGraphQL Smart Cache optimizes caching by sending the keys in the headers, but the caching client (e.g., Varnish or Litespeed) needs to use those keys to tag the cache. WPGraphQL Smart Cache itself does not tag the cached document; it provides the caching client info (the keys) to tag the cached document with. A supported host like WP engine works with WPGraphQL Smart Cache out of the box.

    Let’s discuss how invalidation works:

    WPGraphQL Smart Cache listens to various events in WordPress, such as publishing, updating, or deleting content, and triggers cache invalidation (or “purge”) based on these events.

    Detailed Key Breakdown:

    Publish Events (purge('list:$type_name')): When a new post or content type is published, the cache for the entire list associated with that content type (e.g., all posts) is purged. This ensures that any queries fetching this list will be up-to-date.

      Update Events (purge('$nodeId')): When an existing post or content type is updated, the cache for that specific node (e.g., a single post) is purged. This allows the updated content to be fetched without affecting the entire list.

        Delete Events (purge('$nodeId')): Similarly, when a post or content type is deleted, the cache for that specific node is purged, ensuring that the deleted content is no longer served from the cache.

    Why This Matters:

    These targeted cache invalidations help maintain the balance between performance and data freshness. By only purging the cache when necessary and only for the relevant data, WPGraphQL Smart Cache ensures that users receive up-to-date content without unnecessary cache purges, which can negatively impact performance.

    This invalidation strategy is crucial for optimizing the performance of headless WordPress setups using WPGraphQL, especially in dynamic environments where content changes frequently.

    How Cache Invalidation and Cache Tags Work Together

    Now that we’ve explored how cached documents are tagged and how cache invalidation works in WPGraphQL Smart Cache, let’s see how these concepts interact.

    When a GraphQL query is executed, specific cache keys (tags) are associated with the cached response. These tags correspond to the data queried, such as posts, categories, or specific node IDs. The cache invalidation strategy then ensures that when relevant data changes occur in WordPress, the associated cached documents are purged based on these tags.

    Example: Invalidation Scenarios for a GetPosts Query

    1. Publishing a New Post (purge('list:post')):
      • When a new post is published, the entire list of posts in the cache (tagged with list:post) is invalidated. This ensures that the new post will appear in any subsequent queries that fetch this list.
    2. Updating or Deleting a Specific Node (purge('$nodeId')):
      • If the “Hello World” post (with the ID cG9zdDox) is updated or deleted, the cache for that specific node is purged. This allows the updated or deleted content to be accurately reflected in any future queries.
    3. Manually Purging Cache (purge('graphql:Query')):
      • Clicking “Purge Cache” in GraphQL > Settings > Cache page triggers a manual cache purge for all queries. This can be useful when you want to ensure that all cached data is refreshed, regardless of specific events.
    4. Operation Name or Query Hash-Based Purge:
      • Custom purge events can be manually triggered based on the operation name (e.g., GetPosts) or the hash of the query. This level of control allows you to finely tune when and how caches are invalidated.

    These strategies work together to ensure that the cache is only invalidated when necessary, providing up-to-date data without unnecessary performance overhead. For instance, when the “Hello World” post is updated, it’s reasonable to expect that the cache for the GetPosts query should be purged so that any queries return the most current data. This fine-grained control over cache invalidation ensures that your headless WordPress site remains performant while delivering fresh content.

    Why Would You Need to Customize WPGraphQL Cache Keys?

    In some scenarios, the default caching behavior might be too broad, leading to frequent cache invalidations.  This is especially true for more complex queries. 

    For instance, if your query includes categories and tags, any update to these taxonomies will invalidate the cache, even if those changes don’t affect the specific posts you’re querying. Customizing cache keys allows you to fine-tune this behavior, ensuring that only relevant updates trigger cache invalidation, thereby improving performance.

    For example, consider the following query:

    {
      posts {
        nodes {
          id
          title
          tags {
            nodes {
              id
              name
            }
          }
        }
      }
      categories {
        nodes {
          id
          name
        }
      }
      tags {
        nodes {
          id
          name
        }
      }
    }

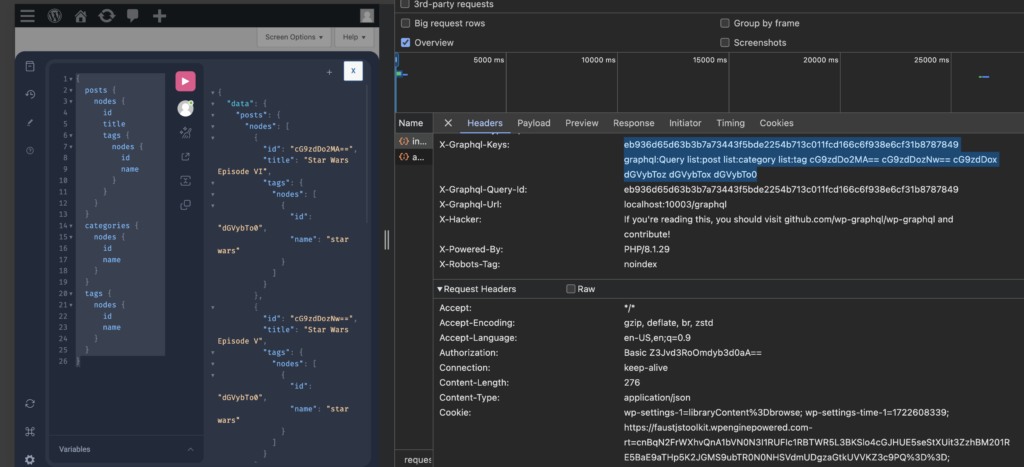
    This query retrieves a list of posts, along with all categories and tags. When this query is executed, the response includes the posts, categories, and tags that match the query as shown here:

    The X-GraphQL-Keys header shows that the cached document is tagged with list:post, list:category, and list:tag. This tagging means that the cache will be invalidated whenever there’s a change in any of these entities—whether it’s a new post, category, or tag.

    While this behavior ensures that your cache is up-to-date, it can lead to excessive cache invalidation. For instance, if a new tag is created and assigned to a post not included in this query, it will still trigger a purge('list:tag'), invalidating the cache for this query.

    This means the cache could be cleared more often than you want for your specific use case, which could negatively impact performance.

    Just A Note

    Just a note, consider this query from the original article on this subject:

    query GetPostsWithCategoriesAndTags {
      posts {
        nodes {
          id
          title
          categories {
            nodes {
              id
              name
            }
          }
          tags {
            nodes {
              id
              name
            }
          }
        }
      }
    }

    The WPGraphQL team changed things to only track list: types from the root.  So, if you run this query, your list of categories won’t be tracked because it is not at the root.

    The Problem

    The problem is that the list:category and list:tag keys could cause this document to be purged more frequently than you might like. WPGraphQL tracks precisely, but it doesn’t know your specific intention and what you care about.

    For example, you might simply not care if this particular query is “fresh” when terms change. OR you might ONLY care for this query to be fresh when terms change. 

    WPGraphQL doesn’t know the intent of the query, only what the query is.

    Fortunately, you can customize the cache keys to better suit your specific needs, reducing unnecessary cache invalidations and improving performance.

    Customizing Cache Keys

    By customizing the cache keys, you can ensure that the cache is only invalidated when changes you believe are relevant to your use case occur. This involves fine-tuning the tags associated with your queries, allowing you to maintain optimal performance without sacrificing data accuracy.

    Let’s do this by navigating to our WP admin and modifying the functions.php file.  Go to Appearance> Theme File Editor.  Select the functions.php file from your active theme.

    Insert this code snippet at the bottom of your functions.php file to customize the cache keys for a specific GraphQL operation.  In this case, let’s add an operator name to the query we used in the section before.  We are calling our operation GetPostWithCategoriesAndTags:

    add_filter( 'graphql_query_analyzer_graphql_keys', function( $graphql_keys, $return_keys ) {
        $keys_array = explode( ' ', $return_keys );
        if ( ! in_array( 'operation:GetPostsWithCategoriesAndTags', $keys_array, true ) ) {
            return $graphql_keys;
        }
        $keys_array = array_diff($keys_array, ['list:tag', 'list:category']);
        $graphql_keys['keys'] = implode( ' ', $keys_array );
        return $graphql_keys;
    }, 10, 5 );
    

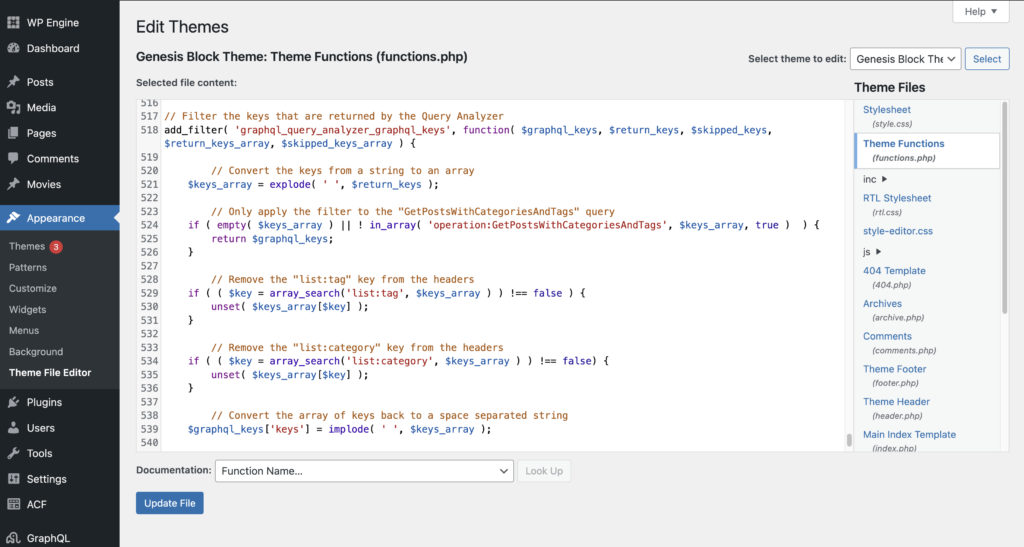
    You should have something that looks like this:

    This snippet customizes the cache keys for the GetPostsWithCategoriesAndTags operation. It removes the list:tag and list:category keys from the cache, preventing their updates from invalidating the cache for this specific query. The array_diff() function is used to filter out the unwanted keys, and the modified keys are then reassembled into a string and returned.

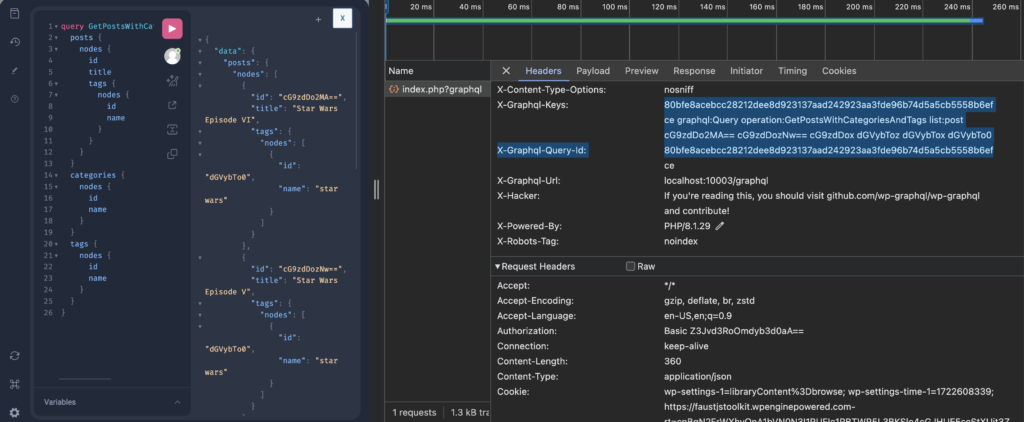
    Let’s test this now in WPGraphQL IDE and the browser dev tools:

    Stoked!!!  Now as you see in the dev tools image, publishing new categories and tags, which triggers purge( 'list:category' ) and purge( 'list:tag' ) will not purge this document. 

    We’re getting the benefits of cached GraphQL documents. The document is invalidated when the post is updated or deleted, but we’re letting the cache remain cached when categories or tags are created.

    Conclusion

    We hope you have a better understanding of using filters, as demonstrated above, to customize your cache tagging and invalidation strategies to better suit your project’s specific needs. By taking control of how cache keys are managed, you can optimize performance and reduce unnecessary cache invalidations.
    As always, we look forward to hearing your feedback, thoughts, and projects, so hit us up in Discord!

  • SEO in Headless WordPress with Yoast, Next.js and WPGraphQL

    In this article, I will give a walk-through tutorial on how to manage Search Engine Optimization (SEO) in a headless WordPress architecture.

    Prerequisites

    • A fundamental understanding of Next.js and the Node ecosystem
    • Foundational SEO best practices knowledge
    • A WordPress install
    • A basic understanding of the WPGraphQL API

    Yoast SEO

    Before getting into the Yoast SEO plugin, let’s quickly go over what SEO is and its importance. SEO is the practice of optimizing your website to rank higher on a search engine results page (SERP) so that you receive more traffic. The aim is typically to rank on the first page of Google results for search terms that mean the most to your target audience.

    Yoast SEO is a WordPress plugin that improves your website’s rankings on search engines by helping you optimize your site’s content and keywords. A lot of what Yoast SEO does is automated such as analyzing a page’s content and providing suggestions on how to improve it. The plugin gives you a score, tells you what problems there are and how to improve your content for SEO. But there are things that still need your input such as key phrases and meta descriptions.

    In this next section, let’s go over installing it and extending it with WPGraphQL.

    Installing Yoast SEO and WPGraphQL extensions

    To start, we need to set up and configure Yoast and WPGraphQL including its Yoast extension to expose the SEO fields in the GraphQL schema with Yoast.

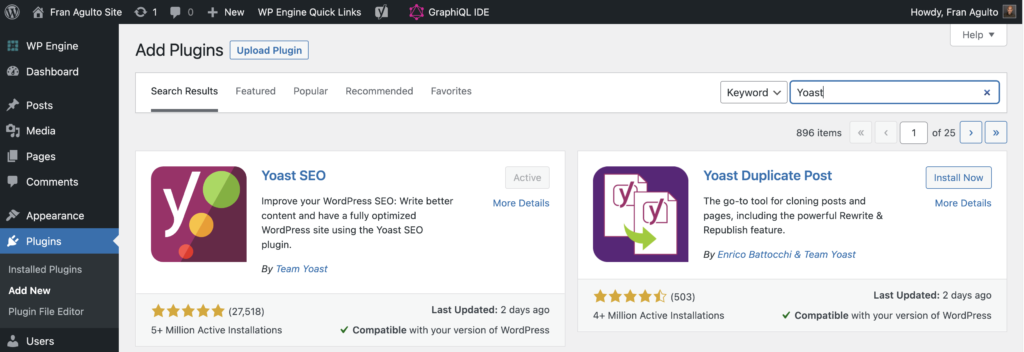
    Log in to your WP Admin. From Plugins > Add new menu, search for Yoast SEO, install it, and activate the plugin:

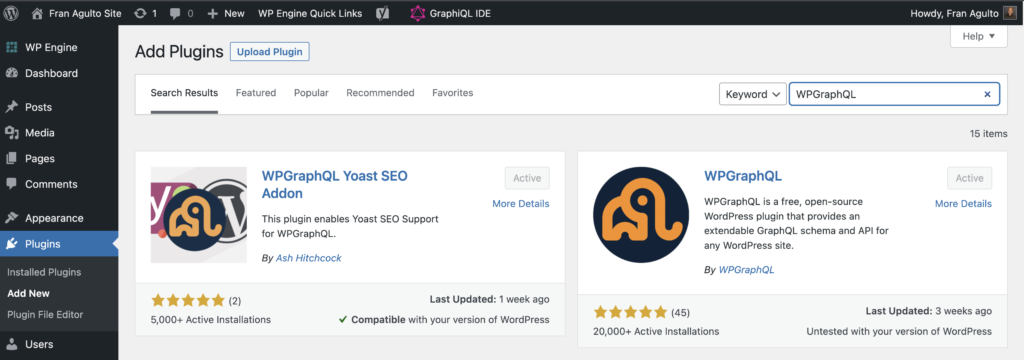
    Next, search for WPGraphQL and Yoast for WPGraphQL, and install and activate both:

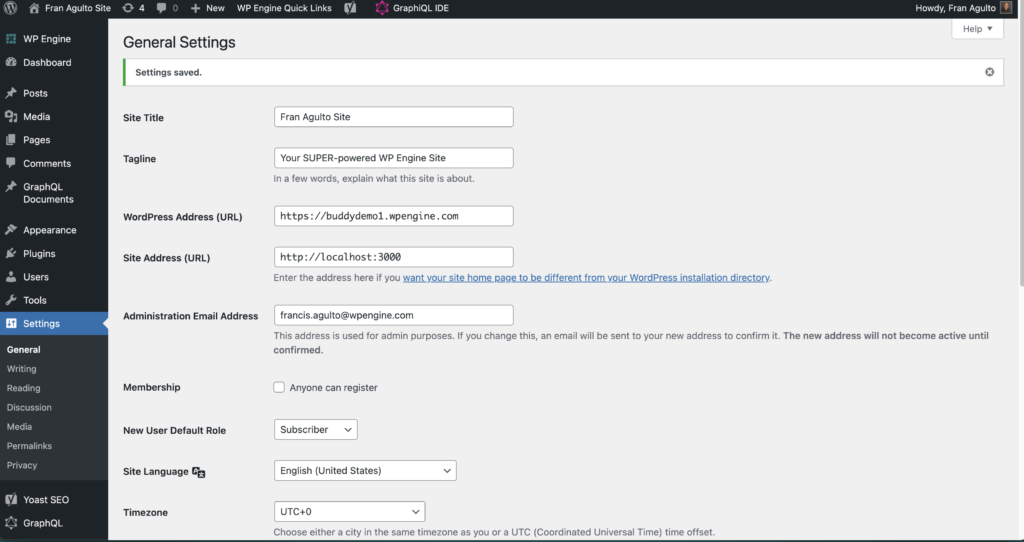
    Once these are activated, let’s navigate to Settings > General and swap out our site address URL for whatever our front-end URL will be in order to reflect that for our SEO. In this case, it will be localhost:3000 as shown:

    Stoked! These are all the plugins we need on the WordPress install to manage SEO in a headless setup! Let’s make sure everything is working as it should be.

    Now go to this code snippet and add this to your existing functions.php file within the theme editor.

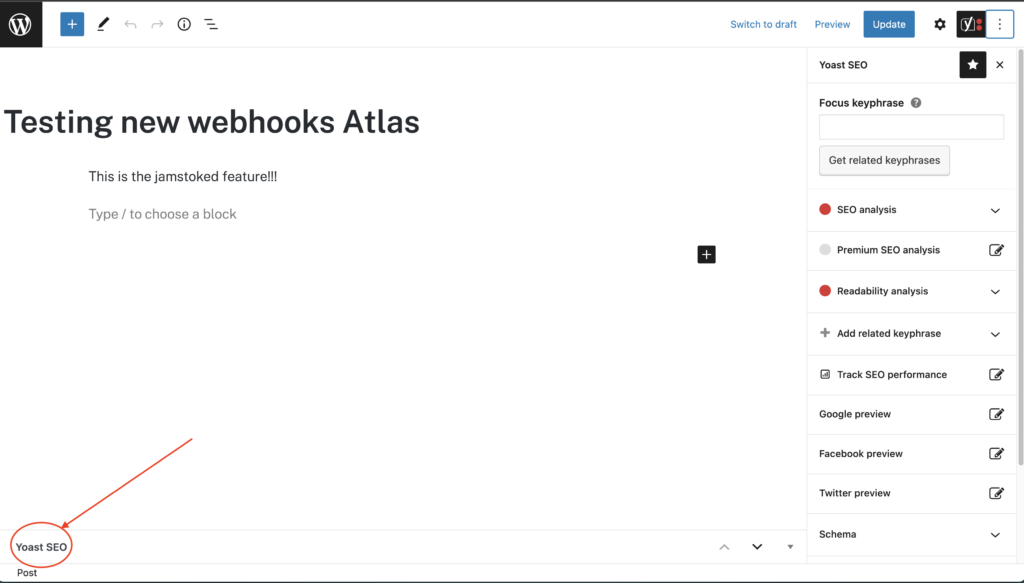
    Head over to Posts and click on an individual post to edit it. When you are in the edit interface of the individual post, you should see an option to select Yoast SEO at the bottom of the page:

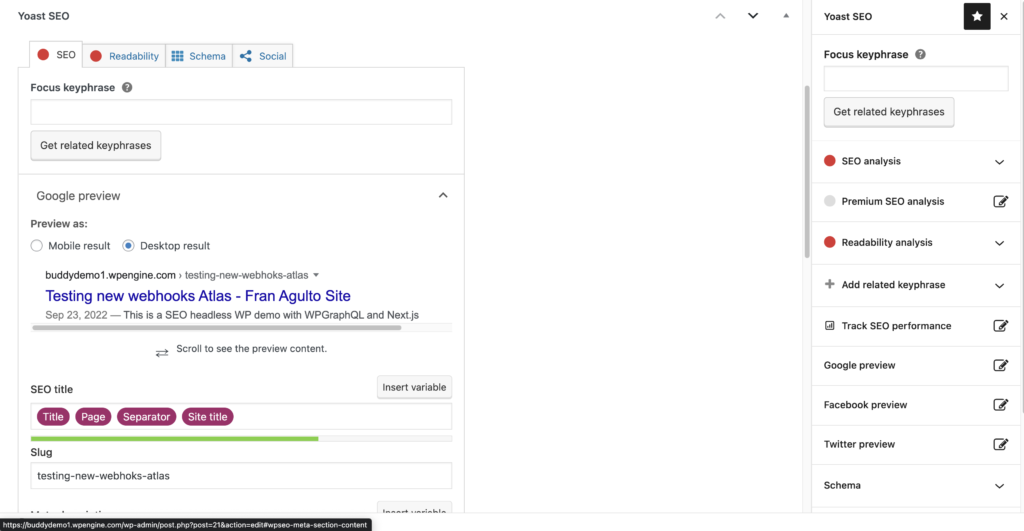
    Click on that Yoast SEO option and it will reveal tools such as adding a meta description, canonical URL, breadcrumbs title, etc. There are lots of features to increase and boost your SEO. For this quick tutorial, we will focus on exposing the meta and full head of the HTML in the post in order for web crawlers to better find and index the page.

    WPGraphQL and the SEO field

    The WPGraphQL for Yoast extension makes it really easy and seamless to expose and query for the SEO data in the WordPress WPGraphQL schema. A SEO field is exposed in the GraphiQL IDE and you can ask specifically for what SEO data you want back.

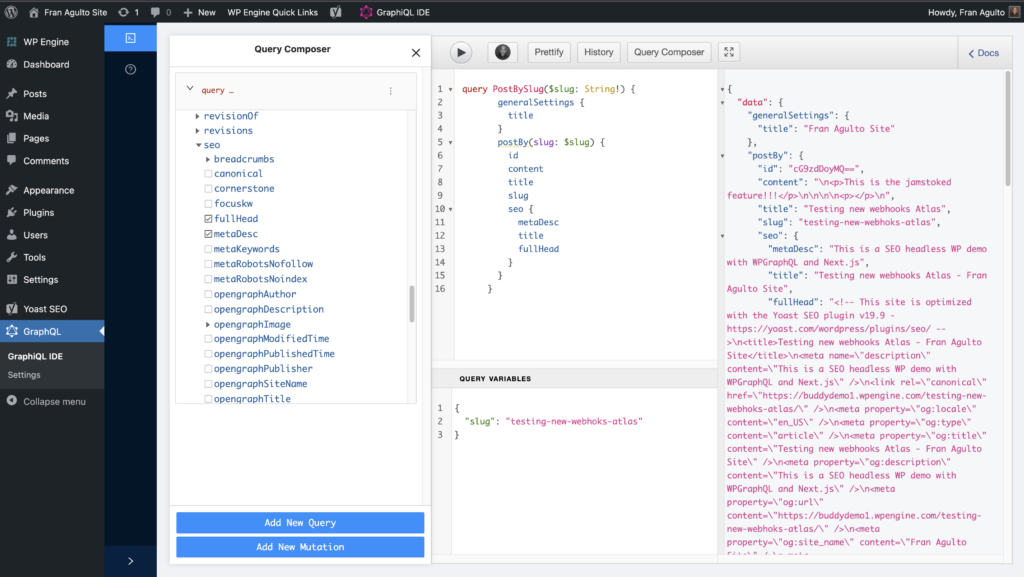
    On the side menu in your WP admin, go to the GraphiQL option on the left or the icon at the top of the navbar. In this case, I am querying for a single post by its slug as the variable and asking for the meta description, title, and the full head of the HTML page in the SEO field.

    This is what my query looks like in a code block:

    query PostBySlug($slug: String!) {
            generalSettings {
              title
            }
            postBy(slug: $slug) {
              id
              content
              title
              slug
              seo {
                metaDesc
                title
                fullHead
              }
            }
          }

    This is what the query looks like in the GraphiQL IDE in WP Admin after you press play to run it:

    You can see that it exposes the SEO data via GraphQL schema!! We get back some SEO data goodness! The next step is to get this data and consume it on our frontend UI with Next.js.

    Next.js Head and Metadata

    We have our WordPress install transformed into a WPGraphQL server with the SEO extension to expose that metadata. The next step is to use Next.js as our frontend app to consume that data and turn it into HTML and improve the way the search engine indexes our site.

    In this tutorial, I am going to use my Next.js demo starter. Once you clone down the starter, navigate to the root of the project into the pages/[slug].js file. Go down to the getStaticProps function that contains our GraphQL query. Copy and paste this block over the existing code. It should look like this:

    export async function getStaticProps({ params }) {
      const GET_POST = gql`
        query PostBySlug($id: ID!) {
          post(id: $id, idType: SLUG) {
            title
            content
            date
            seo {
              metaDesc
              fullHead
              title
            }
            author {
              node {
                firstName
                lastName
              }
            }
          }
        }
      `;

    This file and query are grabbing an individual post with its related data. The SEO meta description, full head, and title are also being requested! Stoked!!

    Now that our SEO data is being requested and coming through, let’s show it on our site by adding it to our variable in Next.js and destructure it so we can add it to our jsx.

    At the top of the [slug].js file, copy this code block and paste it over the existing code. It should look like this:

    import { client } from "../lib/apollo";
    import { gql } from "@apollo/client";
    
    import Head from "next/head";
    
    export default function SlugPage({ post }) {
      const { seo } = post;
    
      return (
        
    {seo.title}

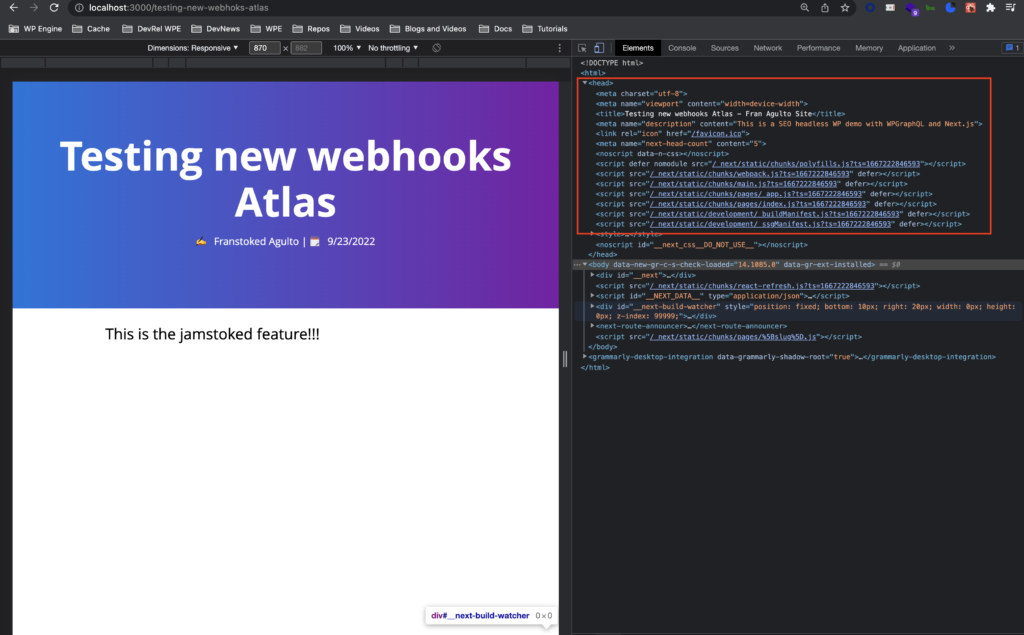
    When we run this locally in the terminal to pull up the site on the browser with npm run dev and open up the dev tools to inspect the elements in the Head tag, you should see all the SEO data that you requested:

    We are now optimized for SEO using next/head which is a built-in component in Next.js that allows us to append elements at the head of each page.

    Full Head and HTML Parser

    Managing the entire Head of your page is made easier with the full head field within the WPGraphQL schema. The issue here is the next/head component does not support React dangerouslySetInnerHTML convention.

    In order to alleviate this issue we can use the html-react-parser package. Go to terminal and install it like so in your project directory:

    Once installed, go back to the [slug].js file and copy this code block from top to bottom and your full file should look like this:

    import { client } from "../lib/apollo";
    import { gql } from "@apollo/client";
    import parse from "html-react-parser";
    import Head from "next/head";
    
    export default function SlugPage({ post }) {
      const fullHead = parse(post.seo.fullHead);
      return (
        
    {fullHead}

    {post.title}

    ✍️    {`${post.author.node.firstName} ${post.author.node.lastName}`} | 🗓️   {new Date(post.date).toLocaleDateString()}

    ); } export async function getStaticProps({ params }) { const GET_POST = gql` query PostBySlug($id: ID!) { post(id: $id, idType: SLUG) { title content date seo { metaDesc fullHead title } author { node { firstName lastName } } } } `; // the params argument for this function corresponds to the dynamic URL segments // we included in our page-based route. So, in this case, the `params` object will have // a property named `uri` that contains that route segment when a user hits the page const response = await client.query({ query: GET_POST, variables: { id: params.slug, }, }); const post = response?.data?.post; return { props: { post, }, }; } export async function getStaticPaths() { const paths = []; return { paths, fallback: "blocking", }; }

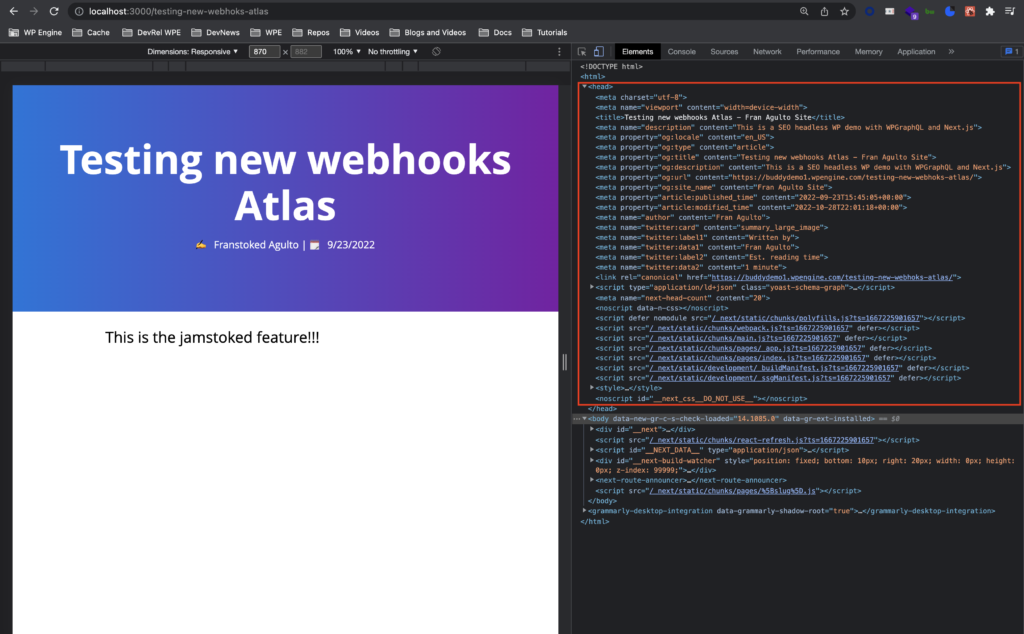
    At the top of the file, we import the parse from html-react-parser. Then, we set a const up to call the full head and transform it into react. Once that is done, we simply add the jsx within the head tag grabbing the full head data in one object.

    Going back to terminal and running it locally, we can see that it is working!!! The entire full head is showing with all the metadata and canonical URLs!

    Addendum: Proxying Next.js Sitemaps to Yoast Sitemaps Using Next.js Middleware

    In this addendum, we are going to use the Next.js middleware feature to access the Yoast sitemaps from WordPress. The link to the code used for this addendum is here.

    1. Middleware Configuration

    First, ensure that your URLs in the sitemap are set up to your front-end URL and not the WordPress URL.

    Let’s start by setting up the middleware which will handle incoming requests for sitemaps.

    In the root of your project, create a middleware.ts file and paste this code block in:

    import { NextResponse } from "next/server";
    import type { NextRequest } from "next/server";
    
    // This function will be responsible for handling the incoming request
    export function middleware(request: NextRequest) {
      const url = request.nextUrl;
      url.pathname = "/api/sitemap"; // redirect to our API endpoint
      return NextResponse.rewrite(url); // rewrite the request path
    }
    
    export const config = {
      matcher: [
        /* Match all sitemap paths */
        "/([\\w\\d_-]*sitemap[\\w\\d_-]*.xml)/",
      ],
    };

    Here’s what’s happening in the above code:

    • When a request matches any URL pattern like *sitemap*.xml, the middleware intercepts that request.
    • It then rewrites the request URL to /api/sitemap, which will be our API endpoint responsible for fetching the actual sitemap from WordPress.

    2. API Endpoint Setup

    Now, let’s set up the API route that will fetch the sitemap from WordPress and return it to the user.

    Create a sitemap.ts file in pages/api and copy and paste this code block:

    import type { NextApiRequest, NextApiResponse } from "next";
    
    export default async function handler(
      req: NextApiRequest,
      res: NextApiResponse
    ) {
      // Fetch the sitemap from the WordPress backend
      const xmlRes = await fetch((process.env.NEXT_PUBLIC_WORDPRESS_URL ?? "") + req.url);
      let xml = await xmlRes.text();
    
      // Set the Content-Type to text/xml and send the XML content to the client
      res.setHeader("Content-Type", "text/xml");
      res.write(xml);
      res.end();
    }

    In this code:

    • The handler function is an asynchronous function that uses the Fetch API to get the XML content of the sitemap from the WordPress backend.
    • It assumes that the WordPress URL is stored in an environment variable called NEXT_PUBLIC_WORDPRESS_URL.
    • After fetching, it sets the response Content-Type header to text/xml to ensure the browser understands that it’s receiving an XML document.
    • Finally, it writes the XML content to the response and ends the response.

    Conclusion and additional links

    SEO is an important part of your site’s discoverability when it comes to Google and other search engines indexing your site and ranking them high. It makes your website more visible, and that means more traffic.

    With the tools like WPGraphQL, Yoast SEO, and Next.js to host, this is made much easier and seamless for the developer.

    This tutorial covered just the basics of what Yoast SEO can do with WPGraphQL. There are a lot more features and options you can do and I would love to hear about them in our Discord channel!

    Some other links to consider beyond just the basics are here:

    Fix Yoast sitemaps in Headless WP

    Replacing Media URLs

  • Tutorial: Registering a Custom Post Type as a GraphQL Interface

    WPGraphQL v1.12.0 introduces new options for customizing how Post Types and Taxonomies are exposed to the WPGraphQL Schema. The goal of this post is to show how to use some of these options in action. You can read this post for an overview of all the options, or check out the release..

    To do that, we’re going to explore a few approaches to solving the same problem.

    Imagine that we’re working on a project for a restaurant that sells food. More specifically, they only sell Pizza and Cake.

    The restaurant needs to be able to enter the different types of pizza and cake they have available.

    For simplicity sake, we’ve determined that each all food has some properties, but each type of food also has unique properties.

    All cake is food, but not all food is cake. All pizza is food, but not all food is pizza.

    • All food: has a title and a price
    • Pizza: has toppings.
    • Cake: has frosting color.

    The goal of this exercise is to configure WordPress to be able to maintain this data in the CMS, and expose it in the WPGraphQL API.

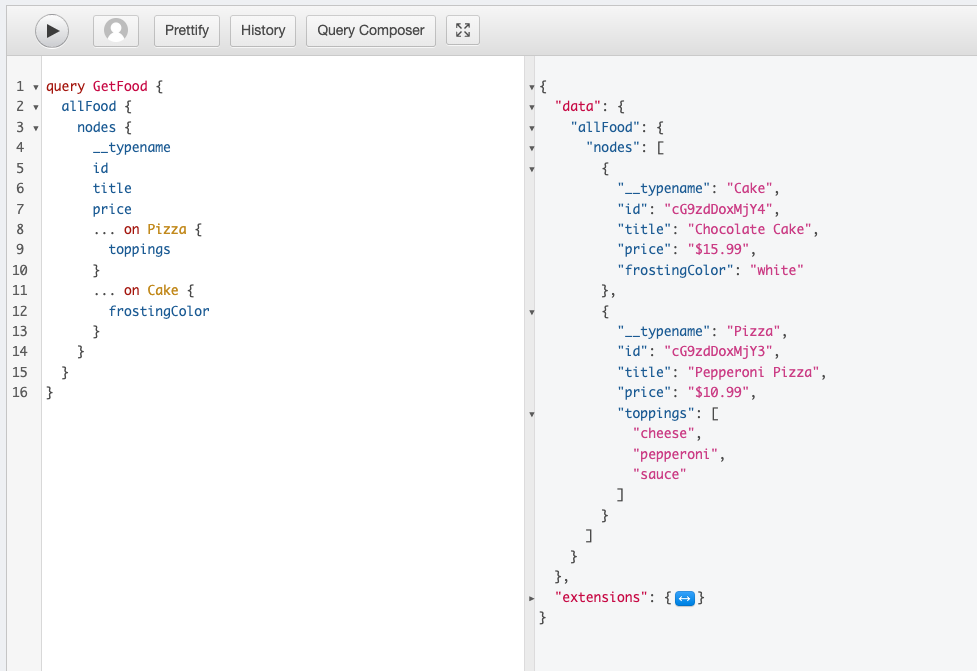
    We would like to be able to query for a list of food, asking for the common fields like “title” and “price”, but also specifying the unique fields, such as “frostingColor” for cake and “toppings” for pizza.

    We want to be able to execute the following GraphQL Query:

    query GetFood {
      allFood {
        nodes {
          __typename
          id
          title
          price
          ...on Cake {
            frostingColor
          }
          ...on Pizza {
            toppings
          }
        }
      }
    }

    And in response, we’d like to get data like so:

    {
      "data": {
        "foods": {
          "nodes": [
            {
              "__typename": "Cake",
              "title": "Cake",
              "price": "$15.99",
              "frostingColor": "white"
            },
            {
              "__typename": "Pizza",
              "title": "Pepperoni Pizza",
              "price": "$10.99",
              "toppings": [
                "pepperoni",
                "sauce",
                "cheese",
                "jalapenos"
              ]
            }
          ]
        }
      }
    }

    There are probably many ways we could achieve this.

    In this post, I’ll show 2 different ways.

    In both scenarios, the query above should work. We should be able to query a list of food, asking for common fields, and also asking for unique fields for Pizza and Cake.

    Neither of these options is the “right” one. This is a simple example missing a lot of nuanced details that you would likely have in a real project. The goal of this post is not to prescribe some type of optimal information architecture using WordPress post types, the goal is to show the flexibility and options for exposing WordPress data to the WPGraphQL API.

    Let’s dive in.

    Scenario 1: One “food” post type

    In this scenario, we’ve decided to register a “food” post type where we can enter data for different food items.

    Register the Post Type

    To get started we will register the post type (without thinking too much about WPGraphQL).

    add_action( 'init', function() {
    
      $args = [
        'public' => true,
        'label' => 'Food',
        'supports' => [ 'title', 'editor', 'custom-fields' ]
      ];
    
      register_post_type( 'food', $args );
    
    } );

    Here we’ve registered a public “food” post type with support for title, editor and custom fields.

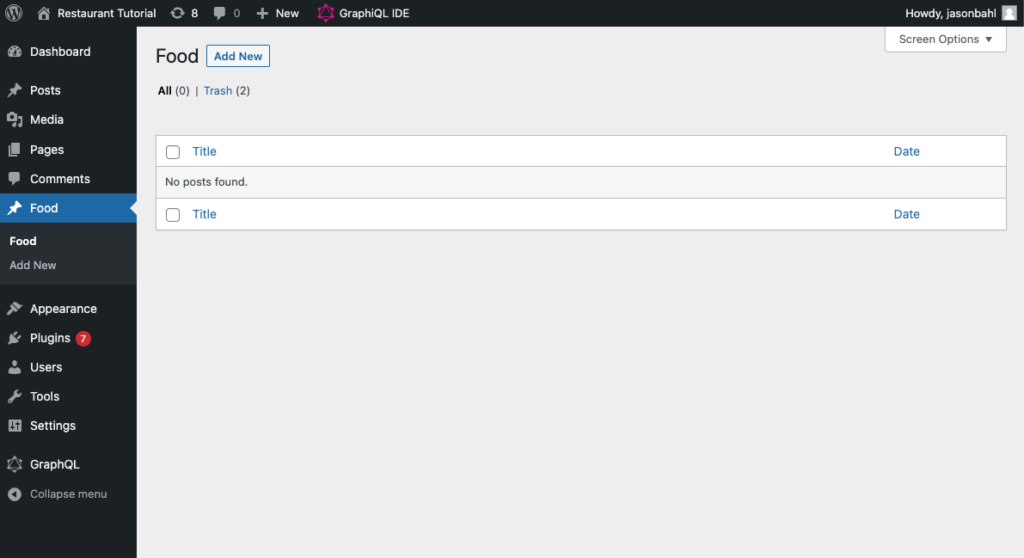
    At this point, we should have a Post Type in WordPress where we can start entering our Cakes and Pizzas into the CMS.

    Add some pizza and cake

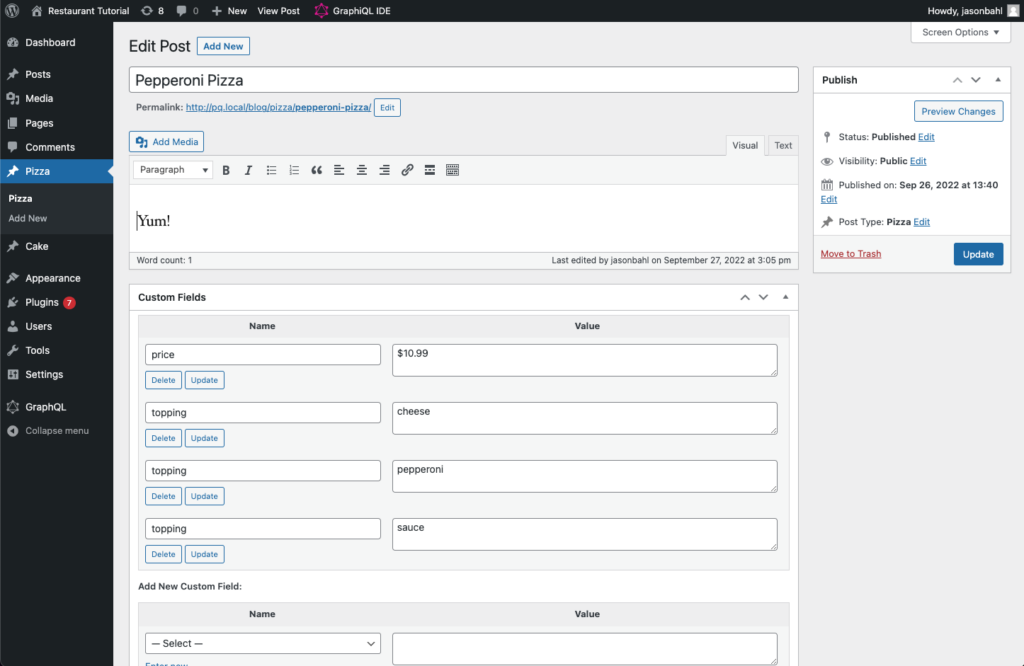
    Click “Add new” and enter the following:

    • Title: Pepperoni Pizza
    • Description: Yum!
    • Custom Fields:
      • food_type: pizza
      • price: $10.99
      • topping: cheese
      • topping: pepperoni
      • topping: sauce

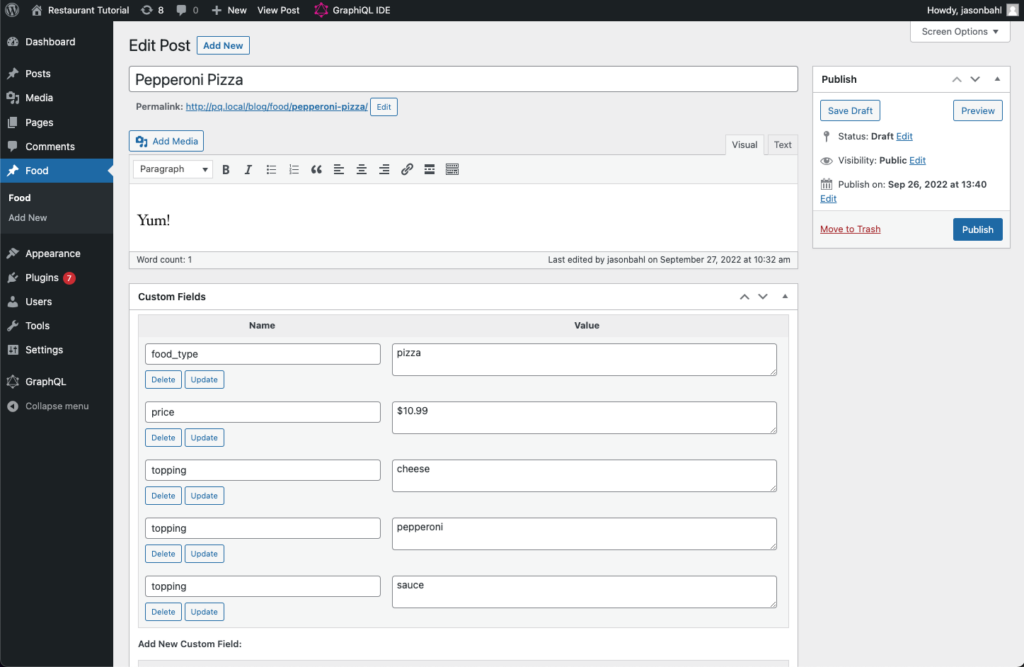
    The pizza should look like so:

    Screenshot of the "Edit Post" screen for the "food" post type showing data entered for a "pepperoni pizza"

    NOTE: For simplicity sake, I’m demonstrating with WordPress’s built-in custom fields, but on a real project I would likely use Advanced Custom Fields.

    Now let’s enter information for a Cake.

    Click “Add new” and enter the following information:

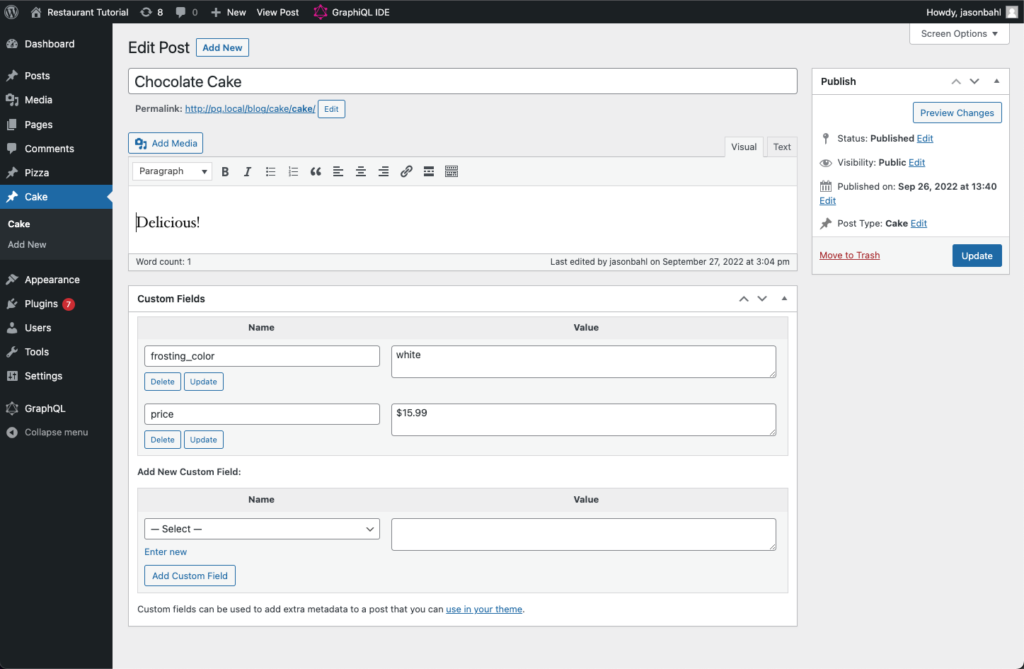
    • Title: Chocolate Cake
    • Description: Delicious!
    • Custom Fields:
      • food_type: cake
      • price: $15.99
      • frosting_color: white

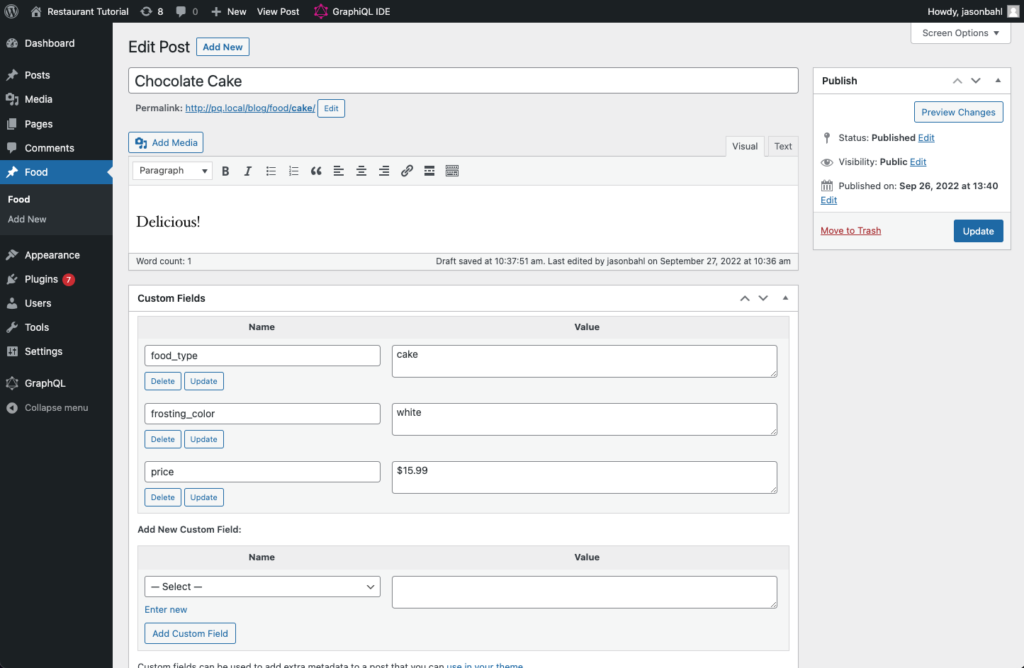
    The cake should look like so:

    Screenshot of the "Edit Post" screen for the "food" post type showing data entered for a "pepperoni pizza"

    So now we have our post type setup and some food entered, how can we query this food in GraphQL?

    Show the Post Type in GraphQL

    If you’ve already familiar with WPGraphQL, you might know that exposing a Post Type to the WPGraphQL Schema requires 3 fields on the post type registration:

    • show_in_graphql: true/false
    • graphql_single_name: Name of the Type in the GraphQL Schema (no spaces or special characters. Value must be unique in the Schema)
    • graphql_plural_name: Plural name of the Type, used for querying lists of items. (no spaces or special characters. Value must be unique in the Schema)

    Let’s update our post type registration above to look like the following:

    add_action( 'init', function() {
    
      $args = [
        'public' => true,
        'label' => 'Food',
        'supports' => [ 'title', 'editor', 'custom-fields' ],
        'show_in_graphql' => true,
        'graphql_single_name' => 'Food',
        'graphql_plural_name' => 'Food',
      ];
    
      register_post_type( 'food', $args );
    
    } );

    By adding these 3 lines:

    'show_in_graphql' => true,
    'graphql_single_name' => 'Food',
    'graphql_plural_name' => 'Food',

    The data in the “food” post type is now exposed in the WPGraphQL Schema.

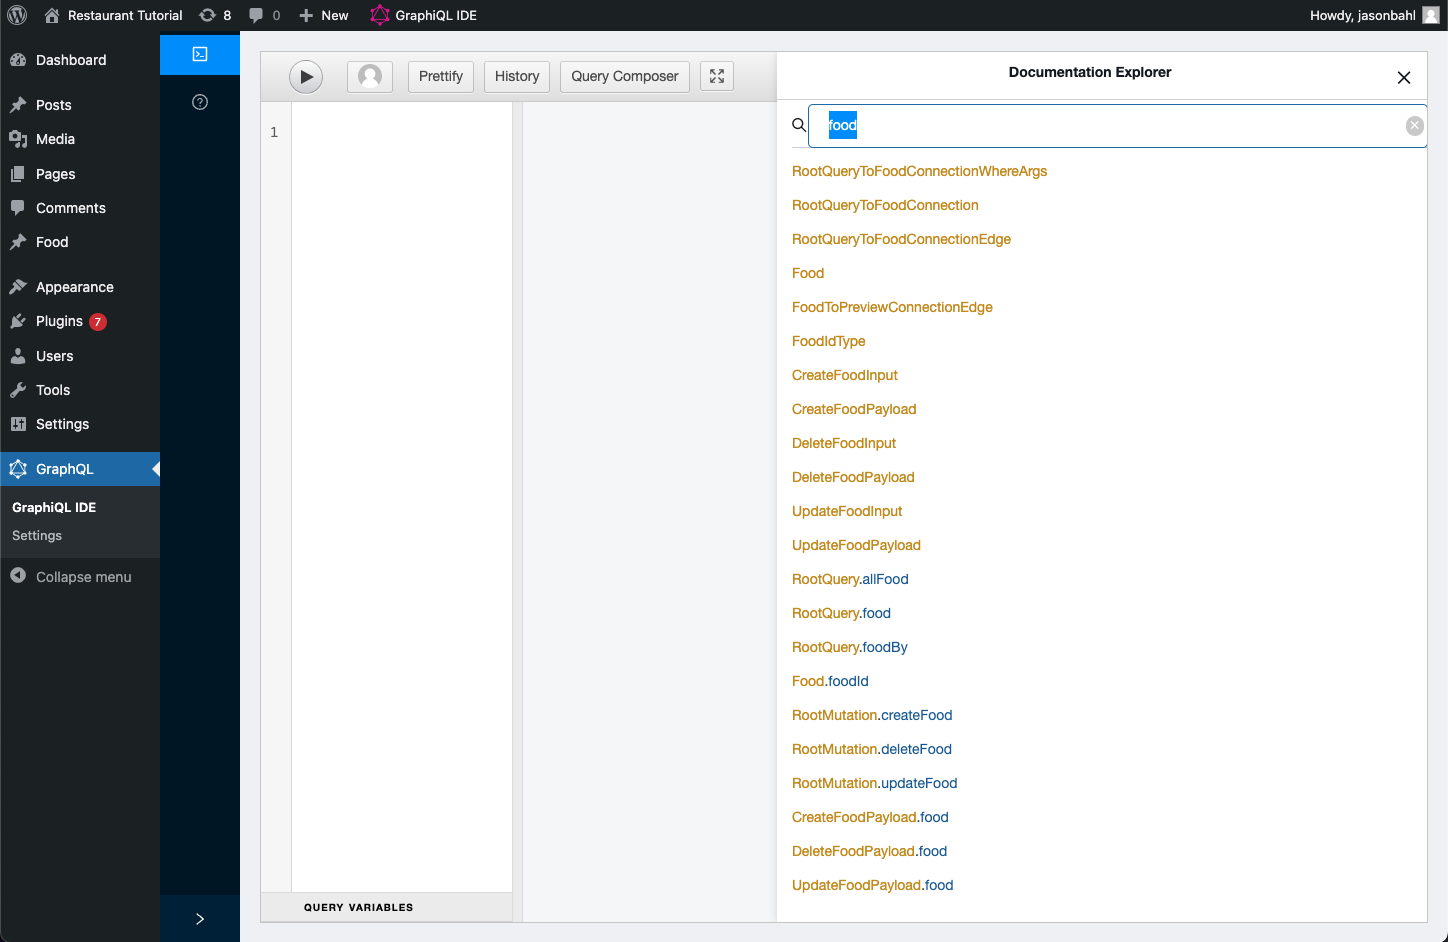
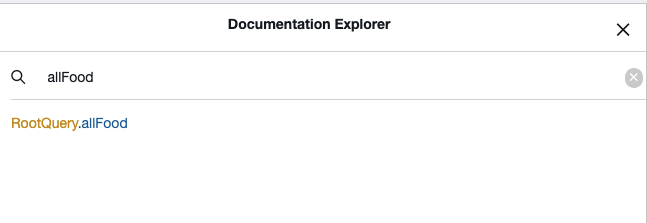
    We can open up the GraphiQL IDE and search for “food” and see all the ways it shows in our Schema now:

    We have a lot of new Types and Fields added to the Schema.

    Since our goal was to query a list of “allFood” we can see that a “RootQuery.allFood” field now exists in the Schema.

    NOTE: Since the “graphql_single_name” and “graphql_plural_name” were both “food” WPGraphQL adds the “plural” field as “allFood”. If the “graphql_plural_name” was a different value, such as “foodItems” it would add a field with that value instead.

    At this point, we can write a query to query a list of food, like so:

    query GetFood {
      allFood {
        nodes {
          __typename
          id
          title
        }
      }
    }

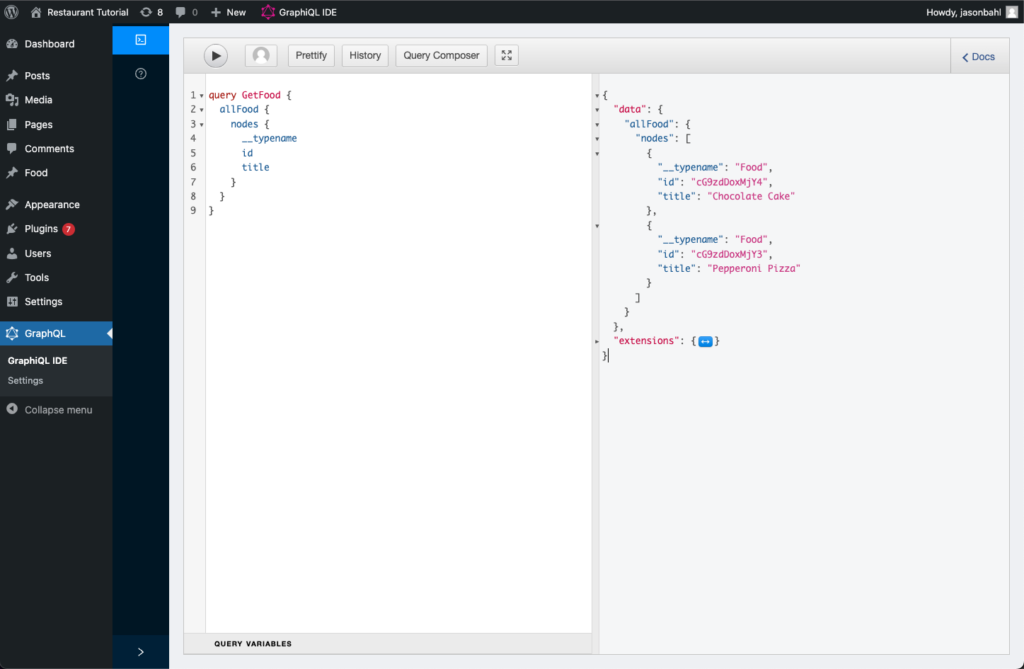
    And we’ll get a response like so:

    {
      "data": {
        "allFood": {
          "nodes": [
            {
              "__typename": "Food",
              "id": "cG9zdDoxMjY4",
              "title": "Chocolate Cake"
            },
            {
              "__typename": "Food",
              "id": "cG9zdDoxMjY3",
              "title": "Pepperoni Pizza"
            }
          ]
        }
      }
    }

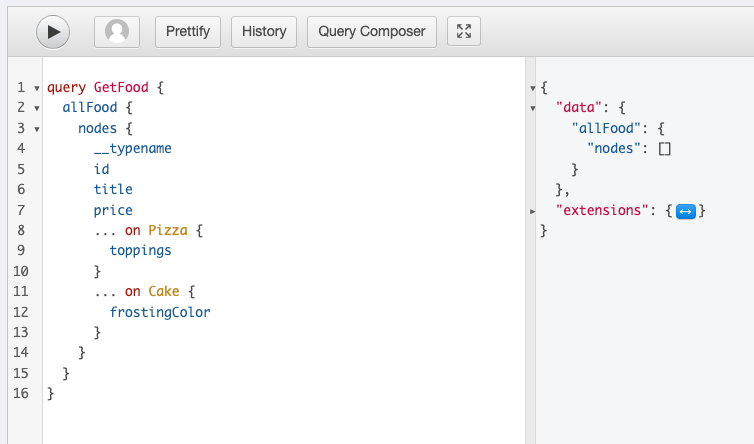
    Here’s what it looks like executed in the GraphiQL IDE:

    One thing you might have noticed, is that we have only queried for 3 fields on each “node”:

    • __typename
    • id
    • title

    Our goal was to be able to also query “price” for all food items, and then specify that we want “toppings” for Pizza and “frostingColor” for Cake.

    If we look at our Schema docs in GraphiQL, we won’t find any mention of “price”, “toppings”, “frostingColor”, “pizza” or “cake”.

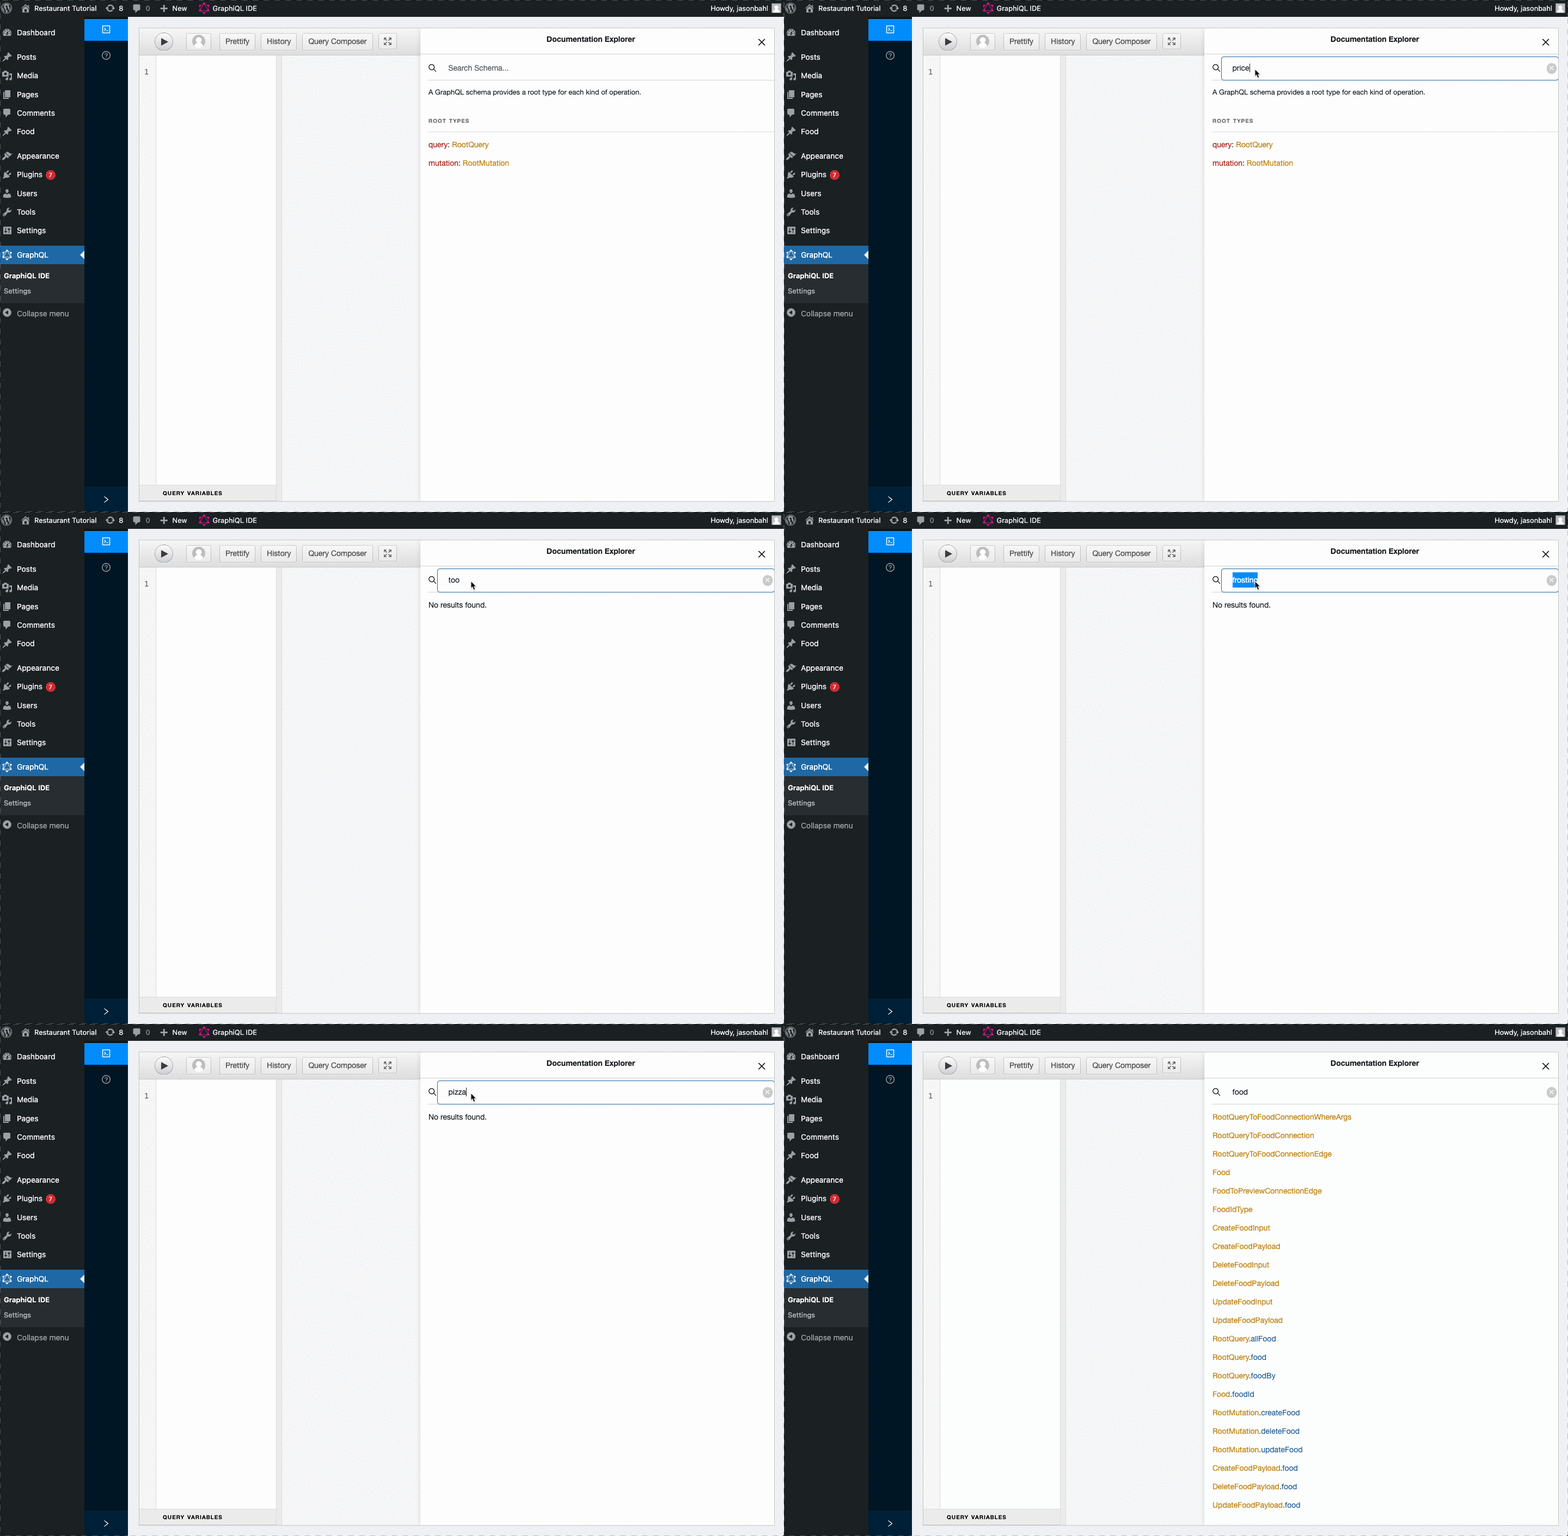
    Gif screen recording showing empty results when searching for “price”, “toppings”, “frosting”, “pizza” and “cake” and getting no results.

    Add the “price” field to the Schema

    Since we agreed that all “food” should have a price field, we can add this to the Schema using the register_graphql_field function.

    Let’s use the following snippet to add this field to the Schema:

    add_action( 'graphql_register_types', function() {
    
      register_graphql_field( 'Food', 'price', [
        'type' => 'String',
        'description' => __( 'The cost of the food item', 'your-textdomain' ),
        'resolve' => function( $food ) {
          $price = get_post_meta( $food->databaseId, 'price', true );
          return ! empty( $price ) ? $price : null;
        }
      ] );
    
    } );

    Let’s break down what this code is doing:

    First, it hooks into the “graphql_register_types” action. This ensures the code will only execute when the GraphQL Schema is being built. Most requests to WordPress aren’t GraphQL requests, so no need to execute GraphQL related functions unless necessary.

    Next, we call the register_graphql_field function. The first argument is the GraphQL Type we want to add a field to. And the 2nd argument is the name of the field to add. We passed “Food” as the first argument and “price” as the 2nd argument because we want “Food” to have a “price” field. The third argument is an array to configure the field.

    In this config array we define the “Type” of data the field will return. We’ve opted for “String” as the type of data we will return for the “price” field. This is the contract between the API consumer and the server. We’ve agreed now that whenever the “price” field is asked for, it will either be a “null” value, or a string. This field will not return an array or an object or an integer or any other type of data.

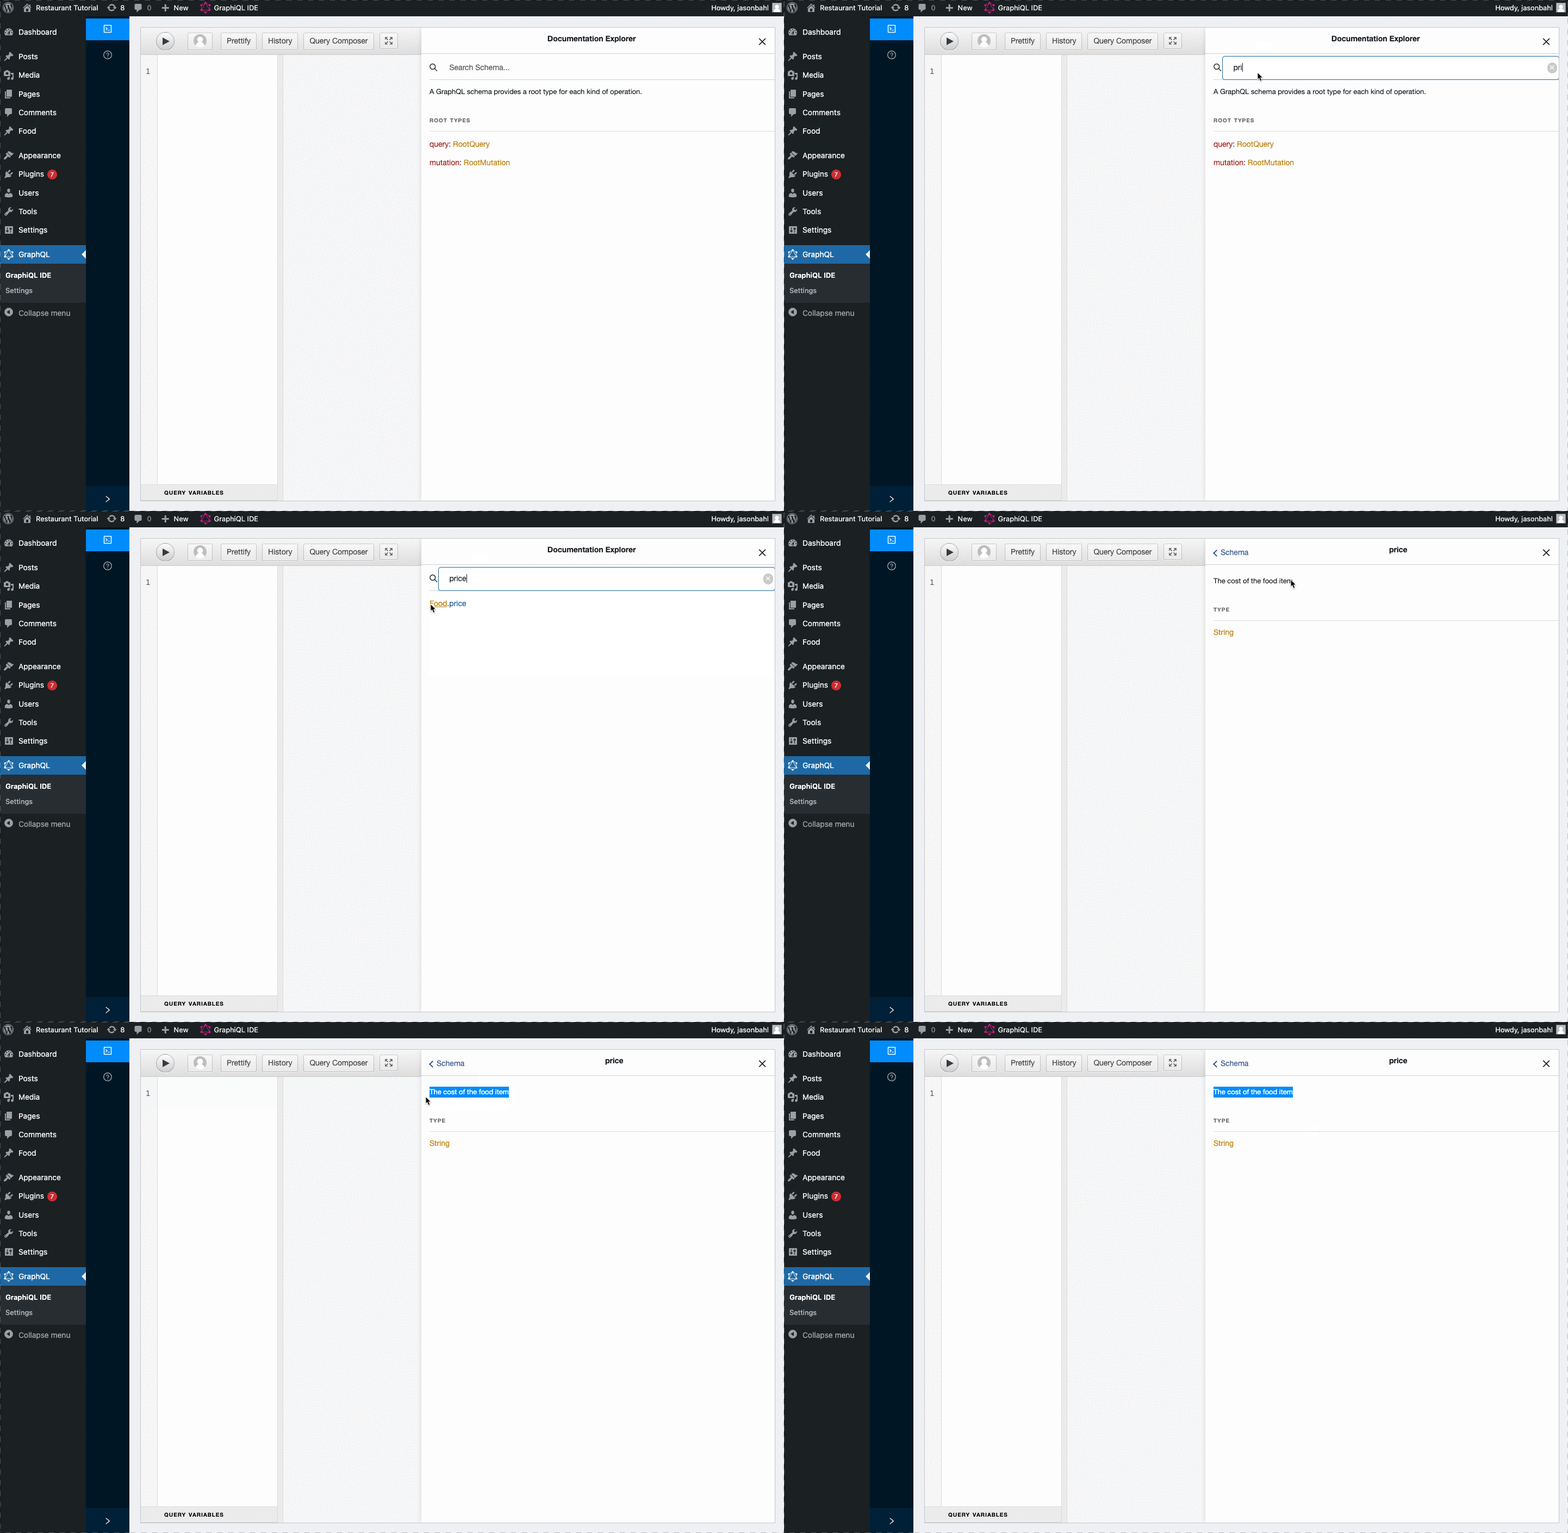
    Next, we added a description, which shows in tools like GraphiQL. This can be helpful to describe to consumers of the API what a field is meant to be used for.

    And last, we define our “resolve” function.

    The resolver will get the resolving object passed to it. Since we’ve registered a field to the “Food” type, this means we will get “Food” objects passed to the field.

    In WPGraphQL the objects passed down are typically “GraphQL Model” objects. In this case, the resolver will get a GraphQL\Model\Post object passed to the resolver.

    We use the databaseId from the model to get the value of the “price” post_meta. If there is a value, return it. Otherwise, return a “null” value.

    Now, with this field registered to the Schema, we can search GraphiQL again for “price” and we should find it in the Schema:

    At this point, we can update our query to query for the “price” field and we should see the values we entered as custom fields returned.

    Screenshot of a query for allFood including the price field.

    Differentiate types of food

    One other thing you might be noticing is that the response for the “__typename” field is “Food”, but in our goal we were hoping to have the values be “Cake” and “Pizza”.

    Additionally, we wanted to be able to query for “toppings” if the type of food is Pizza, and “frostingColor” if the type of food is Cake.

    How do we do this?

    We will convert the “Food” type to be a GraphQL Interface, then register new GraphQL Object Types for “Pizza” and “Cake” that implement the “Food” Interface.

    Let’s take a look:

    Make “Food” an Interface

    According to the GraphQL Documentation “Interface is an abstract type that includes a certain set of fields that a type must include to implement the interface”.

    In practice, this means that multiple Unique Types can have a common bond.

    All Pizza is Food, but not all Food is Pizza. All Cake is Food, but not all Food is Cake.

    We want to be able to define unique Types of Food (in our case Pizza and Cake), but let them implement the “Food” interface.

    We can update our post type registration to make the “Food” type an “Interface” by adding this line:

    $args = [
     ... // existing args
     'graphql_kind' => 'interface',
     'graphql_resolve_type' => function( $food ) {
       $food_type = get_post_meta( $food->databaseId, 'food_type', true );
    
       // if the "food_type" custom field is set to "pizza" return the "Pizza" type
       if ( 'pizza' === $food_type ) {
         $return_type = 'Pizza';
       } else {
         $return_type = 'Cake';
       }
    
       return $return_type;
     }
    ];
    
    register_post_type( 'Food', $args );

    By adding these 2 lines to our “register_post_type” $args, we’ve now told WPGraphQL to treat “Food” as an Interface instead of an Object Type, and we’ve told it how to determine what Object type to resolve, based on the “food_type” meta value.

    In order for this to work, however, we need a “Pizza” and “Cake” Type added to the Schema.

    Register the Pizza GraphQL Object Type

    In the “graphql_resolve_type” function above, we determined that “Food” can return a “Pizza” or “Cake” based on the value of the “food_type” post meta value.

    In order for this to work, we need a Pizza and Cake type to be added to the Schema.

    Within our “graphql_register_types” hook where we registered the “price” field, we can add the following:

    register_graphql_object_type( 'Pizza', [
      // Description shows in the Schema for client developers using tools like the GraphiQL IDE
      'description' => __( 'A tasty food best prepared in an air-fryer', 'your-textdomain' ),
      // This tells the Schema that "All Pizza is Food" and will inherit the "Food" fields (such as Price)
      'interfaces' => [ 'Food' ],
      // This helps with caching. If your Object Type is associated with a particular Model, you should define it here. In our case, Pizza is resolved by the Post model.
      'model' => WPGraphQL\Model\Post::class, 
       // This field shows the Type in the Schema even if there are no root fields that reference the Type directly.
      'eagerlyLoadType' => true,
      // Define the unique fields of this type. For Pizza, "toppings" will be a "list of strings"
      'fields' => [
        'toppings' => [
          'type' => [ 'list_of' => 'String' ],
          'resolve' => function( $pizza ) {
            $toppings = get_post_meta( $pizza->databaseId, 'toppings', false );
            return is_array( $toppings ) ? $toppings : null;
          }
        ],
      ],
    ]);

    Here we’ve registered a “Pizza” GraphQL Object Type. On the Type we declared that it implements the “Food” interface, and that it has a “toppings” field which returns a list of String, resolved from the “topping” meta key.

    Register the Cake GraphQL Object Type

    Now, we can register the “Cake” Object Type, very similar to how we registered the “Pizza” Type.

    register_graphql_object_type( 'Cake', [
      // Description shows in the Schema for client developers using tools like the GraphiQL IDE
      'description' => __( 'A tasty dessert, most likely also good if heated in an air-fryer', 'your-textdomain' ),
      // This tells the Schema that "All Cake is Food" and will inherit the "Food" fields (such as Price)
      'interfaces' => [ 'Food' ],
      'eagerlyLoadType' => true,
      'model' => WPGraphQL\Model\Post::class,
      'fields' => [
        'frostingColor' => [
          'type' => 'String',
          'resolve' => function( $cake ) {
            return get_post_meta( $cake->databaseId, 'frosting_color', true );
          }
        ],
      ]
    ]);

    Here we’ve registered a “Cake” object type. On the type we’ve declared that it implements the “Food” interface, and that it has a “frostingColor” field which returns a String, resolved from the “frosting_color” meta key.

    At this point, we’ve converted the “Food” type to be an Interface using the “graphql_kind” arg on “register_post_type”. We also declared the “graphql_resolve_type” function, returning either a “Pizza” or “Cake” when “Food” is queried.

    Then we defined the “Pizza” and “Cake” Types and their fields.

    At this point, we can successfully execute the query we set out to.

    query GetFood {
      allFood {
        nodes {
          __typename
          id
          title
          price
          ...on Cake {
            frostingColor
          }
          ...on Pizza {
            toppings
          }
        }
      }
    }

    Since the “allFood” connection is added to the schema from the “food” post type, the resolver will query posts of the “food” post type. Each post will be converted into a “Post” Model and then our “graphql_resolve_type” function will use the “food_type” meta to determine whether the “food” is “Pizza” or “Cake”, then each field (price, toppings, frostingColor) is resolved.

    Success! We end up with the expected results:

    {
      "data": {
        "foods": {
          "nodes": [
            {
              "__typename": "Cake",
              "title": "Cake",
              "price": "$15.99",
              "frostingColor": "white"
            },
            {
              "__typename": "Pizza",
              "title": "Pepperoni Pizza",
              "price": "$10.99",
              "toppings": [
                "pepperoni",
                "sauce",
                "cheese",
                "jalapenos"
              ]
            }
          ]
        }
      }
    }

    Scenario 2: 2 different “Pizza” and “Cake” post types

    Now, we already accomplished the goal we set out to, but I wanted to show a different way to get the the same goal.

    In this approach, instead of using one “food” post type, let’s use 2 different post types: “Pizza” and “Cake”.

    But, the goal is still the same. We want to be able to query for “allFood” and depending on whether the food is “Pizza” or “Cake” we’d like to query for “toppings” or “frostingColor” respectively.

    Register the Food Interface

    Instead of registering a “Food” post type and setting its “graphql_kind” as “interface”, this time we will manually register an Interface, then register 2 post types and apply the “Food” interface to those 2 post types.

    With the following snippet, we can register a “Food” interface:

    add_action( 'graphql_register_types', function() {
    
      register_graphql_interface_type( 'Food', [
        'description' => __( 'An item of food for sale', 'your-textdomain' ),
        // ensure all "food" nodes have a title
        'interfaces' => [ 'Node', 'NodeWithTitle' ],
        'fields' => [
          'price' => [
            'type' => 'String',
    	'description' => __( 'The cost of the food item', 'your-textdomain' ),
    	'resolve' => function( $food ) {
    	  return get_post_meta( $food->databaseId, 'price', true );
    	},
          ],
        ],
        'resolveType' => function( $node ) {
          // use the post_type to determine what GraphQL Type should be returned. Default to Cake
          return get_post_type_object( $node->post_type )->graphql_single_name ?: 'Cake';
        }
      ]);
    
    });

    Register the Post Types

    We just defined our “Food” Interface, but it doesn’t really do anything yet, because no Type in the Graph implements this interface.

    Let’s register our “Cake” and “Pizza” post types and implement the “Food” interface on them.

    add_action( 'init', function() {
    
      $pizza_args = [
        'public' => true,
        'label' => 'Pizza',
        'show_in_graphql' => true,
        'supports' => [ 'title', 'editor', 'custom-fields' ],
        'graphql_single_name' => 'Pizza',
        'graphql_plural_name' => 'Pizza',
        'graphql_interfaces' => [ 'Food' ],
        'graphql_fields' => [
          'toppings' => [
            'type' => [ 'list_of' => 'String' ],
            'resolve' => function( $pizza ) {
               $toppings = get_post_meta( $pizza->databaseId, 'topping', false );
              return is_array( $toppings ) ? $toppings : null;
            }
          ],
        ],
      ];
    
      register_post_type( 'pizza', $pizza_args );
    
      $cake_args = [
        'public' => true,
        'label' => 'Cake',
        'show_in_graphql' => true,
        'supports' => [ 'title', 'editor', 'custom-fields' ],
        'graphql_single_name' => 'Cake',
        'graphql_plural_name' => 'Cakes',
        'graphql_interfaces' => [ 'Food' ],
        'graphql_fields' => [
          'frostingColor' => [
            'type' => 'String',
            'resolve' => function( $cake ) {
              return get_post_meta( $cake->databaseId, 'frosting_color', true );
            }
          ],
        ]
      ];
    
      register_post_type( 'cake', $cake_args );
    
    });

    In this snippet, we’ve registered both a “cake” and a “pizza” post type. We set both to “show_in_graphql”, defined their “graphql_single_name” and “graphql_plural_name”, then we applied the “Food” interface using the “graphql_interfaces” argument.

    Additionally, we used the “graphql_fields” argument to add a “toppings” field to the “Pizza” Type and a “frostingColor” field to the “Cake” Type.

    At this point, we can search our GraphQL Schema for “food” and we’ll find the “Food” interface, and see that it is implemented by “Pizza” and “Cake”.


    However, we will also see that no field in the Schema returns the “food” type.

    There’s no “allFood” field, like we set out to query.

    There is a “RootQuery.allPizza” and “RootQuery.cakes” field for querying lists of Pizza and lists of Cakes independently, but no “allFood” field.

    Let’s add that!

    Register “allFood” connection

    Since we decided to manage our Pizza and Cake in different Post types, we need to provide an entry point into the Graph that allows us to query items of both of these post types as a single list.

    To do this we will use the register_graphql_connection API.

    Within the “graphql_register_types” hook above, we can add the following:

    register_graphql_connection([
      'fromType' => 'RootQuery',
      'toType' => 'Food',
      'fromFieldName' => 'allFood',
      'resolve' => function( $root, $args, $context, $info ) {
        $resolver = new \WPGraphQL\Data\Connection\PostObjectConnectionResolver( $root, $args, $context, $info );
        $resolver->set_query_arg( 'post_type', [ 'pizza', 'cake' ] );
        return $resolver->get_connection();
      }
    ]);

    This code registers a GraphQL Connection from the “RootQuery” to the “Food” type. A Connection is a way in GraphQL to query paginated lists of data. Here, we’ve defined our connection’s “fromType” and “toType”, and set the “fromFieldName”to “allFood’.

    This will expose the connection to the Schema. At this point, we would be able to execute our query, but we wouldn’t get any results unless we also had a resolver.

    Our resolver function handles querying the “food” from the database and returning data in the proper “connection” shape.

    In GraphQL, all resolvers are passed 4 arguments:

    • $source: The object being executed that the resolving field belongs to
    • $args: Any input arguments on the field
    • $context: Context about the request
    • $info: Info about where in the resolve tree execution is

    In our resolver above, we take all 4 of these arguments and pass them to a new instance of “\WPGraphQL\Data\Connection\PostObjectConnectionResolver”. This class handles a lot of the complicated work of fetching data from the WordPress Posts table and returning it in a proper shape for connections.

    After instantiating the PostObjectConnectionResolver, we use its “set_query_arg” method to ensure the connection resolver will resolve data from the “pizza” and “cake” post types. Then we return the connection.

    At this point, we should be able to explore the Schema and see that we now have a “RootQuery.allFood” field, and it returns a “RootQueryToFoodConnection”.

    If we tried to query it now, the query would be valid and we shouldn’t get any errors, but we would also get no results.

    That’s because we haven’t entered data into our Pizza and Cake post types!

    Create a Pizza and a Cake

    We can follow the same steps we did in the first scenario to enter data for the “Pizza” and “Cake” post type.

    The difference, this time, is that we can enter them in their own Custom Post Type, and we don’t need to specify the “food_type” meta field, as we’re using the post type itself to make the distinction.

    Here’s what my Pizza looks like:

    Here’s what my Cake looks like:

    Query for allFood

    Now that we have some data in our “pizza” and “cake” post types, we can successfully execute the query we set out for.

    Conclusion

    In this post we explored 2 different ways to manage different types of Food and then query that food using WPGraphQL.

    The first scenario opted for using a single post type for managing all food, and using a meta field to differentiate the type of food.

    In this scenario, since only one post type was registered to the Schema we didn’t need to register a custom connection, it was done automatically by WPGraphQL.

    One thing we didn’t cover in detail in this post, was mutations.

    In scenario 1, by registering just one post type, WPGraphQL would have added the following mutations: “createFood”, “updateFood”, “deleteFood”. But in scenario 2 each post type would have its own mutations: “createPizza”, “updatePizza”, “deletePizza” and “createCake”, “updateCake”, “deleteCake”.

    There are pros and cons to both options, here. I encourage you to play with both options, explore the Schema and understand how each option might best serve your projects.

    I hope you learned something in this post and look forward to hearing stories about how these APIs have helped speed up your project development!

  • Adding End 2 End Tests to WordPress plugins using wp-env and wp-scripts

    I recently published a video walking through how End to End tests are set up for WPGraphQL, but I thought it would be good to publish a more direct step-to-step tutorial to help WordPress plugin developers set up End 2 End tests for their own WordPress plugins.

    Setting up End to End tests for WordPress plugins can be done in a number of ways (Codeception, Cypress, Ghost Inspector, etc), but lately, the easiest way I’ve found to do this is to use the @wordpress/env and @wordpress/scripts packages, distributed by the team working on the WordPress Block Editor (a.k.a. Gutenberg), along with GitHub Actions.

    If you want to skip the article and jump straight to the code, you can find the repo here: https://github.com/wp-graphql/wp-graphql-e2e-tests-example

    What are End to End tests?

    Before we get too far, let’s cover what end to end tests even are.

    When it comes to testing code, there are three common testing approaches.

    • Unit Tests: Testing individual functions
    • Integration Tests: Testing various units when integrated with each other.
    • End to End Tests (often called Acceptance Tests): Testing that tests the application as an end user would interact with it. For WordPress, this typically means the test will open a browser and interact with the web page, click buttons, submit forms, etc.

    For WPGraphQL, the majority of the existing tests are Integration Tests, as it allows us to test the execution of GraphQL queries and mutations, which requires many function calls to execute in the WPGraphQL codebase and in WordPress core, but doesn’t require a browser to be loaded in the testing environment.

    The End to End tests in WPGraphQL are for the GraphiQL IDE tools that WPGraphQL adds to the WordPress dashboard.

    What’s needed for End to End Tests with WordPress?

    In order to set up End to End tests for WordPress, we need a way for the test suite to visit pages of a WordPress site and interact with the web page that WordPress is serving. We also need a way to write programs that can interact with the Web Page, and we need to be able to make assertions that specific behaviors are or are not happening when the web page(s) are interacted with. We also need a way for this to run automatically when our code changes.

    Let’s break down how we’ll tackle this:

    • @wordpress/env: Sets up a WordPress environment (site) for the test suites to interact with
    • @wordpress/scripts: Runs the tests using Puppeteer and Jest. This lets our tests open the WordPress site in a Chrome browser and interact with the page.
      • Puppeteer: A Node library which provides a high-level API to control Chrome or Chromium over the DevTools Protocol. Puppeteer has APIs that we will use to write tests that interact with the pages.
      • Jest: JavaScript Testing Framework with a focus on simplicity
    • GitHub Actions: We’ll be using GitHub actions for our Continuous Integration. You should be able to apply what is covered in this post to other CI tools, such as CircleCI.

    Setting up our dependencies

    I’m going to assume that you already have a WordPress plugin that you want to add tests to. But, if this is your first time building a WordPress plugin, you can see this commit to the example plugin to see what’s needed to get a basic WordPress plugin set up, with zero functionality.

    If you do not have a package.json already, you’ll need to create a new package.json file, with the following:

    {
      "name": "wp-graphql-e2e-tests-example",
      "version": "0.0.1",
      "description": "An example plugin showing how to set up End to End tests using @wordpress/env and @wordpress/scripts",
      "devDependencies": {},
      "scripts": {},
    }

    npm “devDependencies”

    ???? If you don’t already have node and npm installed on your machine, you will need to do that now.

    We need the following “dev dependencies” for our test suite:

    • @wordpress/e2e-test-utils
    • @wordpress/env
    • @wordpress/jest-console
    • @wordpress/jest-puppeteer-axe
    • @wordpress/scripts
    • expect-puppeteer
    • puppeteer-testing-library

    The difference between “dependencies” and “devDependencies” is that if you are bundling a JavaScript application for production, the “dedpendencies” will be included in the bundles for use at runtime, but “devDependencies” are only used during development for things like testing, linting, etc and are not included in the built application for use at runtime. We don’t need Jest or Puppeteer, etc in our runtime application, just while developing.

    We can install these via the command line:

    npm install @wordpress/e2e-test-utils @wordpress/env @wordpress/jest-console @wordpress/jest-puppeteer-axe @wordpress/scripts expect-puppeteer puppeteer-testing-library --d

    Or you can paste the devDependencies in the package.json and run npm install.

    Whether you install via the command line or pasting into package.json, the resulting devDependencies block in your package.json should look like the following:

    "devDependencies": {
      "@wordpress/e2e-test-utils": "^6.0.0",
      "@wordpress/env": "^4.2.0",
      "@wordpress/jest-console": "^5.0.0",
      "@wordpress/jest-puppeteer-axe": "^4.0.0",
      "@wordpress/scripts": "^20.0.2",
      "expect-puppeteer": "^6.1.0",
      "puppeteer-testing-library": "^0.6.0"
    }

    Adding a .gitignore

    It’s also a good idea to add a .gitignore file to ensure we don’t version the node_modules directory. These dependencies are only needed when developing, so they can be installed on the machine that needs them, when needed. They don’t need to be versioned in the project. I’ve also included an ignore for .idea which are files generated by PHPStorm. If your IDE or operating system includes hidden files that are not needed for the project, you can ignore them here as well.

    # Ignore the node_modules, we don't want to version this directory
    node_modules
    
    # This ignores files generated by JetBrains IDEs (I'm using PHPStorm)
    .idea

    At this point, we have our package.json and our .gitignore setup. You can see this update in this commit.

    Setting up the WordPress Environment

    Now that we’ve got the initial setup out of the way, let’s move on to getting the WordPress environment set up.

    The @wordpress/env package is awesome! It’s one, of many, packages that have been produced as part of the efforts to build the WordPress block editor (a.k.a. Gutenberg). It’s a great package, even if you’re not using the block editor for your projects. We’re going to use it here to quickly spin up a WordPress environment with our custom plugin active.
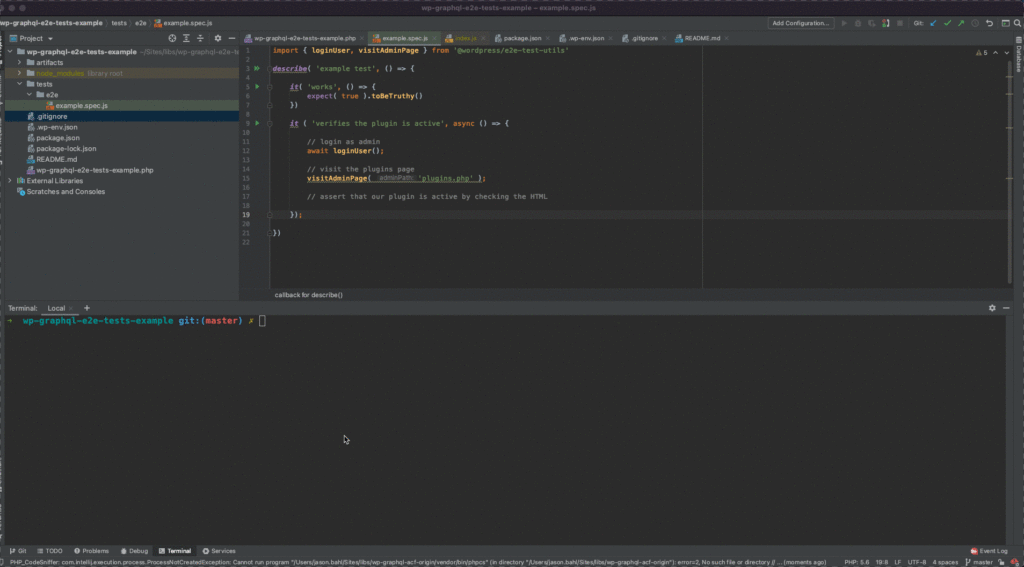
    Adding the wp-env script

    The command we want to run to start our WordPress environment, is npm run wp-env start, but we don’t have a script defined for this in our `package.json`.

    Let’s add the following script:

    ...
    "scripts": {
      "wp-env": "wp-env"
    }

    You can see the commit making this change here.

    Start the WordPress environment

    With this in place, we can now run the command: npm run wp-env start

    You should see output pretty similar to the following:

    > wp-graphql-e2e-tests-example@0.0.1 wp-env
    > wp-env "start"
    
    WordPress development site started at http://localhost:8888/
    WordPress test site started at http://localhost:8889/
    MySQL is listening on port 61812
    MySQL for automated testing is listening on port 61840
    

    Two WordPress environments are now running. You can click the links to open them in a browser.

    And just like that, you have a WordPress site up and running!
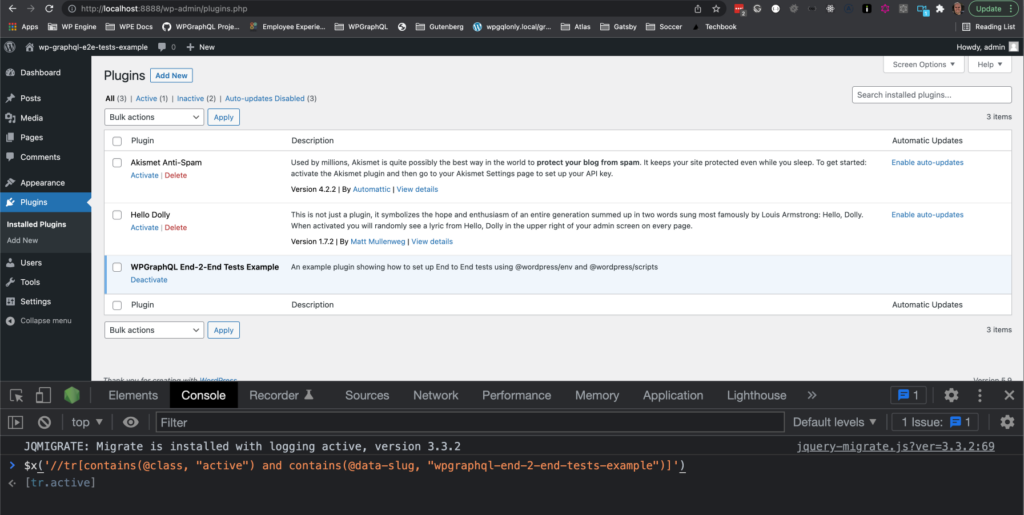
    Stopping the WordPress environment

    If you want to stop the environment, you can run npm run wp-env stop.

    This will generate output like the following:

    > wp-graphql-e2e-tests-example@0.0.1 wp-env
    > wp-env "stop"
    
    ✔ Stopped WordPress. (in 1s 987ms)

    And visiting the url in a browser will now 404, as there is no longer a WordPress site running on that port.

    Configuring wp-env

    At this point, we’re able to start a WordPress environment pretty quickly, but, if we want to be able to test functionality of our plugin, we’ll want the WordPress environment to start with our plugin active, so we can test it.

    We can do this by adding a .wp-env.json file to the root of our plugin, and configuring the environment to have our plugin active when the environment starts.

    Set our plugin to be active in WordPress

    At the root of the plugin, add a file named .wp-env.json with the following contents:

    {
      "plugins": [ "." ]
    }

    We can use this config file to tell WordPress which plugins and themes to have active by default, and we can configure WordPress in other ways as well.

    In this case, we’ve told WordPress we want the current directory to be activated as a plugin.

    You can see this change in this commit.

    Login and verify

    Now, if you start the environment again (by running npm run wp-env start), you can login to the WordPress dashboard to see the plugin is active.

    You can login at: http://localhost:8888/wp-admin using the credentials:

    • username: admin
    • password: password

    Then visit the plugins page at: http://localhost:8888/wp-admin/plugins.php

    You should see our plugin active:

    Screenshot of the Plugin page in the WordPress dashboard, showing our plugin active.

    Running tests

    Now that we’re able to get a WordPress site running with our plugin active, we’re ready to start testing!

    At this point, there are 2 more things we need to do before we can run some tests.

    • write some tests
    • define scripts to run the tests

    Writing our first test

    Since our plugin doesn’t have any functionality to test, we can write a simple test that just makes an assertion that we will know is always true, just so we can make sure our test suites are running as expected.

    Let’s add a new file under /tests/e2e/example.spec.js.

    The naming convention *.spec.js is the default naming convention for wp-scripts to be able to run the tests. We can override this pattern if needed, but we won’t be looking at overriding that in this post.

    Within that file, add the following:

    describe( 'example test', () => {
    
        it( 'works', () => {
            expect( true ).toBeTruthy()
        })
    
    })

    This code is using two global methods from Jest:

    • describe: Creates a block of related tests
    • it: A function used to run a test (this function is an alias of the “test” function)

    Adding scripts to run the tests

    In order to run the test we just wrote, we’ll need to add some test scripts to the package.json file.

    Right above where we added the wp-env script, paste the following scripts:

    "test": "echo \"Error: no test specified\" && exit 1",
    "test-e2e": "wp-scripts test-e2e",
    "test-e2e:debug": "wp-scripts --inspect-brk test-e2e --puppeteer-devtools",
    "test-e2e:watch": "npm run test-e2e -- --watch",

    These scripts work as follows:

    • npm run test: This will return an error that a specific test should be specified
    • npm run test-e2e: This will run any tests that live under the tests/e2e directory, within files named *.spec.js
    • npm run test-e2e:debug: This will run the e2e tests, but with Puppeteer devtools, which means a Chrome browser will open and we can watch the tests run. This is super handy, and a lot of fun to watch.
    • npm run test-e2e:watch: This will watch as files change and will re-run the tests automatically when changes are made.

    Run the tests

    Now that we have a basic test in place, and our scripts configured, let’s run the test command so we can see how it works.

    In your command line, run the command npm run test-e2e.

    This will run our test suite, and we should see output like the following:

    > wp-graphql-e2e-tests-example@0.0.1 test-e2e
    > wp-scripts test-e2e
    
    Chromium is already in /Users/jason.bahl/Sites/libs/wp-graphql-e2e-tests-example/node_modules/puppeteer-core/.local-chromium/mac-961656; skipping download.
     PASS  tests/e2e/example.spec.js
      example test
        ✓ works (2 ms)
    
    Test Suites: 1 passed, 1 total
    Tests:       1 passed, 1 total
    Snapshots:   0 total
    Time:        0.434 s, estimated 1 s
    Ran all test suites.

    Amazing! Our first test that checks if true is indeed truthy, worked! Great!

    Just to make sure things are working as expected, we can also add a test that we expect to fail.

    Under our first test, we can add:

      it ( 'fails', () => {
        expect( false ).toBeTruthy()
      })

    This test should fail.

    If we run the script again, we should see the following output:

    > wp-graphql-e2e-tests-example@0.0.1 test-e2e
    > wp-scripts test-e2e
    
    Chromium is already in /Users/jason.bahl/Sites/libs/wp-graphql-e2e-tests-example/node_modules/puppeteer-core/.local-chromium/mac-961656; skipping download.
     FAIL  tests/e2e/example.spec.js
      example test
        ✓ works (1 ms)
        ✕ fails (73 ms)
    
      ● example test › fails
    
        expect(received).toBeTruthy()
    
        Received: false
    
           6 |
           7 |     it ( 'fails', () => {
        >  8 |         expect( false ).toBeTruthy()
             |                         ^
           9 |     })
          10 |
          11 | })
    
          at Object. (tests/e2e/example.spec.js:8:25)
    
    Test Suites: 1 failed, 1 total
    Tests:       1 failed, 1 passed, 2 total
    Snapshots:   0 total
    Time:        0.519 s, estimated 1 s
    Ran all test suites.

    We can delete that 2nd test now that we’re sure the tests are running properly.

    You can see the state of the plugin at this commit.

    Testing that our plugin is active

    Right now, testing that true is truthy isn’t a very valuable test. It shows that the tests are running, but it’s not ensuring that our plugin is working properly.

    Since our plugin doesn’t have any functionality yet, we don’t have much to test.

    One thing we can do to get familiar with some of the test utilities, is testing that the plugin is active in the Admin.

    To do this we will need to:

    • Login to WordPress as an admin user
    • Visit the plugins page
    • Check to see if our plugin is active.
      • As a human, we can see a plugin is active because it’s highlighted different than inactive plugins. A machine (our tests) can see if a plugin is active by inspecting the HTML and seeing if the plugin has certain attributes.

    Writing the test

    In our example.spec.js file, we can add a new test. Go ahead and paste the following below the first test.

    it ( 'verifies the plugin is active', async () => {
      // Steps:
      // login as admin
      // visit the plugins page
      // assert that our plugin is active by checking the HTML
    });

    Right now, these steps are just comments to remind us what this test needs to do. Now, we need to tell the test to do these things.

    Login as Admin

    One of the dependencies we added in our package.json, was @wordpress/e2e-test-utils. This package has several helpful functions that we can use while writing e2e tests.

    One of the helpful functions is a loginUser function, that opens the login page of the WordPress site, enters a username and password, then clicks login.

    The loginUser function accepts a username and password as arguments, but if we don’t pass any arguments, the default behavior is to login as the admin user.

    In our /tests/e2e/example.spec.js file, let’s import the loginUser function at the top of the file:

    import { loginUser } from '@wordpress/e2e-test-utils'

    Then, let’s add this function to our test:

    it ( 'verifies the plugin is active', async () => {
    
      // login as admin
      await loginUser();
    
      // visit the plugins page
      // assert that our plugin is active by checking the HTML
    
    });

    Visit the Plugins Page

    Next, we want to visit the plugins page. And we can do this with another function from the @wordpress/e2e-test-utils package: visitAdminPage().

    Let’s import this function:

    import { loginUser, visitAdminPage } from '@wordpress/e2e-test-utils'

    And add it to our test:

    it ( 'verifies the plugin is active', async () => {
    
      // login as admin
      await loginUser();
    
      // visit the plugins page
      await visitAdminPage( 'plugins.php' );
    
      // assert that our plugin is active by checking the HTML
    
    });

    At this point, you should now be able to run the test suite in debug mode and watch the test script login to WordPress and visit the admin page.

    Run the command npm run test-e2e:debug.

    You should see the tests run, open Chrome, login as an admin that navigate away from the dashboard to the plugins page, then we should see the tests marked as passing in the terminal.

    Screen recording showing the test running in debug mode. The Chrome browser opens and logs into the admin then navigates to another page.

    NOTE: If you’re in PHP Storm or another JetBrains IDE, the debugger will kick in for you automatically. If you’re in VSCode, you might need to add a .vscode/launch.json file, like this.

    Asserting that the plugin is active

    Now that we’ve successfully logged into the admin and navigated to the Plugins page, we can now write our assertion that the plugin is active.

    If we wanted to inspect the HTML of the plugins page to see if the plugin is active, we could open up our browser dev tools and inspect the element. We would see that the row for our active plugin looks like so:

    <tr class="active" data-slug="wpgraphql-end-2-end-tests-example" data-plugin="wp-graphql-e2e-tests-example/wp-graphql-e2e-tests-example.php">

    We want to make an assertion that the plugins page contains a <tr> element, that has a class with the value of active, and a data-slug attribute with the value of wpgraphql-end-2-end-tests-example (or whatever your plugin name is).

    We can use XPath expressions for this.

    I’m not going to go deep into XPath here, but I will show you how to test this in your browser dev tools.

    You can open up the plugins page in your WordPress install (that you started from the npm run wp-env command). Then in the console, paste the following line:

    $x('//tr[contains(@class, "active") and contains(@data-slug, "wpgraphql-end-2-end-tests-example")]')

    You should see that it found exactly one element, as shown in the screenshot below.

    Screenshot of testing XPath in the Chrome browser dev tools.

    We can take this code that works in the browser dev tools, and convert it to use the page.$x method from Puppeteer.

    NOTE: the page object from Puppeteer is a global object in the test environment, so we don’t need to import it like we imported the other utils functions.

    // Select the plugin based on slug and active class
            const activePlugin = await page.$x('//tr[contains(@class, "active") and contains(@data-slug, "wpgraphql-end-2-end-tests-example")]');

    Then, we can use the (also global) expect method from jest, to make an assertion that the plugin is active:

    // assert that our plugin is active by checking the HTML
    expect( activePlugin?.length ).toBe( 1 );

    The full test should look like so:

      it ( 'verifies the plugin is active', async () => {
    
      // login as admin
      await loginUser();
    
      // visit the plugins page
      await visitAdminPage( 'plugins.php' );
    
      // Select the plugin based on slug and active class
      const activePlugin = await page.$x('//tr[contains(@class, "active") and contains(@data-slug, "wpgraphql-end-2-end-tests-example")]');
    
      // assert that our plugin is active by checking the HTML
      expect( activePlugin?.length ).toBe( 1 );
    
    });

    Running the test should pass. We can verify that the test is actually working and not providing a false pass, by changing the name of the slug in our expect statement. If we changed the slug to “non-existent-plugin” but still assert that there would be 1 active plugin with that slug, we would have a failing test!

    Continuous Integration

    Right now, we can run the tests on our own machine. And contributors could run the tests if they cloned the code to their machine.

    But, one thing that is nice to set up for tests like this, is to have the tests run when code changes. That will give us the confidence that new features and bugfixes don’t break old features and functionality.

    Setting up a GitHub Workflow

    We’re going to set up a GitHub Workflow (aka GitHub Action) that will run the tests when a Pull Request is opened against the repository, or when code is pushed directly to the master branch.

    To create a GitHub workflow, we can create a file at .github/workflows/e2e-tests.yml.

    Then, we can add the following:

    name: End-to-End Tests
    
    on:
      pull_request:
      push:
        branches:
          - master
    
    jobs:
      admin:
        name: E2E Tests
        runs-on: ubuntu-latest
        strategy:
          fail-fast: false
          matrix:
            node: ['14']
    
        steps:
          - uses: actions/checkout@5a4ac9002d0be2fb38bd78e4b4dbde5606d7042f # v2.3.4
    
          - name: Setup environment to use the desired version of NodeJS
            uses: actions/setup-node@38d90ce44d5275ad62cc48384b3d8a58c500bb5f # v2.2.2
            with:
              node-version: ${{ matrix.node }}
              cache: npm
    
          - name: Installing NPM dependencies
            run: |
              npm install
    
          - name: Starting the WordPress Environment
            run: |
              npm run wp-env start
    
          - name: Running the tests
            run: |
              npm run test-e2e

    If you’ve never setup a GitHub workflow, this might look intimidating, but if you slow down to read it carefully, it’s pretty self-descriptive.

    The file gives the Worfklow a name “End-to-End Tests”.

    name: End-to-End Tests

    Then, it configures what GitHub actions the Workflow should be triggered by. We configure it to run “on” the “pull_request” and the “push” actions, if the push is to the “master” branch.

    on:
      pull_request:
      push:
        branches:
          - master

    Then, we define what jobs to run and set up the environment to us ubuntu-latest and node 14.

    jobs:
      admin:
        name: E2E Tests
        runs-on: ubuntu-latest
        strategy:
          fail-fast: false
          matrix:
            node: ['14']

    Then, we define the steps for the job.

    The first step is to “checkout” the codebase.

    - uses: actions/checkout@5a4ac9002d0be2fb38bd78e4b4dbde5606d7042f # v2.3.4

    Then, we setup Node JS using the specified version.

          - name: Setup environment to use the desired version of NodeJS
            uses: actions/setup-node@38d90ce44d5275ad62cc48384b3d8a58c500bb5f # v2.2.2
            with:
              node-version: ${{ matrix.node }}
              cache: npm

    Then, we install our NPM dependencies.

          - name: Installing NPM dependencies
            run: |
              npm install

    Then, we start the WordPress environment.

          - name: Starting the WordPress Environment
            run: |
              npm run wp-env start

    And last, we run the tests.

          - name: Running the tests
            run: |
              npm run test-e2e

    And now, with this in place, our tests will run (and pass!) in GitHub!

    You can see the passing test run here.

    Conclusion

    I hope this post helps you understand how to use the @wordpress/scripts and @wordpress/env packages, Jest, Puppeteer, and GitHub actions to test your WordPress plugins and themes.

    If you’re interested in content like this, please subscribe to the WPGraphQL YouTube Channel and follow WPGraphQL on Twitter!

    If you’ve never tried using GraphQL with WordPress, be sure to install and activate WPGraphQL as well!

  • Query any page by its path using WPGraphQL

    One of the most common ways WordPress is used, is by users visiting a URL of a WordPress site and reading the content on the page.

    WordPress has internal mechanisms that take the url from the request, determine what type of entity the user is requesting (a page, a blog post, a taxonomy term archive, an author’s page, etc) and then returns a specific template for that type of content.

    This is a convention that users experience daily on the web, and something developers use to deliver unique experiences for their website users.

    When you go “headless” with WordPress, and use something other than WordPress’s native theme layer to display the content, it can be tricky to determine how to take a url provided by a user and convert that into content to show your users.

    In this post, we’ll take a look at a powerful feature of WPGraphQL, the nodeByUri query, which accepts a uri input (the path to the resource) and will return the node (the WordPress entity) in response.

    You can use this to re-create the same experience WordPress theme layer provides, by returning unique templates based on the type of content being requested.

    WPGraphQL’s “nodeByUri” query

    One of the benefits of GraphQL is that it can provide entry points into the “graph” that (using Interfaces or Unions) can return different Types of data from one field.

    WPGraphQL provides a field at the root of the graph named nodeByUri. This field accepts one argument as input, a $uri. And it returns a node, of any Type that has a uri. This means any public entity in WordPress, such as published authors, archive pages, posts of a public post type, terms of a public taxonomy, etc.

    When a URI is input, this field resolves to the “node” (post, page, etc) that is associated with the URI, much like entering the URI in a web browser would resolve to that piece of content.

    If you’ve not already used the “nodeByUri” query, it might be difficult to understand just reading about it, so let’s take a look at this in action.

    Here’s a video where I walk through it, and below are some highlights of what I show in the video.

    Video showing how to use the nodeByUri query in WPGraphQL

    Writing the query

    Let’s start by querying the homepage.

    First, we’ll write our query:

    query GetNodeByUri($uri: String!) {
      nodeByUri(uri: $uri) {
        __typename
      }
    }

    In this query, we’re doing a few things.

    First, we give our query a name “GetNodeByUri”. This name can be anything we want, but it can be helpful with tooling, so it’s best practice to give your queries good names.

    Next, we define our variable input to accept: $uri: String!. This tells GraphQL that there will be one input that we don’t know about up front, but we agree that we will submit the input as a string.

    Next, we declare what field we want to access in the graph: nodeByUri( uri: $uri ). We’re telling WPGraphQL that we want to give it a URI, and in response, we want a node back.

    The nodeByUri field is defined in the Schema to return the GraphQL Type UniformResourceIdentifiable, which is a GraphQL Interface implemented by any Type in the Graph that can be accessed via a public uri.

    Screenshot of the nodeByUri field shown in GraphiQL

    If we inspect the documentation in GraphiQL for this type, we can see all of the available Types that can be returned.

    Screenshot of the UniformResourceIdentifiable GraphQL Interface in GraphiQL.

    The Types that can be returned consist of public Post Types, Public Taxonomies, ContentType (archives), MediaItem, and User (published authors are public).

    So, we know that any uri (path) that we query, we know what we can ask for and what to expect in response.

    Execute the query

    Now that we have the query written, we can use GraphiQL to execute the query.

    GraphiQL has a “variables” pane that we will use to input our variables. In this case, the “uri” (or path) to the resource is our variable.

    First, we will enter “/” as our uri value so we can test querying the home page.

    Screenshot of the “uri” variable entered in the GraphiQL Variables pane.

    Now, we can execute our query by pressing the “Play” button in GraphiQL.

    And in response we should see the following response:

    {
      "data": {
        "nodeByUri": {
          "__typename": "ContentType"
        }
      }
    }
    Screenshot of the nodeByUri query for the “/” uri.

    Expanding the query

    We can see that when we query for the home page, we’re getting a “ContentType” node in response.

    We can expand the query to ask for more fields of the “ContentType”.

    If we look at the home page of https://demo.wpgraphql.com, we will see that it serves as the “blogroll” or the blog index. It’s a list of blog posts.

    This is why WPGraphQL returns a “ContentType” node from the Graph.

    We can write a fragment on this Type to ask for fields we want when the query returns a “ContentType” node.

    If we look at the documentation in GraphiQL for the ContentType type, we can see all the fields that we can ask for.

    Screenshot of the ContentType documentation in GraphiQL

    If our goal is to re-create the homepage we’re seeing in WordPress, then we certainly don’t need all the fields! We can specify exactly what we need.

    In this case, we want to ask for the following fields:

    • name: the name of the content type
    • isFrontPage: whether the contentType should be considered the front page
    • contentNodes (and sub-fields): a connection to the contentNodes on the page

    This should give us enough information to re-create what we’re seeing on the homepage.

    Let’s update our query to the following:

    query GetNodeByUri($uri: String!) {
      nodeByUri(uri: $uri) {
        __typename
        ... on ContentType {
          name
          uri
          isFrontPage
          contentNodes {
            nodes {
              __typename
              ... on Post {
                id
                title
              }
            }
          }
        }
      }
    }
    

    And then execute the query again.

    We now see the following results:

    {
      "data": {
        "nodeByUri": {
          "__typename": "ContentType",
          "name": "post",
          "uri": "/",
          "isFrontPage": true,
          "contentNodes": {
            "nodes": [
              {
                "__typename": "Post",
                "id": "cG9zdDoxMDMx",
                "title": "Tiled Gallery"
              },
              {
                "__typename": "Post",
                "id": "cG9zdDoxMDI3",
                "title": "Twitter Embeds"
              },
              {
                "__typename": "Post",
                "id": "cG9zdDoxMDE2",
                "title": "Featured Image (Vertical)…yo"
              },
              {
                "__typename": "Post",
                "id": "cG9zdDoxMDEx",
                "title": "Featured Image (Horizontal)…yo"
              },
              {
                "__typename": "Post",
                "id": "cG9zdDoxMDAw",
                "title": "Nested And Mixed Lists"
              },
              {
                "__typename": "Post",
                "id": "cG9zdDo5OTY=",
                "title": "More Tag"
              },
              {
                "__typename": "Post",
                "id": "cG9zdDo5OTM=",
                "title": "Excerpt"
              },
              {
                "__typename": "Post",
                "id": "cG9zdDo5MTk=",
                "title": "Markup And Formatting"
              },
              {
                "__typename": "Post",
                "id": "cG9zdDo5MDM=",
                "title": "Image Alignment"
              },
              {
                "__typename": "Post",
                "id": "cG9zdDo4OTU=",
                "title": "Text Alignment"
              }
            ]
          }
        }
      }
    }

    If we compare these results from our GraphQL Query, we can see that we’re starting to get data that matches the homepage that WordPress is rendering.

    Screenshot of the homepage

    There’s more information on each post, such as:

    • post author
      • name
      • avatar url
    • post date
    • post content
    • uri (to link to the post with)

    We can update our query once more with this additional information.

    query GetNodeByUri($uri: String!) {
      nodeByUri(uri: $uri) {
        __typename
        ... on ContentType {
          name
          uri
          isFrontPage
          contentNodes {
            nodes {
              __typename
              ... on Post {
                id
                title
                author {
                  node {
                    name
                    avatar {
                      url
                    }
                  }
                }
                date
                content
                uri
              }
            }
          }
        }
      }
    }

    Breaking into Fragments

    The query is now getting us all the information we need, but it’s starting to get a bit long.

    We can use a feature of GraphQL called Fragments to break this into smaller pieces.

    I’ve broken the query into several Fragments:

    query GetNodeByUri($uri: String!) {
      nodeByUri(uri: $uri) {
        __typename
        ...ContentType
      }
    }
    
    fragment ContentType on ContentType {
      name
      uri
      isFrontPage
      contentNodes {
        nodes {
          ...Post
        }
      }
    }
    
    fragment Post on Post {
      __typename
      id
      date
      uri
      content
      title
      ...Author
    }
    
    fragment Author on NodeWithAuthor {
      author {
        node {
          name
          avatar {
            url
          }
        }
      }
    }
    

    Fragments allow us to break the query into smaller pieces, and the fragments can ultimately be coupled with their components that need the data being asked for in the fragment.

    Here, I’ve created 3 named fragments:

    • ContentType
    • Post
    • Author

    And then we’ve reduced the nodeByUri field to only ask for 2 fields:

    • __typename
    • uri

    The primary responsibility of the nodeByUri field is to get the node and return it to us with the __typename of the node.

    The ContentType fragment is now responsible for declaring what is important if the node is of the ContentType type.

    The responsibility of this Fragment is to get some details about the type, then get the content nodes (posts) associated with it. It’s not concerned with the details of the post, though, so that becomes another fragment.

    The Post fragment defines the fields needed to render each post, then uses one last Author fragment to get the details of the post author.

    We can execute this query, and get all the data we need to re-create the homepage!! (sidebar widgets not included)

    Querying a Page

    Now, we can expand our query to account for different types.

    If we enter the /about path into our “uri” variable, and execute the same query, we will get this payload:

    {
      "data": {
        "nodeByUri": {
          "__typename": "Page"
        }
      }
    }
    Screenshot of initial query for the “/about” uri

    We’re only getting the __typename field in response, because we’ve told GraphQL to only return data ...on ContentType and since the node was not of the ContentType type, we’re not getting any data.

    Writing the fragment

    So now, we can write a fragment to ask for the specific information we need if the type is a Page.

    fragment Page on Page {
      title
      content
      commentCount
      comments {
        nodes {
          id
          content
          date
          author {
            node {
              id
              name
              ... on User {
                avatar {
                  url
                }
              }
            }
          }
        }
      }
    }

    And we can work that into the `nodeByUri` query like so:

    query GetNodeByUri($uri: String!) {
      nodeByUri(uri: $uri) {
        __typename
        ...ContentType
        ...Page
      }
    }

    So our full query document becomes (and we could break the comments of the page into fragments as well, too):

    query GetNodeByUri($uri: String!) {
      nodeByUri(uri: $uri) {
        __typename
        ...ContentType
        ...Page
      }
    }
    
    fragment Page on Page {
      title
      content
      commentCount
      comments {
        nodes {
          id
          content
          date
          author {
            node {
              id
              name
              ... on User {
                avatar {
                  url
                }
              }
            }
          }
        }
      }
    }
    
    fragment ContentType on ContentType {
      name
      uri
      isFrontPage
      contentNodes {
        nodes {
          ...Post
        }
      }
    }
    
    fragment Post on Post {
      __typename
      id
      date
      uri
      content
      title
      ...Author
    }
    
    fragment Author on NodeWithAuthor {
      author {
        node {
          name
          avatar {
            url
          }
        }
      }
    }
    

    And when we execute the query for the “/about” page now, we are getting enough information again, to reproduce the page that WordPress renders:

    {
      "data": {
        "nodeByUri": {
          "__typename": "Page",
          "title": "About",
          "content": "

    WP Test is a fantastically exhaustive set of test data to measure the integrity of your plugins and themes.

    \n

    The foundation of these tests are derived from WordPress’ Theme Unit Test Codex data. It’s paired with lessons learned from over three years of theme and plugin support, and baffling corner cases, to create a potent cocktail of simulated, quirky user content.

    \n

    The word “comprehensive” was purposely left off this description. It’s not. There will always be something new squarely scenario to test. That’s where you come in. Let us know of a test we’re not covering. We’d love to squash it.

    \n

    Let’s make WordPress testing easier and resilient together.

    \n", "commentCount": 1, "comments": { "nodes": [ { "id": "Y29tbWVudDo1NjUy", "content": "

    Test comment

    \n", "date": "2021-12-22 12:07:54", "author": { "node": { "id": "dXNlcjoy", "name": "wpgraphqldemo", "avatar": { "url": "https://secure.gravatar.com/avatar/94bf4ea789246f76c48bcf8509bcf01e?s=96&d=mm&r=g" } } } } ] } } } }

    Querying a Category Archive

    We’ve looked at querying the home page and a regular page, so now let’s look at querying a category archive page.

    If we navigate to https://demo.wpgraphql.com/category/alignment/, we’ll see that it’s the archive page for the “Alignment” category. It displays posts of the category.

    Screenshot of the Alignment category page rendered by WordPress

    If we add “/category/alignment” as our variable input to the query, we’ll now get the following response:

    {
      "data": {
        "nodeByUri": {
          "__typename": "Category"
        }
      }
    }
    Screenshot of querying the “alignment” category in GraphiQL

    So now we can write our fragment for what data we want returned when the response type is “Category”:

    Looking at the template we want to re-create, we know we need to ask for:

    • Category Name
    • Category Description
    • Posts of that category
      • title
      • content
      • author
        • name
        • avatar url
      • categories
        • name
        • uri

    So we can write a fragment like so:

    fragment Category on Category {
      name
      description
      posts {
        nodes {
          id
          title
          content
          author {
            node {
              name
              avatar {
                url
              }
            }
          }
          categories {
            nodes {
              name
              uri
            }
          }
        }
      }
    }

    And now our full query document looks like so:

    query GetNodeByUri($uri: String!) {
      nodeByUri(uri: $uri) {
        __typename
        ...ContentType
        ...Page
        ...Category
      }
    }
    
    fragment Category on Category {
      name
      description
      posts {
        nodes {
          id
          title
          content
          author {
            node {
              name
              avatar {
                url
              }
            }
          }
          categories {
            nodes {
              name
              uri
            }
          }
        }
      }
    }
    
    fragment Page on Page {
      title
      content
      commentCount
      comments {
        nodes {
          id
          content
          date
          author {
            node {
              id
              name
              ... on User {
                avatar {
                  url
                }
              }
            }
          }
        }
      }
    }
    
    fragment ContentType on ContentType {
      name
      uri
      isFrontPage
      contentNodes {
        nodes {
          ...Post
        }
      }
    }
    
    fragment Post on Post {
      __typename
      id
      date
      uri
      content
      title
      ...Author
    }
    
    fragment Author on NodeWithAuthor {
      author {
        node {
          name
          avatar {
            url
          }
        }
      }
    }

    And when I execute the query for the category, I get all the data I need to create the category archive page.

    Amazing!

    Any Type that can be returned by the nodeByUri field can be turned into a fragment, which can then be coupled with the Component that will render the data.

  • Building a Bookstore using WordPress, WPGraphQL and Atlas Content Modeler

    In this post, we’ll look at how we can create a simple Book Store using WordPress, WPGraphQL and Atlas Content Modeler, a new plugin from WP Engine that allows Custom Post Types, Custom Taxonomies and Custom Fields to be created in the WordPress dashboard and allows the data to be accessed from WPGraphQL.

    By the end of this tutorial, you should be able to manage a list of Books, each with a Title, Price and Description field and a connection to an Author.

    Then, you should be able to query the data using the GraphiQL IDE in the WordPress dashboard provided by WPGraphQL.

    Pre-requisites

    In order to follow this tutorial, you will need a WordPress install with WPGraphQL and Atlas Content Modeler installed and activated. This tutorial will not cover setting up the environment, so refer to each project’s installation instructions to get set up.

    The WordPress environment I’m using has only 2 plugins installed and activated:

    • WPGraphQL v 1.6.3
    • Atlas Content Modeler v 0.5.0
    Screenshot of the WordPress dashboard’s plugin page showing WPGraphQL and Atlas Content Modeler activated

    Creating a Book Model with Atlas Content Modeler

    Since the goal is to have a Book Store, we’re going to want to get a new Book model (custom post type) set up using Atlas Content Modeler.

    If Atlas Content Modeler has not yet been used in the WordPress install, clicking the "Content Modeler" Menu item in the Dashboard menu will open a “Getting Started” page, where we can create a new Content Model.

    Screenshot of the Atlas Content Modeler getting started page

    After clicking the “Get Started” button, and I’m presented with a form to create a new Content Model.

    Screenshot of the “New Content Model” form in Atlas Content Modeler

    There are 6 fields to fill in to create a new model, and I used the following values:

    • Singular Name: Book
    • Plural Name: Books
    • Model ID: book
    • API Visibility: Public
    • Model Icon: I searched for a book and selected it
    • Description: A collection of books
    Screenshot of the ACM “New Content Model” form filled in

    Clicking “Create” will add the “Book” Content Model to WordPress.

    We’ll see the “Books” Type show in the Admin Menu:

    And we’ll be presented with a new form where we can start adding Fields to the “Book” Content Model.

    For books in our bookstore, we’ll want the following fields:

    • Title (text)
    • Price (number)
    • Description (rich text)

    We can add these fields by selecting the field type we want to add, then filling in the details:

    Add the Title field

    To add the Title field, I selected the “Text” field type, and filled in the form:

    • Field Type: Text
    • Name: Title
    • API Identifier: title
    • Make this field required: checked
    • Use this field as Entry Title: checked
    • Input Type: Single Line
    Screenshot of adding the “Title” field to the Book Content Model

    After clicking create, I’m taken back to the Model screen where I can add more fields:

    Add the Price field

    Clicking the “plus” icon below the title field allows me to add a new field.

    For the Price field I configured as follows:

    • Field Type: Number
    • Name: Price
    • API Identifier: price
    • Required: checked
    • Number Type: decimal

    Add the Description field

    Next, we’ll add a Description field.

    Following the same steps above, we’ll click the Plus icon and add a new field configured like so:

    • Field Type: Rich Text
    • Name: Description
    • API Identifier: description
    Screenshot of the “Description” field being added by ACM

    Adding Books to our Bookstore

    Now that we’ve created a “Books” content model, we can begin adding Books to our bookstore.

    We can click “Books > Add New” from the Admin menu in our WordPress dashboard, and we’ll be taken to a screen to add a new book.

    The fields we created are ready to be filled in.

    You can fill in whatever values you like, but I’ve filled in mine as:

    • Title: Atlas Content Modeler Rocks!
    • Price: 0.00
    • Description: A priceless book about building content models in WordPress.
    Screenshot of a Book content being populated

    Book Authors

    Before we get too far adding more books, we probably want to add support for adding an “Author” to each book.

    While we could add a Text field named Author to the Book Model, that could lead to mistakes. Each book would have to type the Author over and over, and if the Author’s name changed, each book would have to be updated, etc.

    It would be better to add the Author as it’s own entity, and create connections between the Author and the Book(s) that the Author has written.

    Adding the Author Taxonomy

    In order to connect Authors to Books, we’re going to use Atlas Content Modeler to create an Author Taxonomy.

    In the WordPress Admin menu, we can click “Content Modeler > Taxonomies” and we’ll be greeted by a form to fill out to add a new Taxonomy.

    We’ll fill out the following values:

    • Singular Name: Author
    • Plural Name: Authors
    • Taxonomy ID: author
    • Models: Books
    • Hierarchical: unchecked (not-hierarchical as authors should not have parent/child authors)
    • API Visibility: Public

    Once created, we’ll see the Author Taxonomy is now associated with the “book” model.

    And we can also see this relationship in the Admin Menu:

    And in the “Books” list view, we can also see the “Authors” listed for each book.

    Adding an Author

    Of course, we don’t have any Authors yet.

    Let’s add an Author to our new Author Taxonomy.

    In the Admin Menu we can click “Books > Authors” and add a new Author.

    I’ll give our author the name “Peter Parker” simply because my son is watching Spiderman as I type this ????‍♂️.

    And I added this description as Peter’s bio:

    Peter Parker is an author of books about Atlas Content Modeler, and also a member of the Avengers.

    Assign an Author to our Book

    Now that we have Peter Parker added as an Author, we can assign Peter as the author of our book.

    If we navigate back to “Books > All Books” and click “Edit” on the book we created, we’ll now see an “Authors” panel where we can make the connection from our Book to Peter Parker, the author.

    If we add Peter Parker as the author, then click “Update” on the book, then navigate back to “Books > All Books” we can now see Peter listed as the author of the book.

    Adding more Books

    Now that we have our Book Model and Author Taxonomy all set up, let’s add a few more Books and Authors. Feel free to input whatever content you like.


    I added one more Author: “Tony Stark”:


    And 3 more books:

    • Marvel’s Guide to Headless WordPress
    • WordPress, a Super CMS
    • WPGraphQL: The Super Powered API you’ve been waiting for

    Querying the Books with WPGraphQL

    Now that we’ve created our Book Content Model and Author Taxonomy with Atlas Content Modeler, and populated some data, it’s now time to look at how we can interact with this data using WPGraphQL.

    In the WordPress Admin, we’ll navigate to “GraphQL > GraphiQL IDE” and start exploring the GraphQL Schema.

    Exploring the GraphQL Schema

    In the top right, is a “Docs” button. Clicking this opens the GraphQL Schema documentation.

    We can search “book” and see how our Book content model shows in the Schema in various ways.

    Additionally, we can click the “Explorer” button to open up a panel on the left side which we can use to compose queries.

    Using the “Explorer” we can find the “books” field, and start building a query:

    We can also start typing in the Query pane, and get type-ahead hints to help us compose our query:

    The final query I ended up with was:

    query GetBooks {
      books {
        nodes {
          databaseId
          id
          price
          title
          description
          authors {
            nodes {
              name
            }
          }
        }
      }
    }

    And the data that was returned was:

    {
      "data": {
        "books": {
          "nodes": 
            {
              "databaseId": 9,
              "id": "cG9zdDo5",
              "price": 25.99,
              "title": "WPGraphQL: The Super Powered API you've been waiting for",
              "description": "Learn how to use WordPress data in new ways, using GraphQL!",
              "authors": {
                "nodes":
                  {
                    "name": "Tony Stark"
                  }
                ]
              }
            },
            {
              "databaseId": 8,
              "id": "cG9zdDo4",
              "price": 12.99,
              "title": "WordPress, a Super CMS",
              "description": "Learn all the super powers of the world's most popular CMS.",
              "authors": {
                "nodes":
                  {
                    "name": "Peter Parker"
                  }
                ]
              }
            },
            {
              "databaseId": 7,
              "id": "cG9zdDo3",
              "price": 9.99,
              "title": "Marvel's Guide to Headless WordPress",
              "description": "How to develop headless WordPress sites like a Superhero.",
              "authors": {
                "nodes": 
                  {
                    "name": "Tony Stark"
                  }
                ]
              }
            },
            {
              "databaseId": 5,
              "id": "cG9zdDo1",
              "price": 0,
              "title": "Atlas Content Modeler Rocks!",
              "description": "A priceless book about building content models in WordPress.",
              "authors": {
                "nodes":
                  {
                    "name": "Peter Parker"
                  }
                ]
              }
            }
          ]
        }
      }
    }

    Conclusion

    We’ve just explored how to build a basic Bookstore using WordPress, WPGraphQL and Atlas Content Modeler.

    Without writing a line of code, we’ve added a Book model with an Author Taxonomy, and populated our bookstore with Books and Authors and created relationships between them.

    Then, we used WPGraphQL to query data in the GraphiQL IDE.

    Now that you can access the data via GraphQL, it’s up to you to build something with your favorite front-end technology. Whether you prefer React with Gatsby or NextJS, or Vue, or something else, the data in WordPress is now free for you to use as you please!

  • Getting started with WPGraphQL and Gridsome

    This is a guest post by @nicolaisimonsen

    Gridsome is a Vue.js framework for building static generated sites/apps. It’s performant, powerful, yet simple and really faaaaast. Gridsome can pull in data from all sorts of data-sources like CMSs, APIs, Markdown etc. It has a lot of features. Go check ’em out.

    Since GraphQL is so efficient and great to work with it makes sense to fetch our WordPress data in that manner. That’s obviously where WPGraphQL comes into the picture and I think it’s a match made in heaven. ????

    If you’re up for it, below is a quick-start tutorial that will guide you through building your first WPGraphQL-Gridsome app.

    I know I’m stoked about it!

    What we will be building

    We’ll go ahead and build a small personal site in Gridsome. Basically just a blog. The blog posts will be fetched from WordPress via WPGraphQL.

    This project is very minimal, lightweight and this project alone might not blow your socks off, but it’s foundational and a great start to get into headless WordPress with Gridsome.

    Setup a WordPress install

    First off is to install WordPress.

    I highly recommend Local for setting up WordPress locally. It handles everything from server setup and configuration to installing WordPress.

    You can also use MAMP/WAMP/LAMP or however else you like to do it. It’s all good.

    With WordPress spun up and ready to go, we want to install and activate our one and only plugin. WPGraphQL.

    Now go to WPGraphQL > Settings and tick “Enable Public Introspection“.

    That’s it. We are now cooking with GraphQL ????????????

    Included with WPGraphQL is the IDE tool which is awesome for building/testing out queries directly in WordPress.
    It might be a good idea to play around in here for a few minutes before we move along.

    Aaaaaaand we’re back. Last thing we need to do is just to add a new post. Add a title, add some content and press publish.

    Great. You’re golden. Onwards to some coding!

    Gridsome? Let’s go!

    I’m including a WPGraphQL-Gridsome starter (well, actually two).

    I highly recommend cloning the stripped version – this will only include styles and html, so we can hit the ground running.

    However, you can also just start from scratch.

    Either way I got you.

    If you just want the full code, that’s completely fine too.


    Let’s go ahead an open our terminal/console.

    The very first thing is to install the Gridsome CLI

    npm install --global @gridsome/cli

    Navigate to your desired project folder and type in

    gridsome create my-personal-site https://github.com/nicolaisimonsen/wpgraphql-gridsome-starter-stripped.git

    or if you’re starting from scratch

    gridsome create my-personal-site

    Now move into the project directory – then start the local develoment

    cd my-personal-site
    gridsome develop

    In our code editor we should have the following:

    We’re now exactly where we want to be. From here we need to pull in WPGraphQL to Gridsome as our data-source. For that we’ll be using this gridsome source plugin. Go ahead and install it.

    npm install gridsome-source-graphql

    The source plugin needs to be configured.
    Open up gridsome.config.js and provide the following object for the plugins array.

    //gridsome.config.js
    module.exports = {
    //
      plugins: [
        {
          use: 'gridsome-source-graphql',
          options: {
            url: 'http://{your-site}/graphql',
            typeName: 'WPGraphQL',
            fieldName: 'wpgraphql',
          },
        },
      ],
    //
    }

    Remember the options.url is the site url + graphql endpoint.
    (Can be found in WordPress under WPGraphQL > Settings > GraphQL endpoint)

    For every change to gridsome.config.js or gridsome.server.js, we need to restart the app. You can type ctrl + c to exit the gridsome develop process and run gridsome develop again to restart.

    Now you can test the new GraphQL data-source in Gridsome Playground/IDE – located at http://localhost:8080/___graphql
    Write out the following query and hit the execute button (▶︎):

    query {
      posts {
        edges {
          node {
            id
            uri
          }
        }
      }
    }

    There you have it. On the right side you should see your posts data.

    That data could prove to be mighty useful, huh?

    We’ll start setting up a Gridsome template for our posts.

    Within the “src” folder there’s a folder called “templates”.

    A template is used to create a single page/route in a given collection (think posts). Go to/create a file within “templates” folder called Post.vue.

    /src/templates/Post.vue

    In order to query the data from the GraphQL data layer into our templates we can use the following blocks;

    <page-query> for pages/templates, requires id.
    <static-query> for components.

    In the Post.vue template we are fetching a specific post (by id – more on that later), so we’ll write the following <page-query> in between the <template> and <script> blocks:

    Also – change console.log(this) to console.log(this.$page).

    Important – we’ve only laid the groundwork for our template. It won’t actually fetch the data yet, since the route/page and id (dynamically) haven’t been created. The step needed is the Pages API and that’s where we are heading right now.

    Open up gridsome.server.js and provide the following.
    (Remember to restart afterwards)

    // gridsome.server.js
    module.exports = function(api) {
      api.loadSource(({ addCollection }) => {
        // Use the Data Store API here: https://gridsome.org/docs/data-store-api/
      });
    
      api.createPages(async ({ graphql, createPage }) => {
        const { data } = await graphql(`
          
            query {
              posts {
                edges {
                  node {
                    id
                    uri
                  }
                }
              }
            }
          
        `);
    
        data.posts.edges.forEach(({ node, id }) => {
          createPage({
            path: `${node.uri}`,
            component: "./src/templates/Post.vue",
            context: {
              id: node.id,
            },
          });
        });
      });
    };

    Remember the Gridsome Playground query?

    Basically the api.createPages hook goes into the data layer fetched from WPGraphQL and queries the posts (the exact query we ran in Playground) and then loops through the collection to create single page/routes. We’ll provide a path/url for the route, a component which is the Post.vue template and lastly and context.id of the post/node id.

    Magic happened when running “gridsome develop” and now we have routes (got routes?). These can be found in src/.temp/routes.js.

    Try accessing the very first Post route in the browser – localhost:8080/{path} and open up the inspection tool to get the console.

    Because of the console.log(this.$page) in the mounted() hook of our Post.vue – the post data from WordPress is now being written out in the console.

    With this specific data now being available we just need to bind it to the actual template, so we can finally get the HTML and post displayed. Replace the current <article> block with the following:

    Refresh the page.

    Well, ain’t that a sight for sore eyes. Our blog posts are finally up.

    Even though we’re not quite done yet this is awesome. Good job!

    Now. We have posts and that’s really great for a blog, but our visitors might need a way to navigate to these.
    Let’s set up a page called “blog” to list all of our blog posts.

    There’s a folder with “src” called “pages” and this is a great way to setup single pages/routes non-programmatically.
    Basically we just put a file with the .vue extension in there and we now have a singe page for that particular route and only that route. Even if we did set up a Page.vue template within “templates”, the Blog.vue file in the “pages” folder would still supercede. Sweet!

    But why would you do that? Well, simple and fast is not always a sin. We also really don’t need to maintain a page in WordPress that only list out blog posts and the content is not really changing. However, just know that we could create a Page.vue template if we choose to, and obviously it would include our blog page.

    In our new Blog.vue file in “pages” folder insert this <static-query>
    in between the <template> and <script> blocks:

    So we want to fetch all the posts to display on our blog page and that’s why we’re writing a static query. There’s no page template/Wordpress data for this page and so even if we wrote out a <page-query> (like in Post.vue) it would return null. nothing. nada. nichego.
    Change the console.log(this) to console.log(this.$static) and open up our blog page in the browser. Also open the inspection tool and look at the console.

    Awesome. Our static-query ($static) has returned an object with an array of 2 posts. We now have the data, so let’s display it on the page.

    Replace the <script> block with the following:

    This adds a getDate function that we will be using in our Template.

    Now, replace the <template> block with the following:

    Voila! Go check out the page in the browser.

    We are now displaying our posts or rather an excerpt of these with a button to take us to the actual post. That’s wild! Again, good job.

    That pretty much concludes the tutorial. You’ve created a personal site with a blog in Gridsome using WordPress & WPGraphQL.

    Build. Deployment. Live.

    The last thing to this build is to actually use the command ‘build’.

    Go to the terminal/console and execute:

    gridsome build

    Gridsome is now generating static files and upon completion you’ll find the newly created “dist” folder and all of the files and assets.

    That’s the site and all of the data from WordPress in a folder that you can actually just drop onto a FTP server and you have a live site.

    However a more dynamic and modern way of doing static deployment is to use a static web host and build from a git repository.

    There’s lots of hosts out there. I absolutely love and recommend Netlify, but others include Vercel, Amplify, Surge.sh.

    The links above should take you to some guides of how exactly to deploy using their services.

    It would also be pretty cool if we could trigger a build whenever a post is created/updated/deleted in WordPress. Otherwise we could have to manually build from time to time retrieve the latest data from WordPress. Luckily plugins like JAMstack Deployments help us in that regard. It takes in a build hook url from a static web host and hits that each time WordPress does its operations. I would suggest you to try it out.

    I won’t go into deployment in further details, but just wanted to let you in on some of the options for deploying a static site. I’m quite sure can take it from here.

    Where to go from here?

    Obviously deployment – taking this site live should be one of the next steps, but we might also want to enhance the project.
    I’ve listed some possible improvements, which could also just serve as great practice ↓

    Further improvements might be; 

    * A word about extensions – WPGraphQL can be extended to integrate with other WordPress plugins.
    Advanced Custom Fields is a great plugin used by so many to enrich the content and structure of a WordPress site. There’s an WPGraphQL extension for it (and other great plugins too) and these are maintained by some awesome community contributors. Gridsome also has a badass community and a lot of plugins to get you started.

    It’s almost too good to be true ????

    Wrap it up already

    So that’s basically it. Thanks for reading and coding along.

    I definitely encourage you to go further read the documentation on both Gridsome and WPGraphQL. It’s very well written and has examples that will help you no matter what you might build.

    Lastly, if you need to get in touch I’ll try to help you out the best I can.
    Very lastly, if this was of any use to you, or maybe you just hated it – go ahead and let me know.

    @nicolaisimonsen

  • Setting up a new developer environment to contribute to WPGraphQL

    I just announced that I am now employed by WP Engine to work on WPGraphQL.

    With new employment comes a new Macbook, which I need to setup as a dev machine to continue working on WPGraphQL.

    It’s always a tedious process to get a new computer setup to be an effective developer, so I thought I’d record all the steps I take, as I take them, and hopefully provide some help to others.

    Local WordPress Environment

    One of the first things I need to do to work on WPGraphQL, is have a local WordPress environment.

    For the past 3 years or so, my preferred ways to setup WordPress locally is to use Local, a desktop application that makes it easy to setup WordPress sites with a few button clicks.

    I enjoy Local so much, I even picked it as my “Sick Pick” on the Syntax.fm episode about WordPress and GraphQL!

    When working locally, I usually have a number of different WordPress sites with different environments. For example, I have a site that I use locally to test WPGraphQL with WPGraphQL for Advanced Custom Fields, and another environment where I test things with WPGraphQL and WPGraphQL for WooCommerce. Having different sites allows me to separate concerns and test different situations in isolation.

    However, the constant is WPGraphQL. I want to be able to use the same version of WPGraphQL, that I’m actively making changes to, in both environments.

    This is where symlinking comes in.

    In the command line, I navigate to my local site’s plugins directory. For me, it’s at /Users/jason.bahl/Local Sites/wpgraphql/app/public/wp-content/plugins

    Then, with the following command, I symlink WPGraphQL to the Local WordPress site: ln -s /Users/jason.bahl/Sites/libs/wp-graphql

    This allows me to keep WPGraphQL cloned in one directory on my machine, but use it as an active plugin on many Local WordPress sites. As I create more sites using Local, I follow this same step, and repeat for additional plugins, such as WPGatsby or WPGraphQL for Advanced Custom Fields.

    XDebug for PHPStorm Extension

    PHPStorm is my IDE of choice, and Local provides an extension that makes it easy to get PHPStorm configured to work with XDebug. I recommend this extension if you use Local and PHPStorm.

    TablePlus Extension

    I used to use SequelPro, but have been transitioning to use TablePlus, and Local has a community extension that opens Local databases in TablePlus.

    PHPStorm

    For as long as I’ve been working on WPGraphQL, PHPStorm has been my IDE of choice. I won’t get into the weeds, and you are free to use other IDEs / Code Editors, but I find that PHPStorm makes my day to day work easier.

    Pro tip: To save time configuring the IDE, export the settings from from PHPStorm on your old machine and import them on your new machine.

    SourceTree

    SourceTree is a free GUI tool for working with code versioned with Git. While Git is often used in the command line, sometimes I like to click buttons instead of write commands to accomplish tasks. I also find it super helpful to visualize Git trees to see the status of various branches, etc. I find the code diffs easier to read in SourceTree than in the command line too, although I like Github’s UI for code diffs the best.

    In any case, I use SourceTree daily. I think it’s fantastic, and you can’t beat the price!

    Note: If you try using SourceTree before using Git in the command line, it might fail. This is because you need to add github.com (or whatever git host you use) to your ssh known hosts. You can read more about this here.

    MySQL

    Local sets up MySQL for each site, but for running Codeception tests for WPGraphQL, I like to have a general MySQL install unassociated with any specific Local site that I can configure for Codeception to use.

    I download and install MySQL v5.7.26 for macOS here.

    I then ensured that I updated my .zshrc file to include this export, as described here, to ensure the mysqld command will work.

    TablePlus

    I used to use SequelPro, but it’s been deprecated, so I’ve begun using TablePlus. You can download it here.

    Docker Desktop

    WPGraphQL ships with a Docker environment that developers can spin up locally, and the tests also have a Docker environment so they can be run in isolation.

    In order to spin up the local Docker environment or run tests with Docker, Docker Desktop needs to be installed and logged into.

    Homebrew

    Homebrew is a package manager for MacOS (or Linux). It makes it easy to install packages that are useful for development on a Mac.

    I used Homebrew to install the below packages.

    Command Line Tools for XCode

    This is something I seem to forget almost any time I setup a new Mac. When trying to install things from the command line, I’m always prompted to install Command Line Tools for Xcode and agree to their licensing. For me, as I was installing Homebrew, I was prompted to Download and Install this. If you want to install it separately, follow these instructions.

    Git

    Since WPGraphQL is maintained on Github, Git is essential to my daily work.

    With Homebrew installed, I use it to install Git, which is a free and open source distributed version control system designed to handle everything from small to very large projects with speed and efficiency.

    Having git installed locally allows me to clone repositories from Github to my local machine, make commits to code, and push code back up to Github.

    In order to use Git with 2-Factor Authentication enabled, I also had to get SSH keys setup for Github.

    Composer

    Composer is a PHP package manager. WPGraphQL uses Composer for test dependencies, so it’s important to have Composer installed in order to run tests. I used the command brew install composer to install Composer.

    Note: I also had to make sure I was running a version of PHP that the zip module, so I followed these steps to get that working.

    Node & NVM

    Since I do a lot of work with JavaScript applications, such as Gatsby and the WP Engine Headless Framework, having Node installed locally is a must, and having nvm (Node Version Manager) to allow switching Node versions quickly is very helpful.

    I followed this guide to get Node and NVM installed using Homebrew.

    Time to contribute!

    Now that I have my local environment setup and all my regular tools, I’m ready to contribute to WPGraphQL again!