WPGraphQL v1.12.0 introduces new options for customizing how Post Types and Taxonomies are exposed to the WPGraphQL Schema. The goal of this post is to show how to use some of these options in action. You can read this post for an overview of all the options, or check out the release..
To do that, we’re going to explore a few approaches to solving the same problem.
Imagine that we’re working on a project for a restaurant that sells food. More specifically, they only sell Pizza and Cake.
The restaurant needs to be able to enter the different types of pizza and cake they have available.
For simplicity sake, we’ve determined that each all food has some properties, but each type of food also has unique properties.
All cake is food, but not all food is cake. All pizza is food, but not all food is pizza.
- All food: has a title and a price
- Pizza: has toppings.
- Cake: has frosting color.
The goal of this exercise is to configure WordPress to be able to maintain this data in the CMS, and expose it in the WPGraphQL API.
We would like to be able to query for a list of food, asking for the common fields like “title” and “price”, but also specifying the unique fields, such as “frostingColor” for cake and “toppings” for pizza.
We want to be able to execute the following GraphQL Query:
query GetFood {
  allFood {
    nodes {
      __typename
      id
      title
      price
      ...on Cake {
        frostingColor
      }
      ...on Pizza {
        toppings
      }
    }
  }
}
And in response, we’d like to get data like so:
{
  "data": {
    "foods": {
      "nodes": [
        {
          "__typename": "Cake",
          "title": "Cake",
          "price": "$15.99",
          "frostingColor": "white"
        },
        {
          "__typename": "Pizza",
          "title": "Pepperoni Pizza",
          "price": "$10.99",
          "toppings": [
            "pepperoni",
            "sauce",
            "cheese",
            "jalapenos"
          ]
        }
      ]
    }
  }
}
There are probably many ways we could achieve this.
In this post, I’ll show 2 different ways.
- Scenario 1: One “food” post type that stores both cake and pizza
- Scenario 2: Two different post types for “Cake” and “Pizza”
In both scenarios, the query above should work. We should be able to query a list of food, asking for common fields, and also asking for unique fields for Pizza and Cake.
Neither of these options is the “right” one. This is a simple example missing a lot of nuanced details that you would likely have in a real project. The goal of this post is not to prescribe some type of optimal information architecture using WordPress post types, the goal is to show the flexibility and options for exposing WordPress data to the WPGraphQL API.
Let’s dive in.
Scenario 1: One “food” post type
In this scenario, we’ve decided to register a “food” post type where we can enter data for different food items.
Register the Post Type
To get started we will register the post type (without thinking too much about WPGraphQL).
add_action( 'init', function() {

  $args = [
    'public' => true,
    'label' => 'Food',
    'supports' => [ 'title', 'editor', 'custom-fields' ]
  ];

  register_post_type( 'food', $args );

} );
Here we’ve registered a public “food” post type with support for title, editor and custom fields.
At this point, we should have a Post Type in WordPress where we can start entering our Cakes and Pizzas into the CMS.
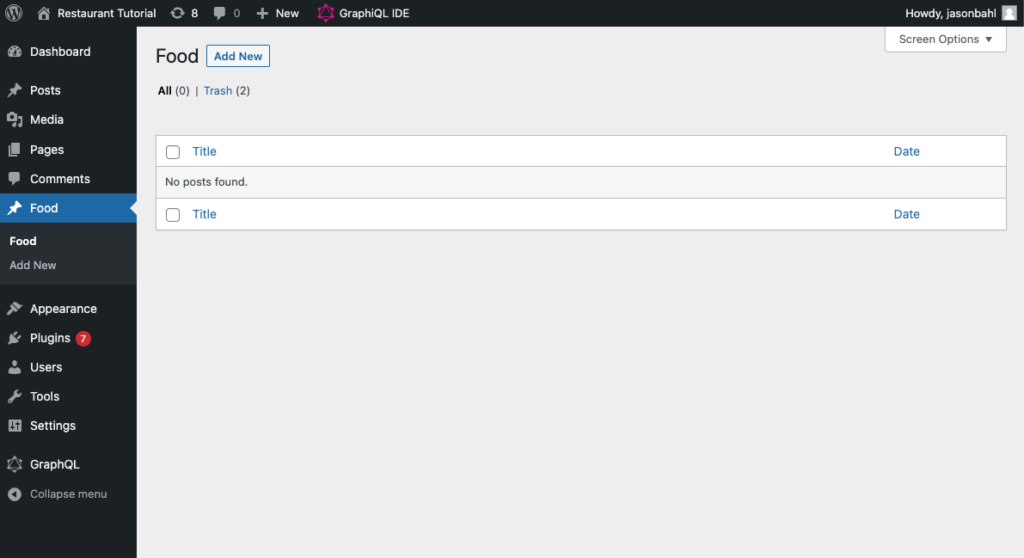
Add some pizza and cake
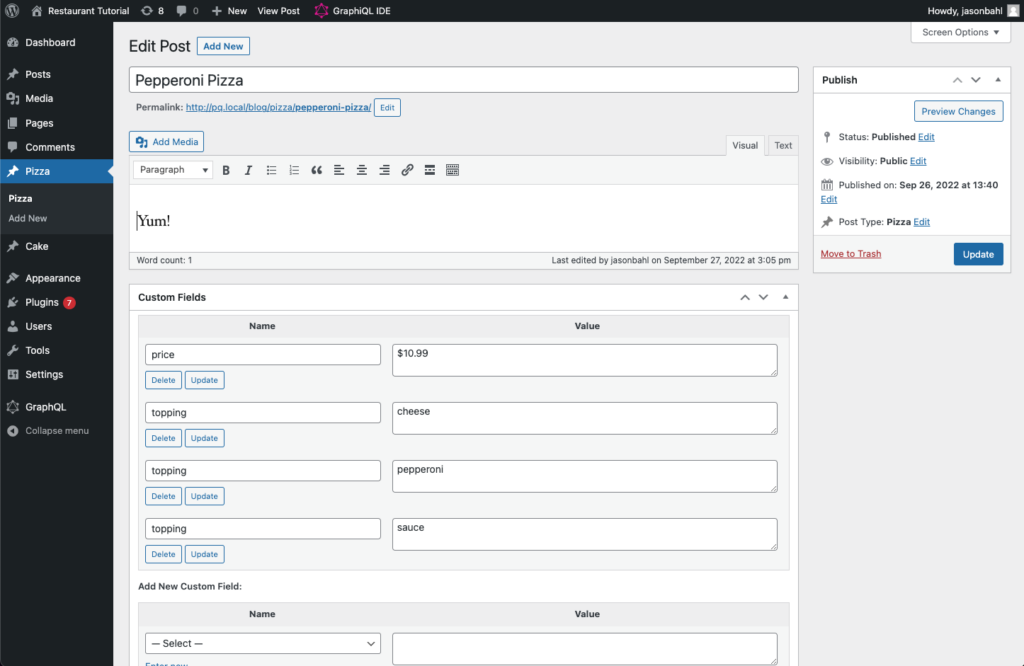
Click “Add new” and enter the following:
- Title: Pepperoni Pizza
- Description: Yum!
- Custom Fields:
- food_type: pizza
- price: $10.99
- topping: cheese
- topping: pepperoni
- topping: sauce
The pizza should look like so:
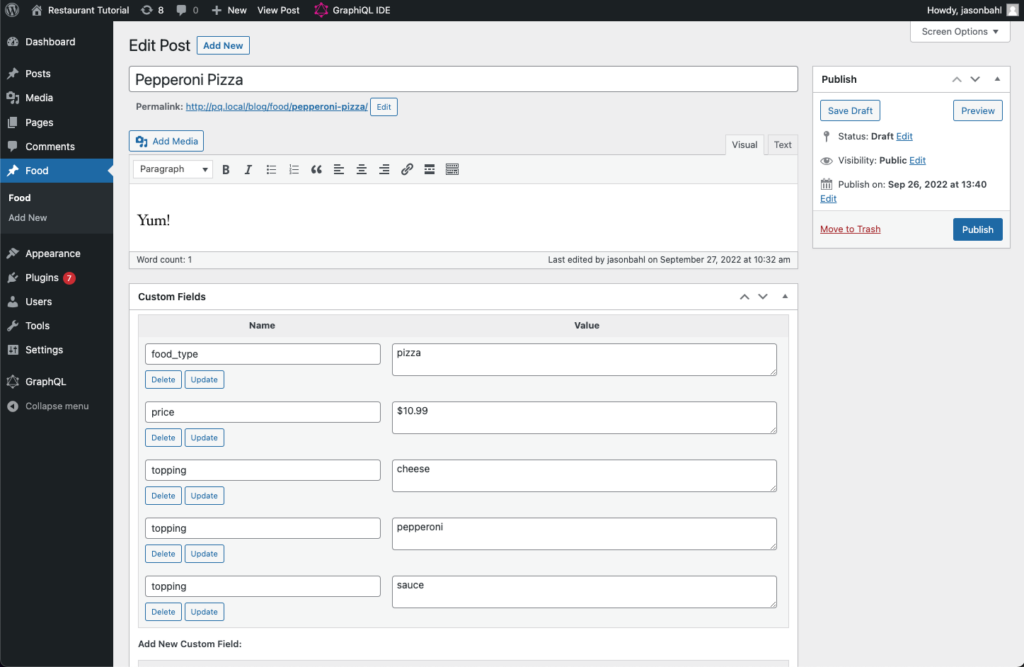
NOTE: For simplicity sake, I’m demonstrating with WordPress’s built-in custom fields, but on a real project I would likely use Advanced Custom Fields.
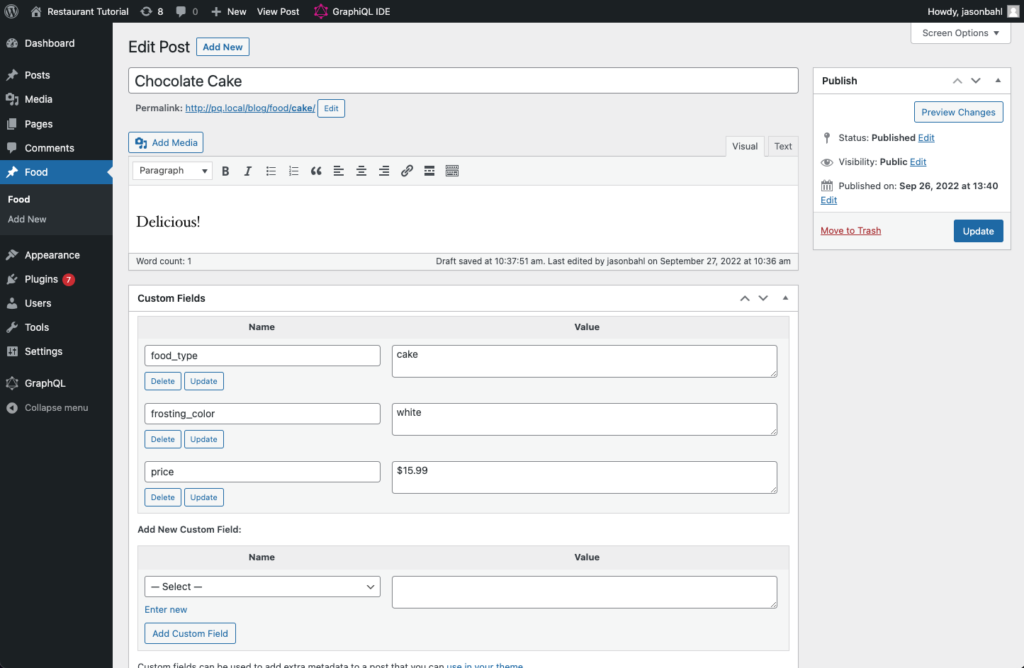
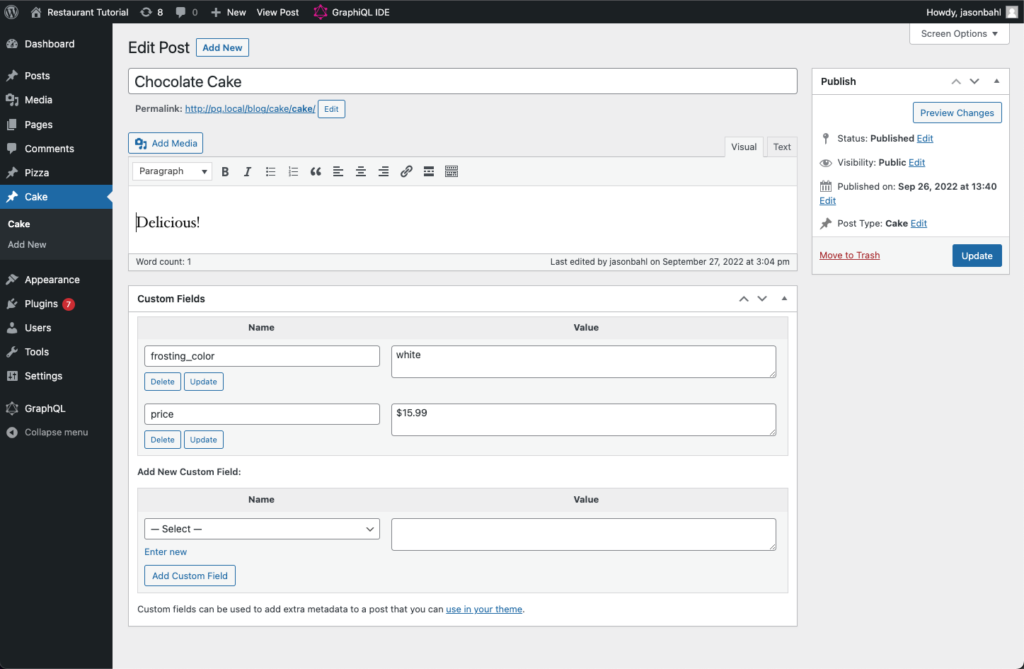
Now let’s enter information for a Cake.
Click “Add new” and enter the following information:
- Title: Chocolate Cake
- Description: Delicious!
- Custom Fields:
- food_type: cake
- price: $15.99
- frosting_color: white
The cake should look like so:
So now we have our post type setup and some food entered, how can we query this food in GraphQL?
Show the Post Type in GraphQL
If you’ve already familiar with WPGraphQL, you might know that exposing a Post Type to the WPGraphQL Schema requires 3 fields on the post type registration:
- show_in_graphql: true/false
- graphql_single_name: Name of the Type in the GraphQL Schema (no spaces or special characters. Value must be unique in the Schema)
- graphql_plural_name: Plural name of the Type, used for querying lists of items. (no spaces or special characters. Value must be unique in the Schema)
Let’s update our post type registration above to look like the following:
add_action( 'init', function() {

  $args = [
    'public' => true,
    'label' => 'Food',
    'supports' => [ 'title', 'editor', 'custom-fields' ],
    'show_in_graphql' => true,
    'graphql_single_name' => 'Food',
    'graphql_plural_name' => 'Food',
  ];

  register_post_type( 'food', $args );

} );
By adding these 3 lines:
'show_in_graphql' => true,
'graphql_single_name' => 'Food',
'graphql_plural_name' => 'Food',
The data in the “food” post type is now exposed in the WPGraphQL Schema.
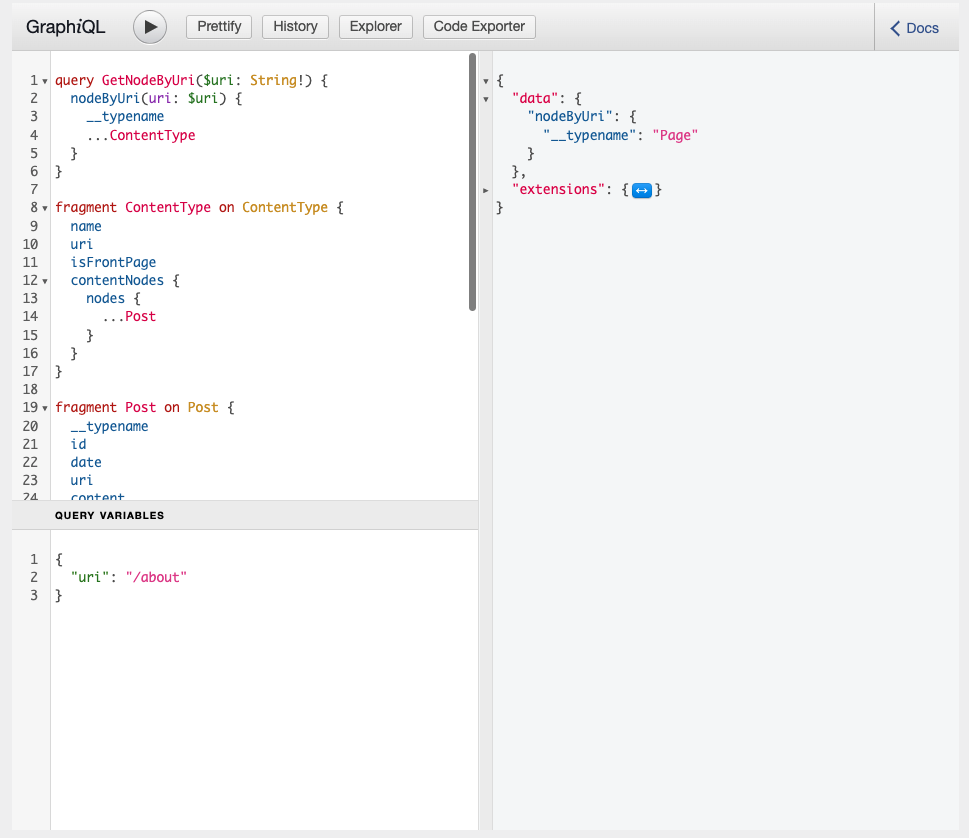
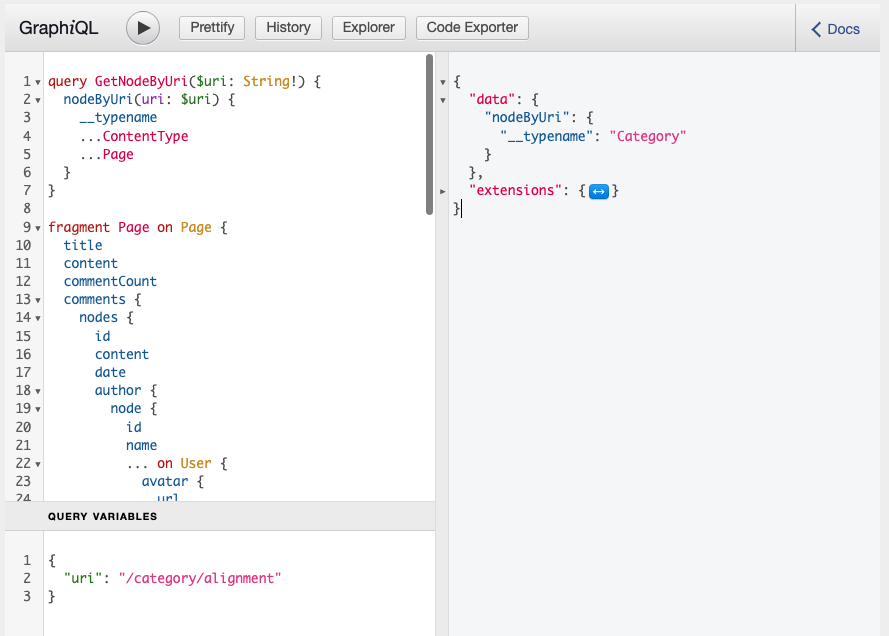
We can open up the GraphiQL IDE and search for “food” and see all the ways it shows in our Schema now:
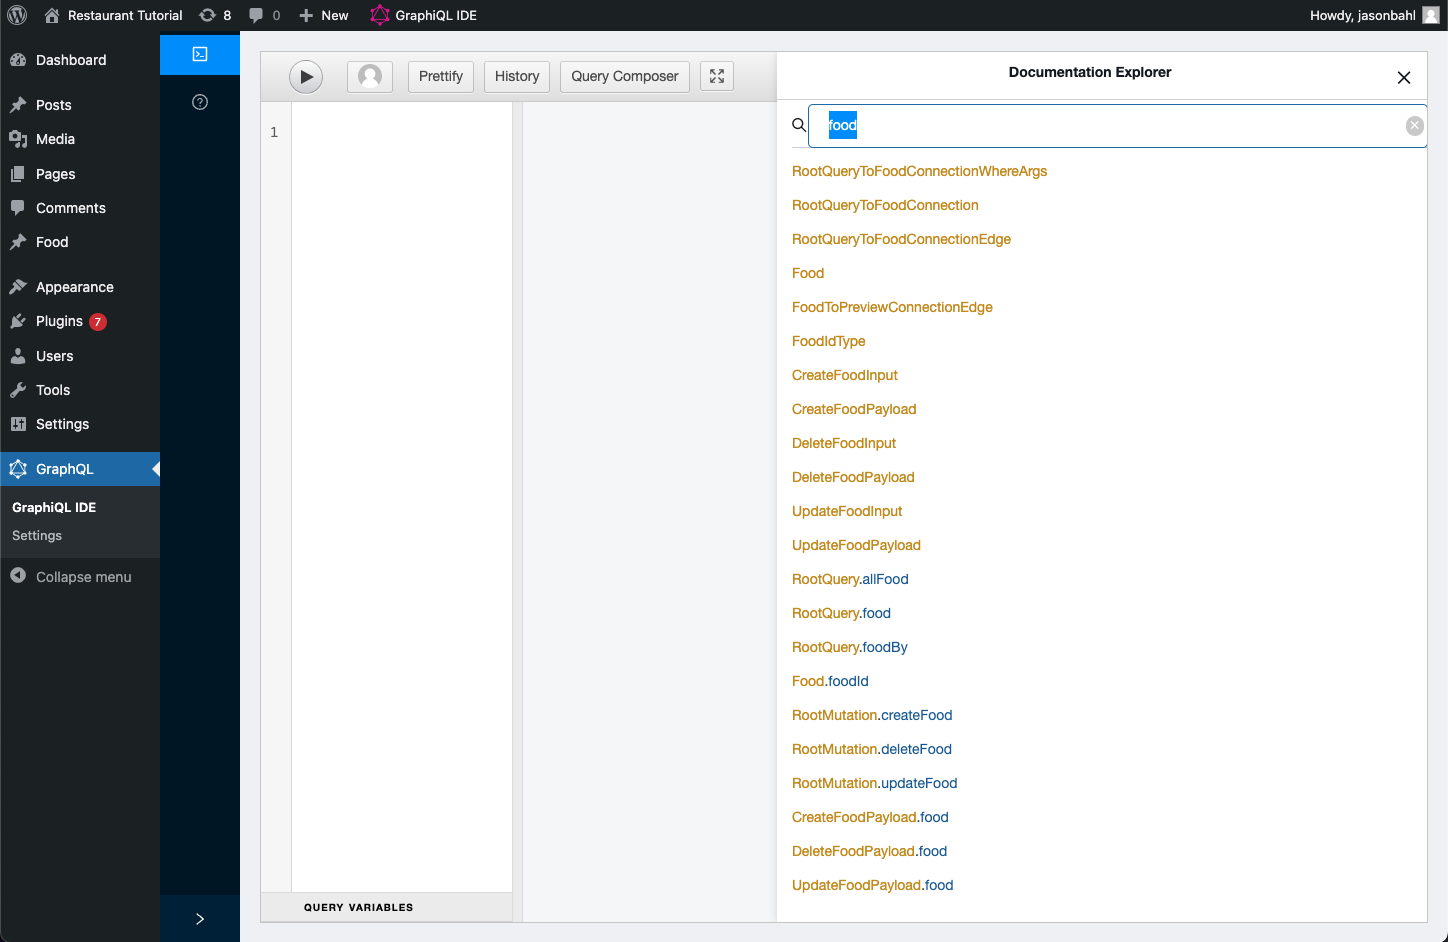
We have a lot of new Types and Fields added to the Schema.
Since our goal was to query a list of “allFood” we can see that a “RootQuery.allFood” field now exists in the Schema.
NOTE: Since the “graphql_single_name” and “graphql_plural_name” were both “food” WPGraphQL adds the “plural” field as “allFood”. If the “graphql_plural_name” was a different value, such as “foodItems” it would add a field with that value instead.
At this point, we can write a query to query a list of food, like so:
query GetFood {
  allFood {
    nodes {
      __typename
      id
      title
    }
  }
}
And we’ll get a response like so:
{
"data": {
"allFood": {
"nodes": [
{
"__typename": "Food",
"id": "cG9zdDoxMjY4",
"title": "Chocolate Cake"
},
{
"__typename": "Food",
"id": "cG9zdDoxMjY3",
"title": "Pepperoni Pizza"
}
]
}
}
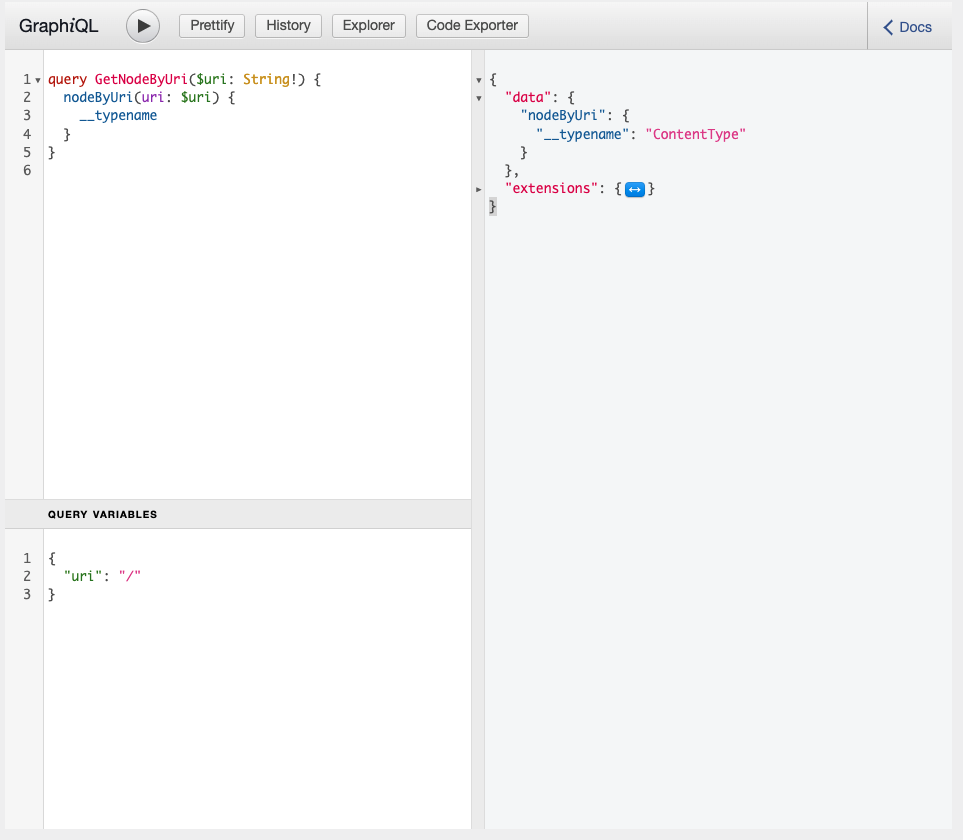
}Here’s what it looks like executed in the GraphiQL IDE:
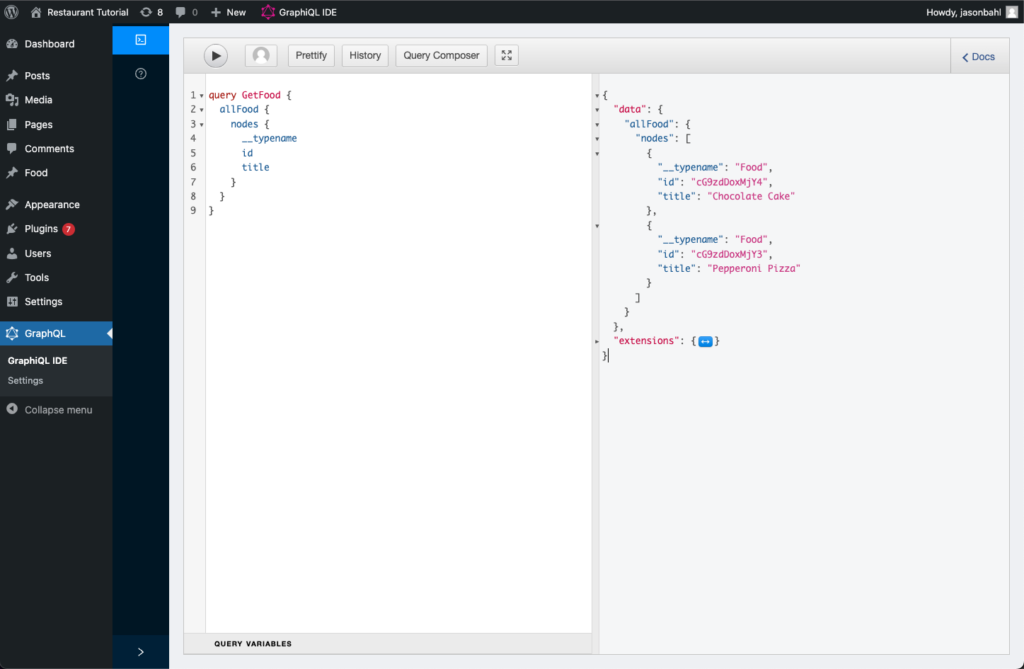
One thing you might have noticed, is that we have only queried for 3 fields on each “node”:
- __typename
- id
- title
Our goal was to be able to also query “price” for all food items, and then specify that we want “toppings” for Pizza and “frostingColor” for Cake.
If we look at our Schema docs in GraphiQL, we won’t find any mention of “price”, “toppings”, “frostingColor”, “pizza” or “cake”.

Add the “price” field to the Schema
Since we agreed that all “food” should have a price field, we can add this to the Schema using the register_graphql_field function.
Let’s use the following snippet to add this field to the Schema:
add_action( 'graphql_register_types', function() {

  register_graphql_field( 'Food', 'price', [
    'type' => 'String',
    'description' => __( 'The cost of the food item', 'your-textdomain' ),
    'resolve' => function( $food ) {
      $price = get_post_meta( $food->databaseId, 'price', true );
      return ! empty( $price ) ? $price : null;
    }
  ] );

} );
Let’s break down what this code is doing:
First, it hooks into the “graphql_register_types” action. This ensures the code will only execute when the GraphQL Schema is being built. Most requests to WordPress aren’t GraphQL requests, so no need to execute GraphQL related functions unless necessary.
Next, we call the register_graphql_field function. The first argument is the GraphQL Type we want to add a field to. And the 2nd argument is the name of the field to add. We passed “Food” as the first argument and “price” as the 2nd argument because we want “Food” to have a “price” field. The third argument is an array to configure the field.
In this config array we define the “Type” of data the field will return. We’ve opted for “String” as the type of data we will return for the “price” field. This is the contract between the API consumer and the server. We’ve agreed now that whenever the “price” field is asked for, it will either be a “null” value, or a string. This field will not return an array or an object or an integer or any other type of data.
Next, we added a description, which shows in tools like GraphiQL. This can be helpful to describe to consumers of the API what a field is meant to be used for.
And last, we define our “resolve” function.
The resolver will get the resolving object passed to it. Since we’ve registered a field to the “Food” type, this means we will get “Food” objects passed to the field.
In WPGraphQL the objects passed down are typically “GraphQL Model” objects. In this case, the resolver will get a GraphQL\Model\Post object passed to the resolver.
We use the databaseId from the model to get the value of the “price” post_meta. If there is a value, return it. Otherwise, return a “null” value.
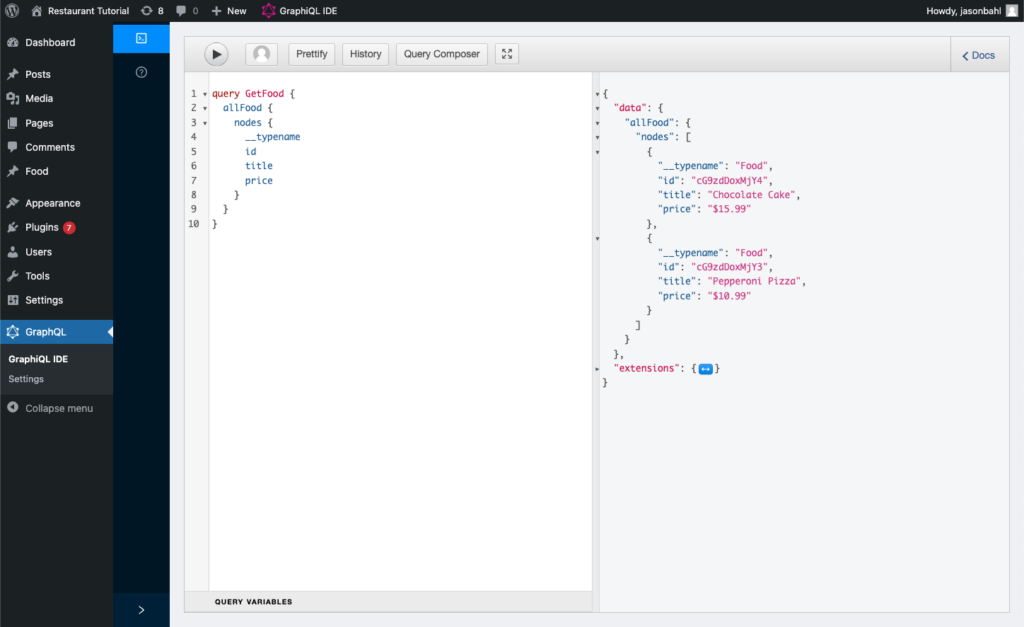
Now, with this field registered to the Schema, we can search GraphiQL again for “price” and we should find it in the Schema:
At this point, we can update our query to query for the “price” field and we should see the values we entered as custom fields returned.
Differentiate types of food
One other thing you might be noticing is that the response for the “__typename” field is “Food”, but in our goal we were hoping to have the values be “Cake” and “Pizza”.
Additionally, we wanted to be able to query for “toppings” if the type of food is Pizza, and “frostingColor” if the type of food is Cake.
How do we do this?
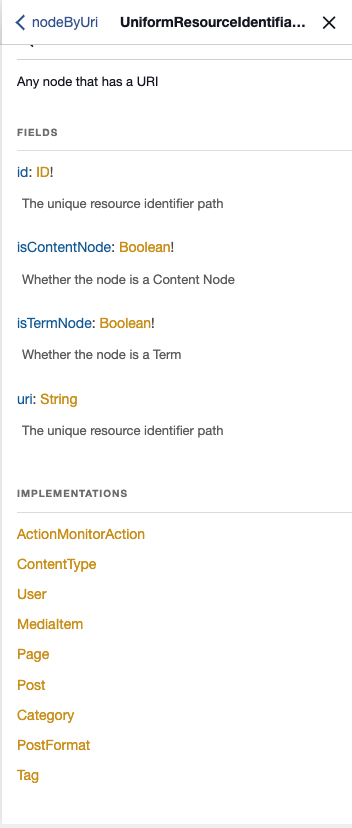
We will convert the “Food” type to be a GraphQL Interface, then register new GraphQL Object Types for “Pizza” and “Cake” that implement the “Food” Interface.
Let’s take a look:
Make “Food” an Interface
According to the GraphQL Documentation “Interface is an abstract type that includes a certain set of fields that a type must include to implement the interface”.
In practice, this means that multiple Unique Types can have a common bond.
All Pizza is Food, but not all Food is Pizza. All Cake is Food, but not all Food is Cake.
We want to be able to define unique Types of Food (in our case Pizza and Cake), but let them implement the “Food” interface.
We can update our post type registration to make the “Food” type an “Interface” by adding this line:
$args = [
 ... // existing args
 'graphql_kind' => 'interface',
 'graphql_resolve_type' => function( $food ) {
   $food_type = get_post_meta( $food->databaseId, 'food_type', true );

   // if the "food_type" custom field is set to "pizza" return the "Pizza" type
   if ( 'pizza' === $food_type ) {
     $return_type = 'Pizza';
   } else {
     $return_type = 'Cake';
   }

   return $return_type;
 }
];

register_post_type( 'Food', $args );
By adding these 2 lines to our “register_post_type” $args, we’ve now told WPGraphQL to treat “Food” as an Interface instead of an Object Type, and we’ve told it how to determine what Object type to resolve, based on the “food_type” meta value.
In order for this to work, however, we need a “Pizza” and “Cake” Type added to the Schema.
Register the Pizza GraphQL Object Type
In the “graphql_resolve_type” function above, we determined that “Food” can return a “Pizza” or “Cake” based on the value of the “food_type” post meta value.
In order for this to work, we need a Pizza and Cake type to be added to the Schema.
Within our “graphql_register_types” hook where we registered the “price” field, we can add the following:
register_graphql_object_type( 'Pizza', [
  // Description shows in the Schema for client developers using tools like the GraphiQL IDE
  'description' => __( 'A tasty food best prepared in an air-fryer', 'your-textdomain' ),
  // This tells the Schema that "All Pizza is Food" and will inherit the "Food" fields (such as Price)
  'interfaces' => [ 'Food' ],
  // This helps with caching. If your Object Type is associated with a particular Model, you should define it here. In our case, Pizza is resolved by the Post model.
  'model' => WPGraphQL\Model\Post::class,
   // This field shows the Type in the Schema even if there are no root fields that reference the Type directly.
  'eagerlyLoadType' => true,
  // Define the unique fields of this type. For Pizza, "toppings" will be a "list of strings"
  'fields' => [
    'toppings' => [
      'type' => [ 'list_of' => 'String' ],
      'resolve' => function( $pizza ) {
        $toppings = get_post_meta( $pizza->databaseId, 'toppings', false );
        return is_array( $toppings ) ? $toppings : null;
      }
    ],
  ],
]);
Here we’ve registered a “Pizza” GraphQL Object Type. On the Type we declared that it implements the “Food” interface, and that it has a “toppings” field which returns a list of String, resolved from the “topping” meta key.
Register the Cake GraphQL Object Type
Now, we can register the “Cake” Object Type, very similar to how we registered the “Pizza” Type.
register_graphql_object_type( 'Cake', [
  // Description shows in the Schema for client developers using tools like the GraphiQL IDE
  'description' => __( 'A tasty dessert, most likely also good if heated in an air-fryer', 'your-textdomain' ),
  // This tells the Schema that "All Cake is Food" and will inherit the "Food" fields (such as Price)
  'interfaces' => [ 'Food' ],
  'eagerlyLoadType' => true,
  'model' => WPGraphQL\Model\Post::class,
  'fields' => [
    'frostingColor' => [
      'type' => 'String',
      'resolve' => function( $cake ) {
        return get_post_meta( $cake->databaseId, 'frosting_color', true );
      }
    ],
  ]
]);
Here we’ve registered a “Cake” object type. On the type we’ve declared that it implements the “Food” interface, and that it has a “frostingColor” field which returns a String, resolved from the “frosting_color” meta key.
At this point, we’ve converted the “Food” type to be an Interface using the “graphql_kind” arg on “register_post_type”. We also declared the “graphql_resolve_type” function, returning either a “Pizza” or “Cake” when “Food” is queried.
Then we defined the “Pizza” and “Cake” Types and their fields.
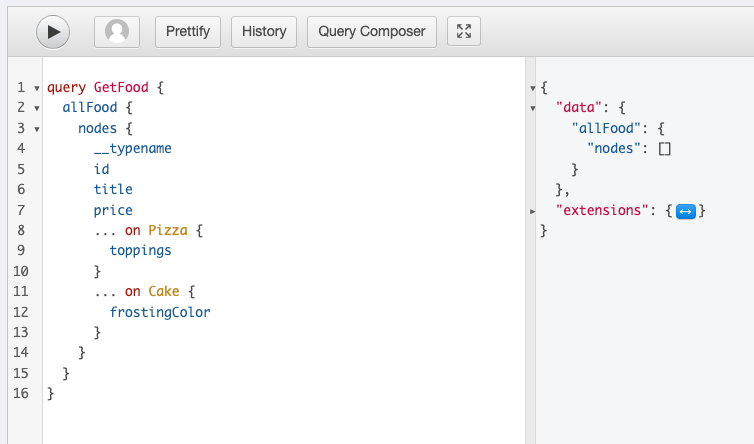
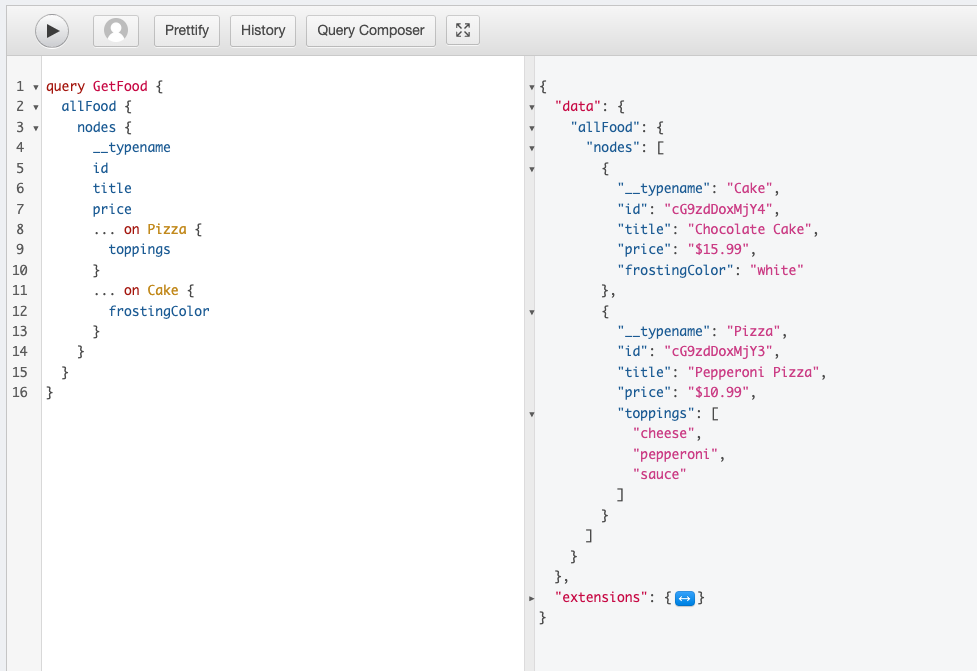
At this point, we can successfully execute the query we set out to.
query GetFood {
  allFood {
    nodes {
      __typename
      id
      title
      price
      ...on Cake {
        frostingColor
      }
      ...on Pizza {
        toppings
      }
    }
  }
}
Since the “allFood” connection is added to the schema from the “food” post type, the resolver will query posts of the “food” post type. Each post will be converted into a “Post” Model and then our “graphql_resolve_type” function will use the “food_type” meta to determine whether the “food” is “Pizza” or “Cake”, then each field (price, toppings, frostingColor) is resolved.
Success! We end up with the expected results:
{
  "data": {
    "foods": {
      "nodes": [
        {
          "__typename": "Cake",
          "title": "Cake",
          "price": "$15.99",
          "frostingColor": "white"
        },
        {
          "__typename": "Pizza",
          "title": "Pepperoni Pizza",
          "price": "$10.99",
          "toppings": [
            "pepperoni",
            "sauce",
            "cheese",
            "jalapenos"
          ]
        }
      ]
    }
  }
}
Scenario 2: 2 different “Pizza” and “Cake” post types
Now, we already accomplished the goal we set out to, but I wanted to show a different way to get the the same goal.
In this approach, instead of using one “food” post type, let’s use 2 different post types: “Pizza” and “Cake”.
But, the goal is still the same. We want to be able to query for “allFood” and depending on whether the food is “Pizza” or “Cake” we’d like to query for “toppings” or “frostingColor” respectively.
Register the Food Interface
Instead of registering a “Food” post type and setting its “graphql_kind” as “interface”, this time we will manually register an Interface, then register 2 post types and apply the “Food” interface to those 2 post types.
With the following snippet, we can register a “Food” interface:
add_action( 'graphql_register_types', function() {

  register_graphql_interface_type( 'Food', [
    'description' => __( 'An item of food for sale', 'your-textdomain' ),
    // ensure all "food" nodes have a title
    'interfaces' => [ 'Node', 'NodeWithTitle' ],
    'fields' => [
      'price' => [
        'type' => 'String',
	'description' => __( 'The cost of the food item', 'your-textdomain' ),
	'resolve' => function( $food ) {
	  return get_post_meta( $food->databaseId, 'price', true );
	},
      ],
    ],
    'resolveType' => function( $node ) {
      // use the post_type to determine what GraphQL Type should be returned. Default to Cake
      return get_post_type_object( $node->post_type )->graphql_single_name ?: 'Cake';
    }
  ]);

});
Register the Post Types
We just defined our “Food” Interface, but it doesn’t really do anything yet, because no Type in the Graph implements this interface.
Let’s register our “Cake” and “Pizza” post types and implement the “Food” interface on them.
add_action( 'init', function() {

  $pizza_args = [
    'public' => true,
    'label' => 'Pizza',
    'show_in_graphql' => true,
    'supports' => [ 'title', 'editor', 'custom-fields' ],
    'graphql_single_name' => 'Pizza',
    'graphql_plural_name' => 'Pizza',
    'graphql_interfaces' => [ 'Food' ],
    'graphql_fields' => [
      'toppings' => [
        'type' => [ 'list_of' => 'String' ],
        'resolve' => function( $pizza ) {
           $toppings = get_post_meta( $pizza->databaseId, 'topping', false );
          return is_array( $toppings ) ? $toppings : null;
        }
      ],
    ],
  ];

  register_post_type( 'pizza', $pizza_args );

  $cake_args = [
    'public' => true,
    'label' => 'Cake',
    'show_in_graphql' => true,
    'supports' => [ 'title', 'editor', 'custom-fields' ],
    'graphql_single_name' => 'Cake',
    'graphql_plural_name' => 'Cakes',
    'graphql_interfaces' => [ 'Food' ],
    'graphql_fields' => [
      'frostingColor' => [
        'type' => 'String',
        'resolve' => function( $cake ) {
          return get_post_meta( $cake->databaseId, 'frosting_color', true );
        }
      ],
    ]
  ];

  register_post_type( 'cake', $cake_args );

});
In this snippet, we’ve registered both a “cake” and a “pizza” post type. We set both to “show_in_graphql”, defined their “graphql_single_name” and “graphql_plural_name”, then we applied the “Food” interface using the “graphql_interfaces” argument.
Additionally, we used the “graphql_fields” argument to add a “toppings” field to the “Pizza” Type and a “frostingColor” field to the “Cake” Type.
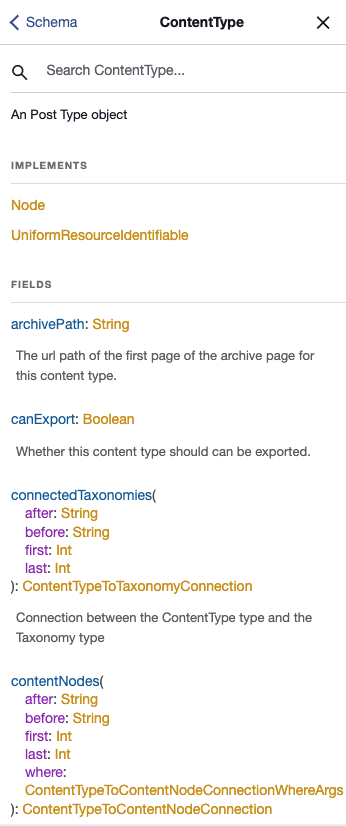
At this point, we can search our GraphQL Schema for “food” and we’ll find the “Food” interface, and see that it is implemented by “Pizza” and “Cake”.
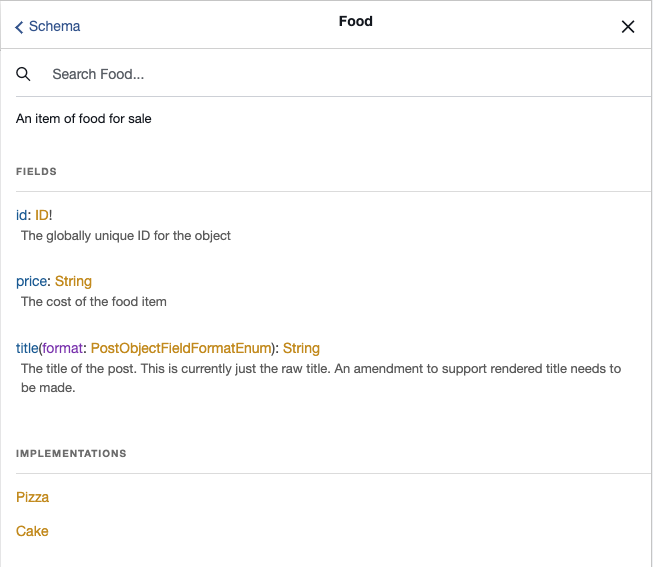
However, we will also see that no field in the Schema returns the “food” type.
There’s no “allFood” field, like we set out to query.
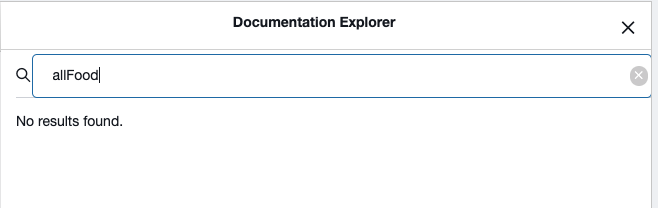
There is a “RootQuery.allPizza” and “RootQuery.cakes” field for querying lists of Pizza and lists of Cakes independently, but no “allFood” field.
Let’s add that!
Register “allFood” connection
Since we decided to manage our Pizza and Cake in different Post types, we need to provide an entry point into the Graph that allows us to query items of both of these post types as a single list.
To do this we will use the register_graphql_connection API.
Within the “graphql_register_types” hook above, we can add the following:
register_graphql_connection([
  'fromType' => 'RootQuery',
  'toType' => 'Food',
  'fromFieldName' => 'allFood',
  'resolve' => function( $root, $args, $context, $info ) {
    $resolver = new \WPGraphQL\Data\Connection\PostObjectConnectionResolver( $root, $args, $context, $info );
    $resolver->set_query_arg( 'post_type', [ 'pizza', 'cake' ] );
    return $resolver->get_connection();
  }
]);
This code registers a GraphQL Connection from the “RootQuery” to the “Food” type. A Connection is a way in GraphQL to query paginated lists of data. Here, we’ve defined our connection’s “fromType” and “toType”, and set the “fromFieldName”to “allFood’.
This will expose the connection to the Schema. At this point, we would be able to execute our query, but we wouldn’t get any results unless we also had a resolver.
Our resolver function handles querying the “food” from the database and returning data in the proper “connection” shape.
In GraphQL, all resolvers are passed 4 arguments:
- $source: The object being executed that the resolving field belongs to
- $args: Any input arguments on the field
- $context: Context about the request
- $info: Info about where in the resolve tree execution is
In our resolver above, we take all 4 of these arguments and pass them to a new instance of “\WPGraphQL\Data\Connection\PostObjectConnectionResolver”. This class handles a lot of the complicated work of fetching data from the WordPress Posts table and returning it in a proper shape for connections.
After instantiating the PostObjectConnectionResolver, we use its “set_query_arg” method to ensure the connection resolver will resolve data from the “pizza” and “cake” post types. Then we return the connection.
At this point, we should be able to explore the Schema and see that we now have a “RootQuery.allFood” field, and it returns a “RootQueryToFoodConnection”.
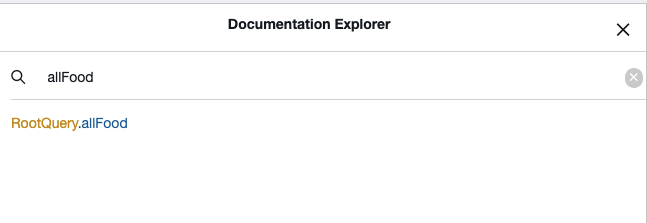
If we tried to query it now, the query would be valid and we shouldn’t get any errors, but we would also get no results.
That’s because we haven’t entered data into our Pizza and Cake post types!
Create a Pizza and a Cake
We can follow the same steps we did in the first scenario to enter data for the “Pizza” and “Cake” post type.
The difference, this time, is that we can enter them in their own Custom Post Type, and we don’t need to specify the “food_type” meta field, as we’re using the post type itself to make the distinction.
Here’s what my Pizza looks like:
Here’s what my Cake looks like:
Query for allFood
Now that we have some data in our “pizza” and “cake” post types, we can successfully execute the query we set out for.
Conclusion
In this post we explored 2 different ways to manage different types of Food and then query that food using WPGraphQL.
The first scenario opted for using a single post type for managing all food, and using a meta field to differentiate the type of food.
In this scenario, since only one post type was registered to the Schema we didn’t need to register a custom connection, it was done automatically by WPGraphQL.
One thing we didn’t cover in detail in this post, was mutations.
In scenario 1, by registering just one post type, WPGraphQL would have added the following mutations: “createFood”, “updateFood”, “deleteFood”. But in scenario 2 each post type would have its own mutations: “createPizza”, “updatePizza”, “deletePizza” and “createCake”, “updateCake”, “deleteCake”.
There are pros and cons to both options, here. I encourage you to play with both options, explore the Schema and understand how each option might best serve your projects.
I hope you learned something in this post and look forward to hearing stories about how these APIs have helped speed up your project development!