In this post, we’ll look at how we can create a simple Book Store using WordPress, WPGraphQL and Atlas Content Modeler, a new plugin from WP Engine that allows Custom Post Types, Custom Taxonomies and Custom Fields to be created in the WordPress dashboard and allows the data to be accessed from WPGraphQL.
By the end of this tutorial, you should be able to manage a list of Books, each with a Title, Price and Description field and a connection to an Author.
Then, you should be able to query the data using the GraphiQL IDE in the WordPress dashboard provided by WPGraphQL.
Pre-requisites
In order to follow this tutorial, you will need a WordPress install with WPGraphQL and Atlas Content Modeler installed and activated. This tutorial will not cover setting up the environment, so refer to each project’s installation instructions to get set up.
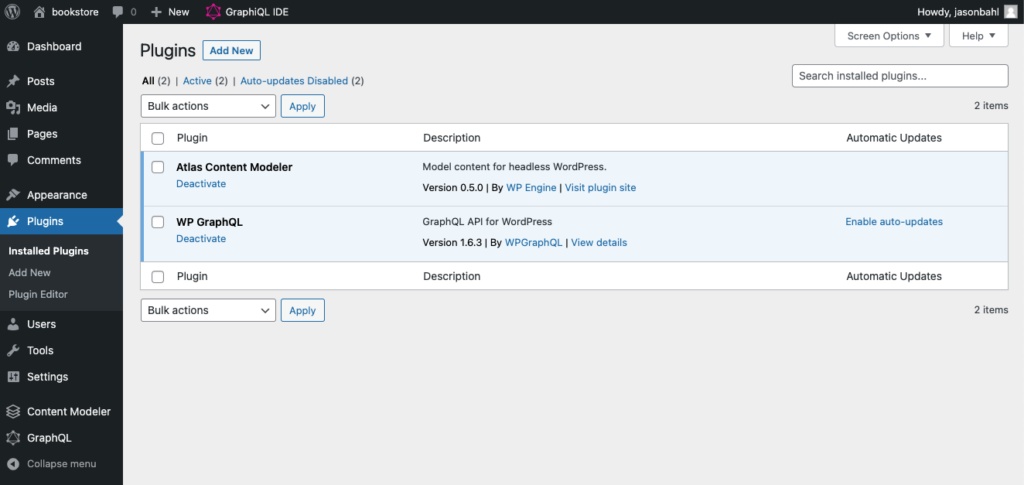
The WordPress environment I’m using has only 2 plugins installed and activated:
- WPGraphQL v 1.6.3
- Atlas Content Modeler v 0.5.0
Creating a Book Model with Atlas Content Modeler
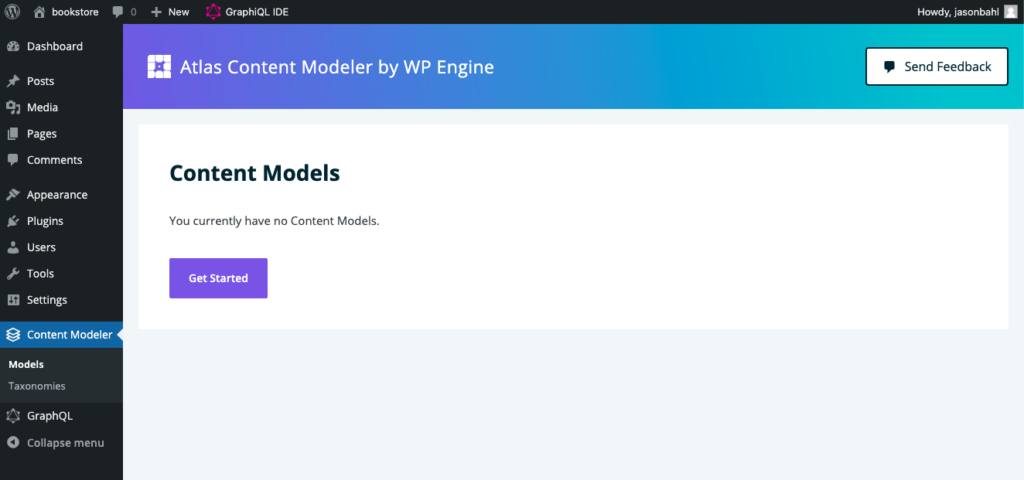
Since the goal is to have a Book Store, we’re going to want to get a new Book model (custom post type) set up using Atlas Content Modeler.
If Atlas Content Modeler has not yet been used in the WordPress install, clicking the "Content Modeler" Menu item in the Dashboard menu will open a “Getting Started” page, where we can create a new Content Model.
After clicking the “Get Started” button, and I’m presented with a form to create a new Content Model.
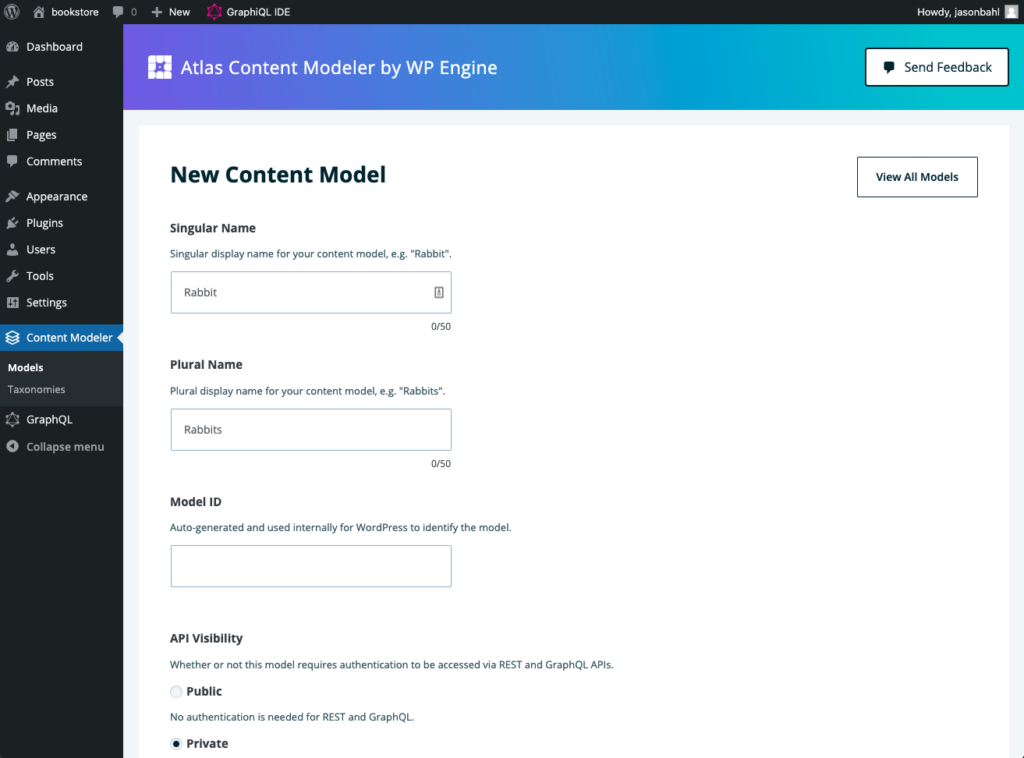
There are 6 fields to fill in to create a new model, and I used the following values:
- Singular Name: Book
- Plural Name: Books
- Model ID: book
- API Visibility: Public
- Model Icon: I searched for a book and selected it
- Description: A collection of books

Clicking “Create” will add the “Book” Content Model to WordPress.
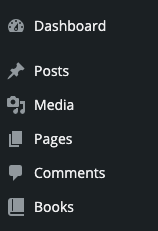
We’ll see the “Books” Type show in the Admin Menu:
And we’ll be presented with a new form where we can start adding Fields to the “Book” Content Model.
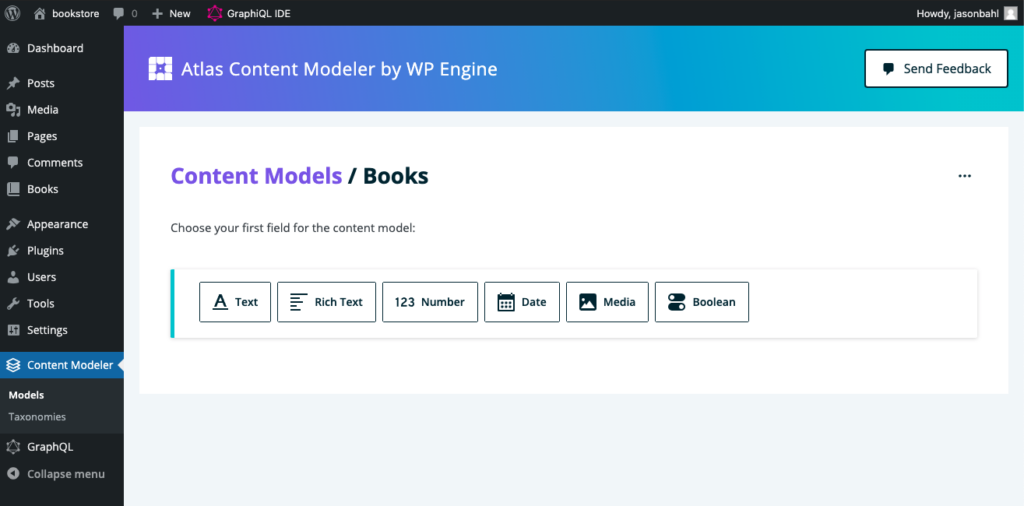
For books in our bookstore, we’ll want the following fields:
- Title (text)
- Price (number)
- Description (rich text)
We can add these fields by selecting the field type we want to add, then filling in the details:
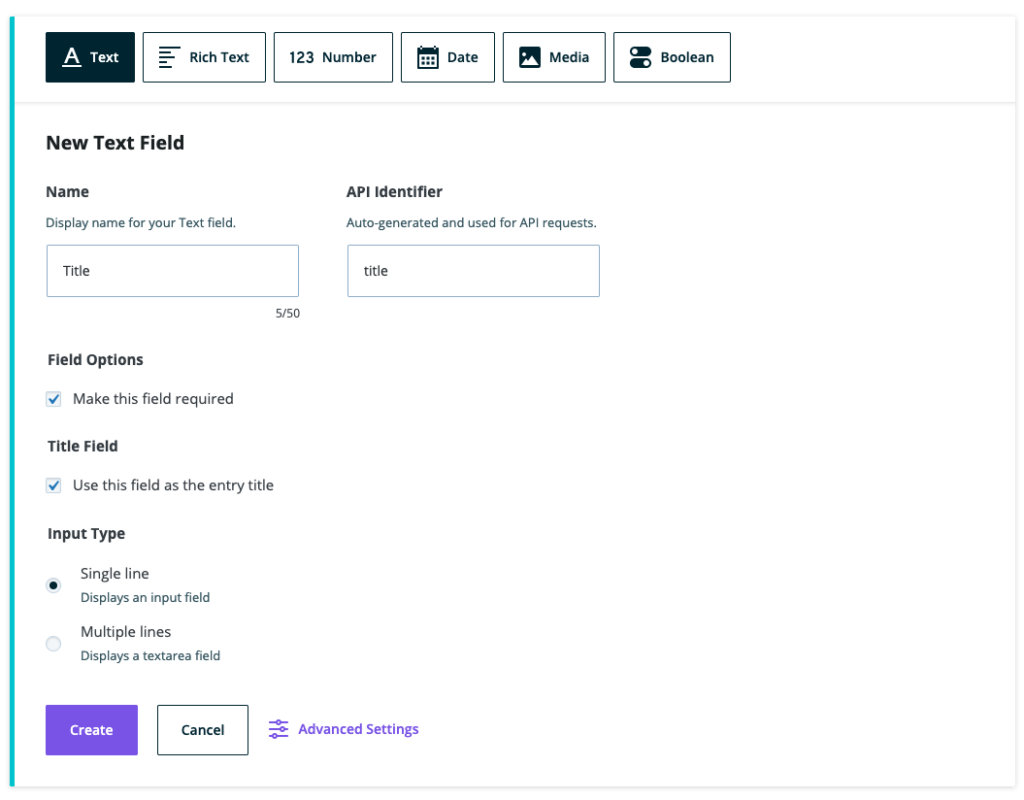
Add the Title field
To add the Title field, I selected the “Text” field type, and filled in the form:
- Field Type: Text
- Name: Title
- API Identifier: title
- Make this field required: checked
- Use this field as Entry Title: checked
- Input Type: Single Line
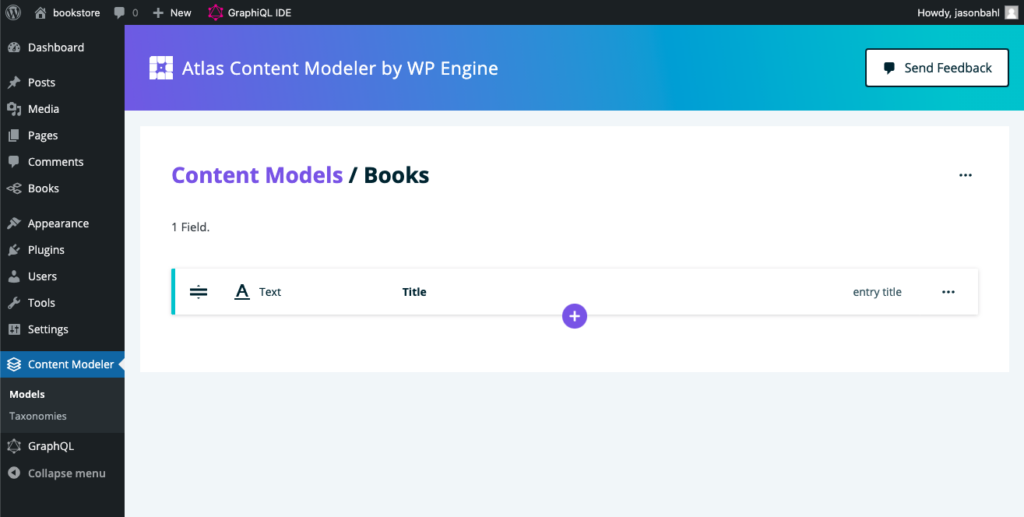
After clicking create, I’m taken back to the Model screen where I can add more fields:
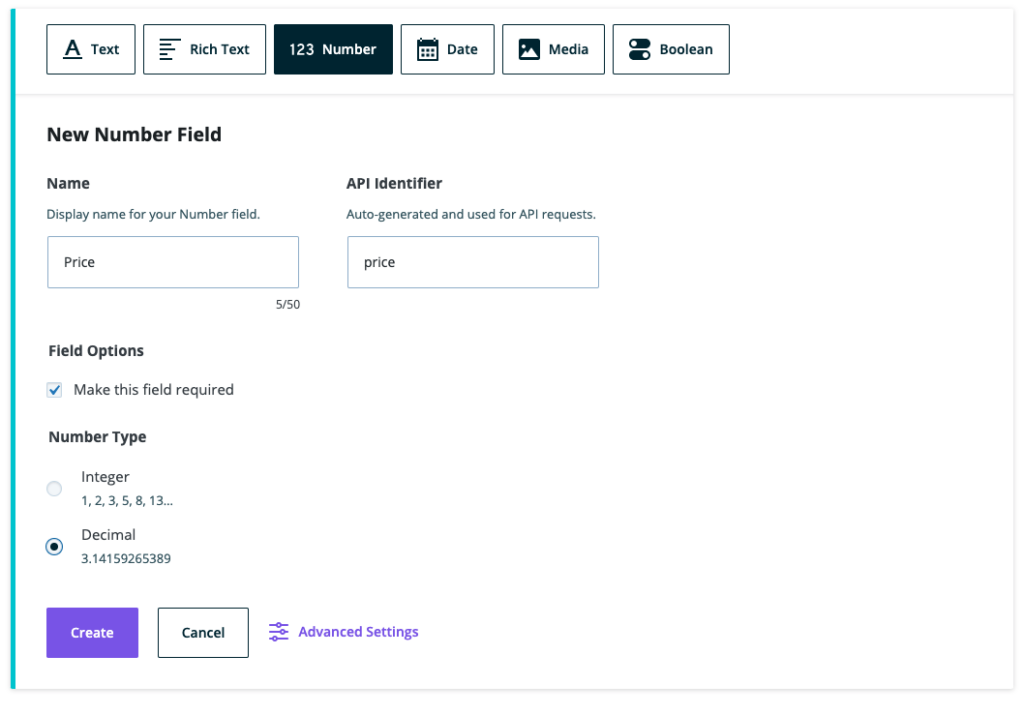
Add the Price field
Clicking the “plus” icon below the title field allows me to add a new field.
For the Price field I configured as follows:
- Field Type: Number
- Name: Price
- API Identifier: price
- Required: checked
- Number Type: decimal
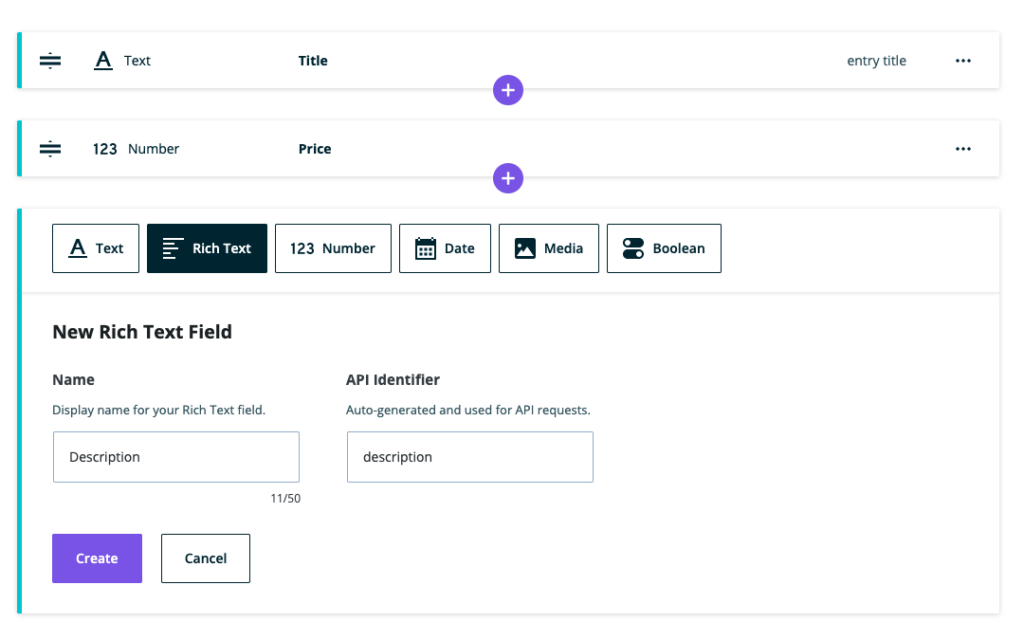
Add the Description field
Next, we’ll add a Description field.
Following the same steps above, we’ll click the Plus icon and add a new field configured like so:
- Field Type: Rich Text
- Name: Description
- API Identifier: description
Adding Books to our Bookstore
Now that we’ve created a “Books” content model, we can begin adding Books to our bookstore.
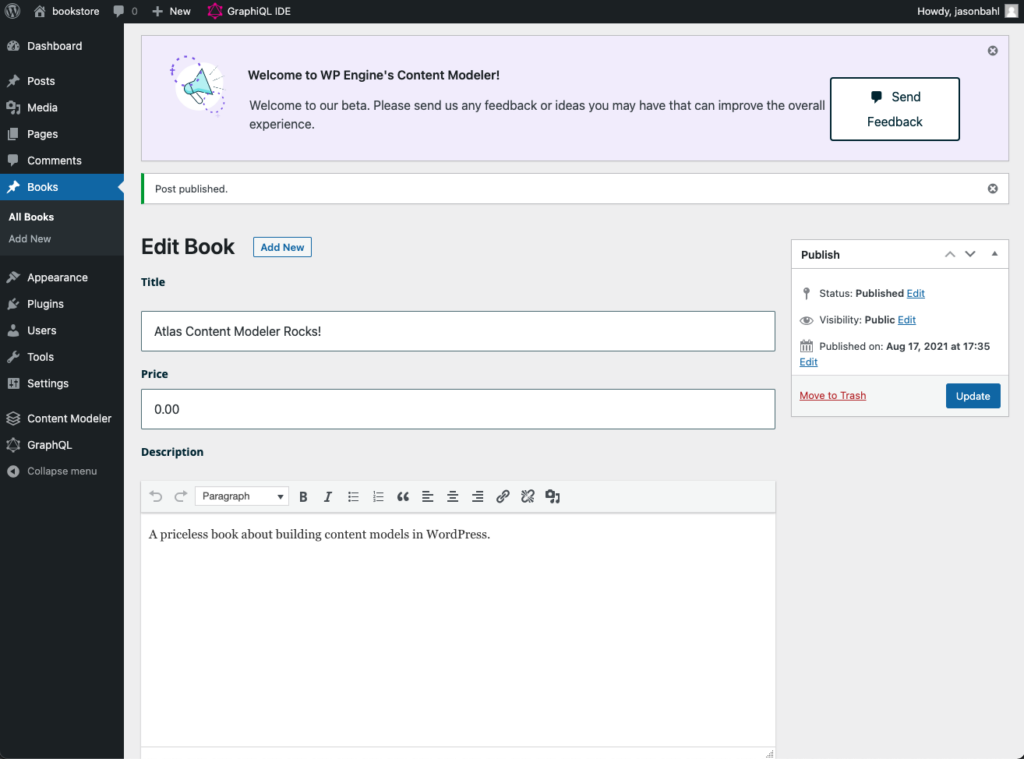
We can click “Books > Add New” from the Admin menu in our WordPress dashboard, and we’ll be taken to a screen to add a new book.
The fields we created are ready to be filled in.
You can fill in whatever values you like, but I’ve filled in mine as:
- Title: Atlas Content Modeler Rocks!
- Price: 0.00
- Description: A priceless book about building content models in WordPress.
Book Authors
Before we get too far adding more books, we probably want to add support for adding an “Author” to each book.
While we could add a Text field named Author to the Book Model, that could lead to mistakes. Each book would have to type the Author over and over, and if the Author’s name changed, each book would have to be updated, etc.
It would be better to add the Author as it’s own entity, and create connections between the Author and the Book(s) that the Author has written.
Adding the Author Taxonomy
In order to connect Authors to Books, we’re going to use Atlas Content Modeler to create an Author Taxonomy.
In the WordPress Admin menu, we can click “Content Modeler > Taxonomies” and we’ll be greeted by a form to fill out to add a new Taxonomy.
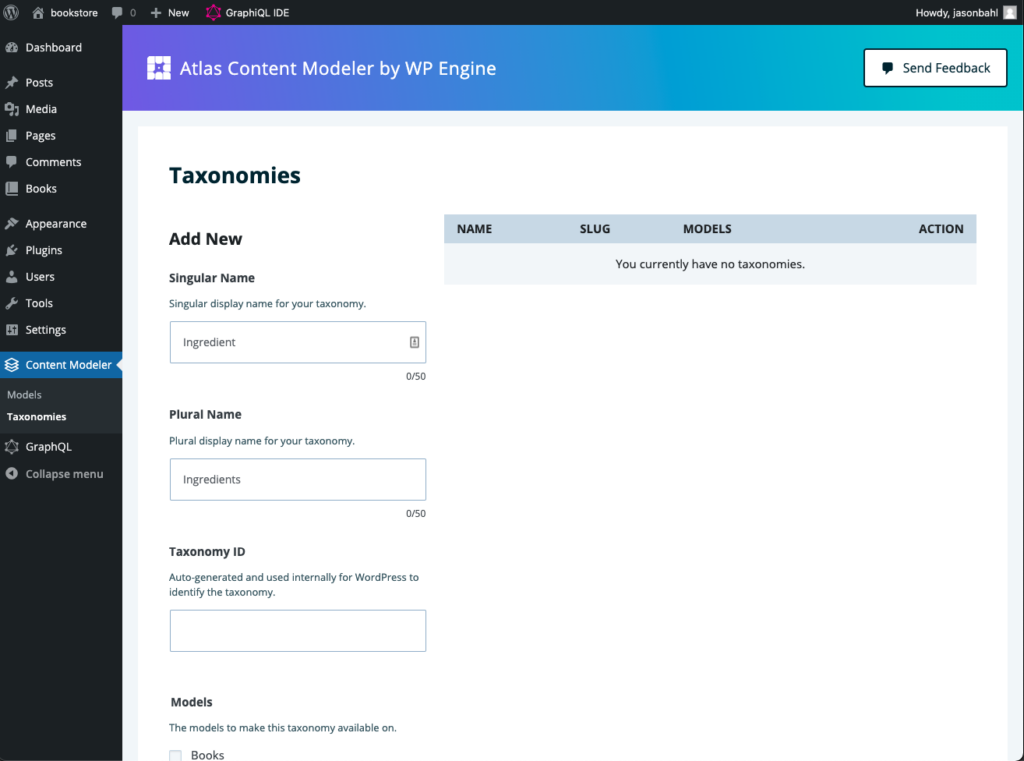
We’ll fill out the following values:
- Singular Name: Author
- Plural Name: Authors
- Taxonomy ID: author
- Models: Books
- Hierarchical: unchecked (not-hierarchical as authors should not have parent/child authors)
- API Visibility: Public
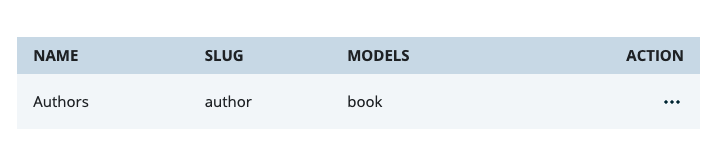
Once created, we’ll see the Author Taxonomy is now associated with the “book” model.
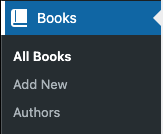
And we can also see this relationship in the Admin Menu:
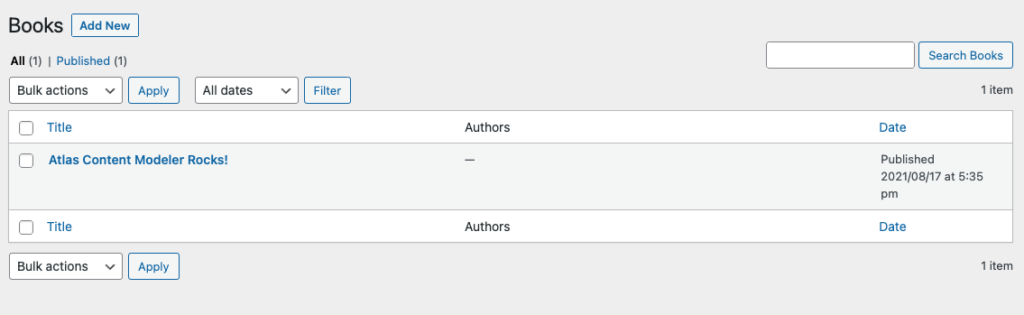
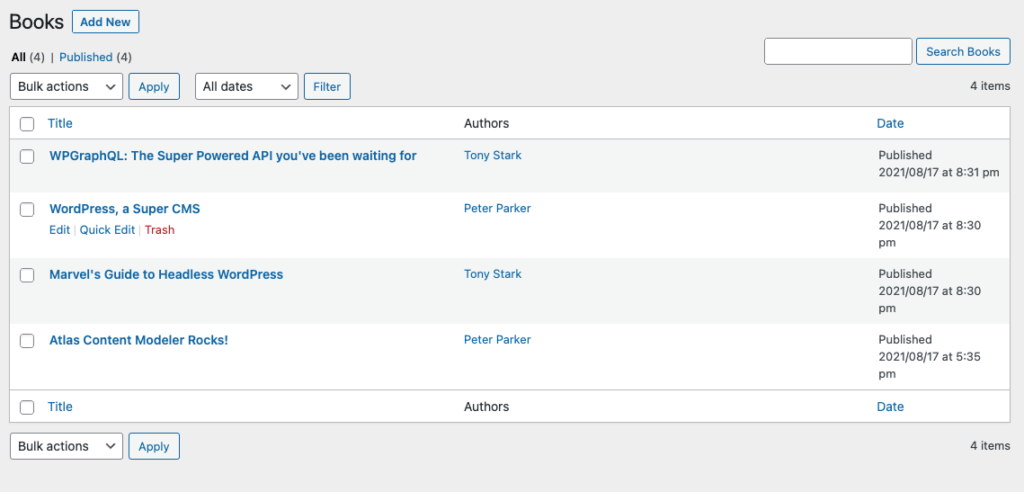
And in the “Books” list view, we can also see the “Authors” listed for each book.
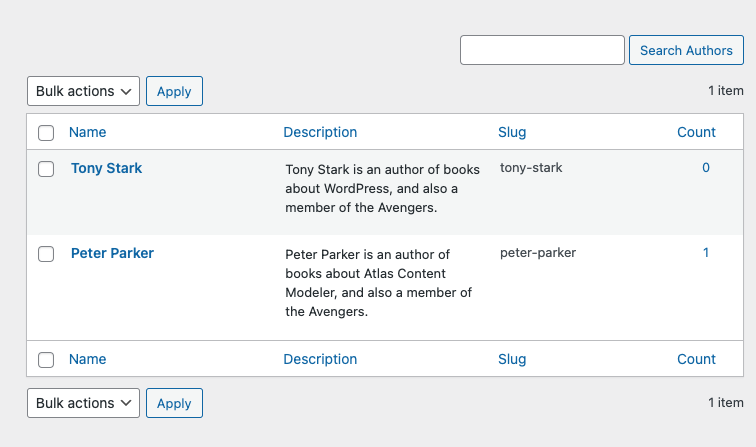
Adding an Author
Of course, we don’t have any Authors yet.
Let’s add an Author to our new Author Taxonomy.
In the Admin Menu we can click “Books > Authors” and add a new Author.
I’ll give our author the name “Peter Parker” simply because my son is watching Spiderman as I type this ????♂️.
And I added this description as Peter’s bio:
Peter Parker is an author of books about Atlas Content Modeler, and also a member of the Avengers.

Assign an Author to our Book
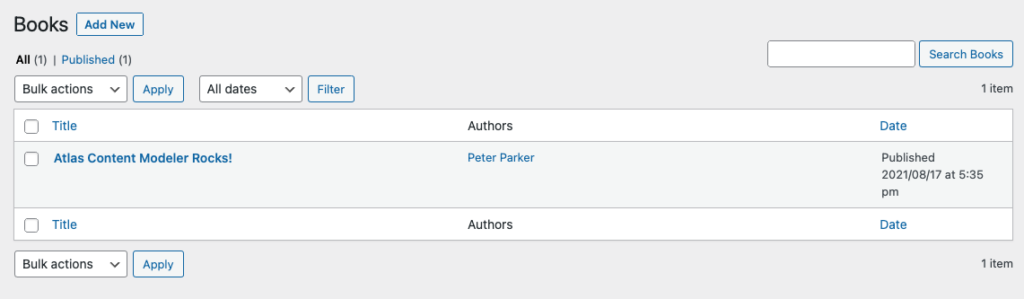
Now that we have Peter Parker added as an Author, we can assign Peter as the author of our book.
If we navigate back to “Books > All Books” and click “Edit” on the book we created, we’ll now see an “Authors” panel where we can make the connection from our Book to Peter Parker, the author.
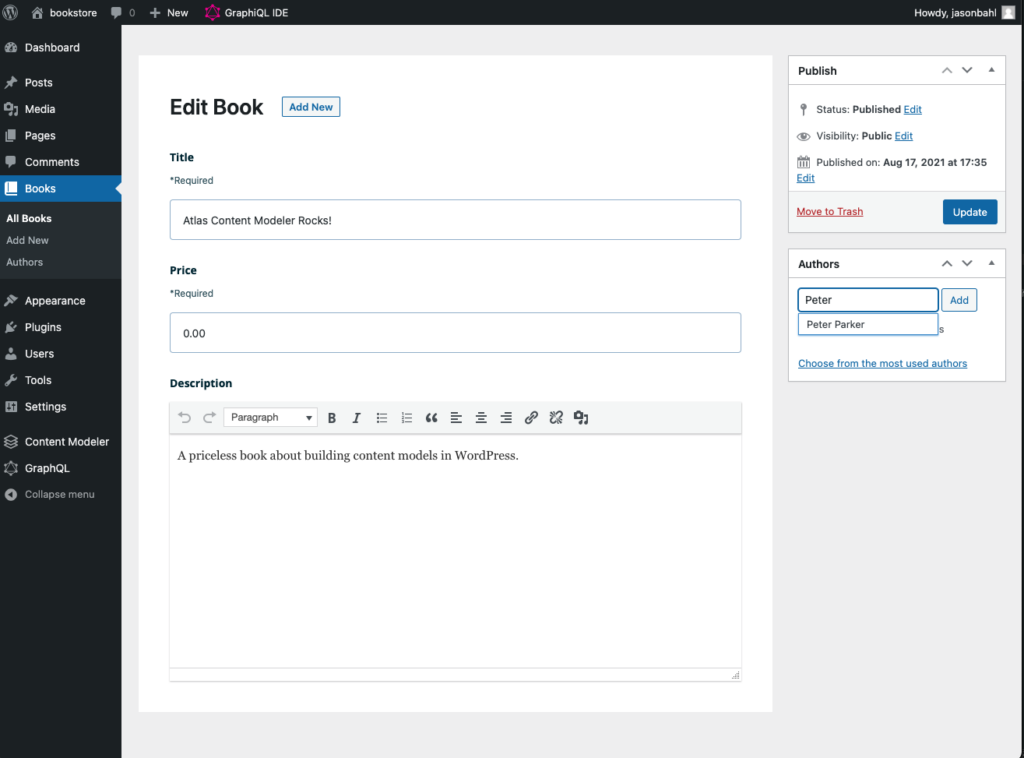
If we add Peter Parker as the author, then click “Update” on the book, then navigate back to “Books > All Books” we can now see Peter listed as the author of the book.
Adding more Books
Now that we have our Book Model and Author Taxonomy all set up, let’s add a few more Books and Authors. Feel free to input whatever content you like.
I added one more Author: “Tony Stark”:
And 3 more books:
- Marvel’s Guide to Headless WordPress
- WordPress, a Super CMS
- WPGraphQL: The Super Powered API you’ve been waiting for
Querying the Books with WPGraphQL
Now that we’ve created our Book Content Model and Author Taxonomy with Atlas Content Modeler, and populated some data, it’s now time to look at how we can interact with this data using WPGraphQL.
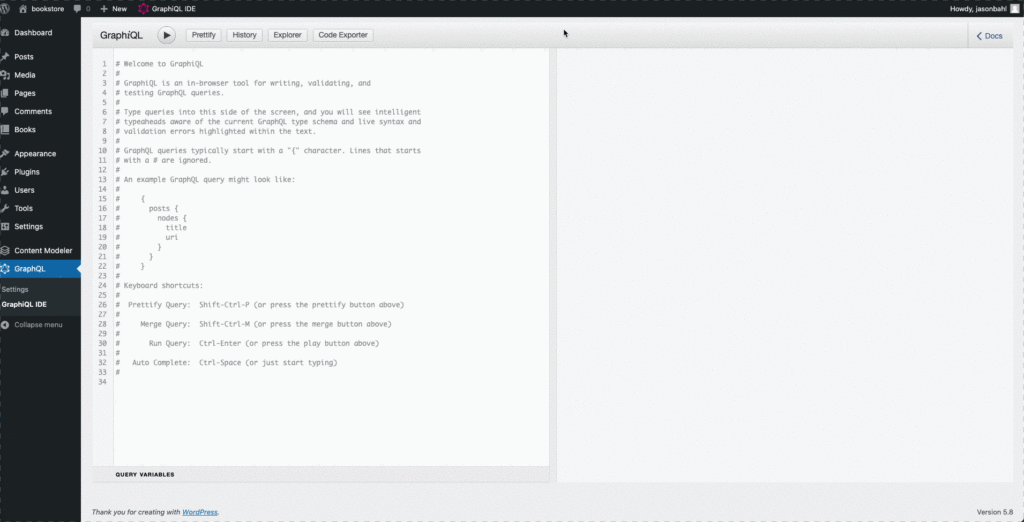
In the WordPress Admin, we’ll navigate to “GraphQL > GraphiQL IDE” and start exploring the GraphQL Schema.
Exploring the GraphQL Schema
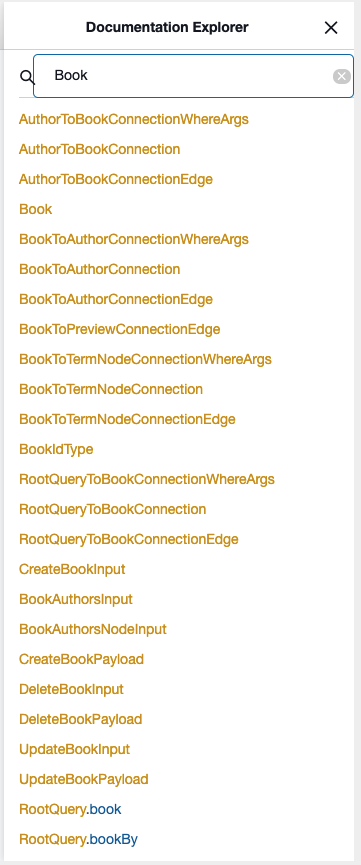
In the top right, is a “Docs” button. Clicking this opens the GraphQL Schema documentation.
We can search “book” and see how our Book content model shows in the Schema in various ways.
Additionally, we can click the “Explorer” button to open up a panel on the left side which we can use to compose queries.
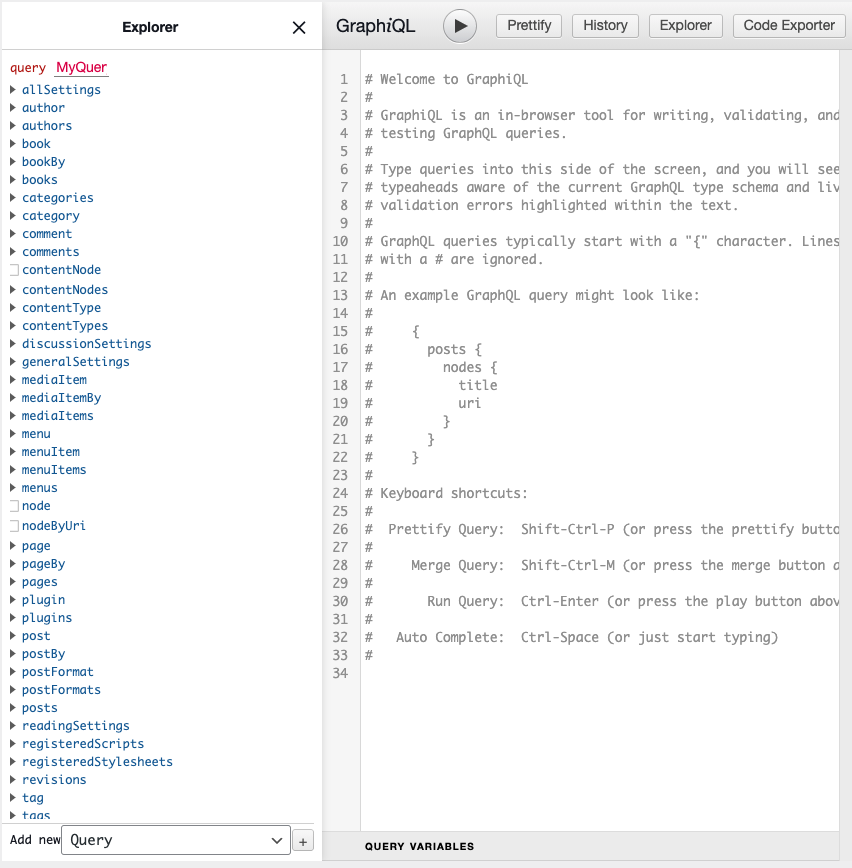
Using the “Explorer” we can find the “books” field, and start building a query:
We can also start typing in the Query pane, and get type-ahead hints to help us compose our query:
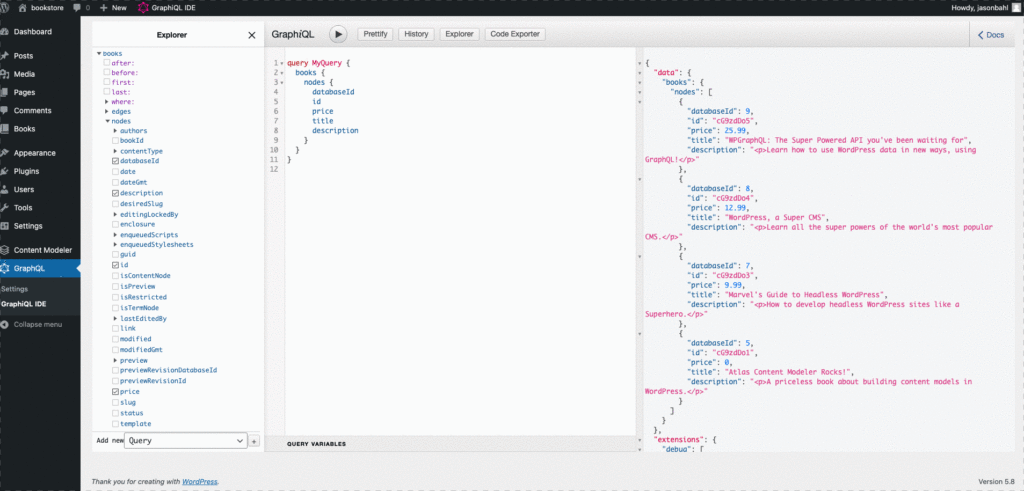
The final query I ended up with was:
query GetBooks {
  books {
    nodes {
      databaseId
      id
      price
      title
      description
      authors {
        nodes {
          name
        }
      }
    }
  }
}
And the data that was returned was:
{
  "data": {
    "books": {
      "nodes":
        {
          "databaseId": 9,
          "id": "cG9zdDo5",
          "price": 25.99,
          "title": "WPGraphQL: The Super Powered API you've been waiting for",
          "description": "Learn how to use WordPress data in new ways, using GraphQL!",
          "authors": {
            "nodes":
              {
                "name": "Tony Stark"
              }
            ]
          }
        },
        {
          "databaseId": 8,
          "id": "cG9zdDo4",
          "price": 12.99,
          "title": "WordPress, a Super CMS",
          "description": "Learn all the super powers of the world's most popular CMS.",
          "authors": {
            "nodes":
              {
                "name": "Peter Parker"
              }
            ]
          }
        },
        {
          "databaseId": 7,
          "id": "cG9zdDo3",
          "price": 9.99,
          "title": "Marvel's Guide to Headless WordPress",
          "description": "How to develop headless WordPress sites like a Superhero.",
          "authors": {
            "nodes":
              {
                "name": "Tony Stark"
              }
            ]
          }
        },
        {
          "databaseId": 5,
          "id": "cG9zdDo1",
          "price": 0,
          "title": "Atlas Content Modeler Rocks!",
          "description": "A priceless book about building content models in WordPress.",
          "authors": {
            "nodes":
              {
                "name": "Peter Parker"
              }
            ]
          }
        }
      ]
    }
  }
}
Conclusion
We’ve just explored how to build a basic Bookstore using WordPress, WPGraphQL and Atlas Content Modeler.
Without writing a line of code, we’ve added a Book model with an Author Taxonomy, and populated our bookstore with Books and Authors and created relationships between them.
Then, we used WPGraphQL to query data in the GraphiQL IDE.
Now that you can access the data via GraphQL, it’s up to you to build something with your favorite front-end technology. Whether you prefer React with Gatsby or NextJS, or Vue, or something else, the data in WordPress is now free for you to use as you please!
Leave a Reply